
Conversational Router Configuration
The Conversational Router Configuration is a fundamental setting in Web Conversations that ensures seamless communication between your chatbot and users. Acting as the central hub for routing all incoming and outgoing messages across CM.com solutions and channels, the router is essential for enabling your chatbot to function properly. While these settings are typically handled during the onboarding process by our team, understanding the configuration process can help you manage and troubleshoot your Web Conversations setup effectively.
This article explores the purpose of the Conversational Router, provides a step-by-step guide for configuring it, and highlights best practices for maintaining a stable and functional chatbot environment.
What Is the Conversational Router?
The Conversational Router is the backbone of your Web Conversations setup. It connects your chatbot to the CM.com ecosystem, ensuring that messages are routed correctly between users and your chatbot across various channels. Without this configuration, your Web Conversations instance cannot function.
Key Functions of the Conversational Router:
Message Routing: Ensures that all incoming and outgoing messages are directed to the correct channels and solutions.
Centralized Communication: Acts as a single point of control for managing message flows across multiple platforms.
Integration Support: Enables seamless integration with Web Conversations and other CM.com solutions.
Why Is Router Configuration Important?
The router configuration is critical for the proper functioning of your Web Conversations instance. Misconfigured or missing router values can disrupt communication, causing your chatbot to stop working. For this reason, it’s important to handle these settings with care and only make changes when absolutely necessary, ideally with guidance from your onboarding team.
How to Configure the Conversational Router
If you need to set up the Conversational Router yourself, follow these steps to ensure a successful configuration:
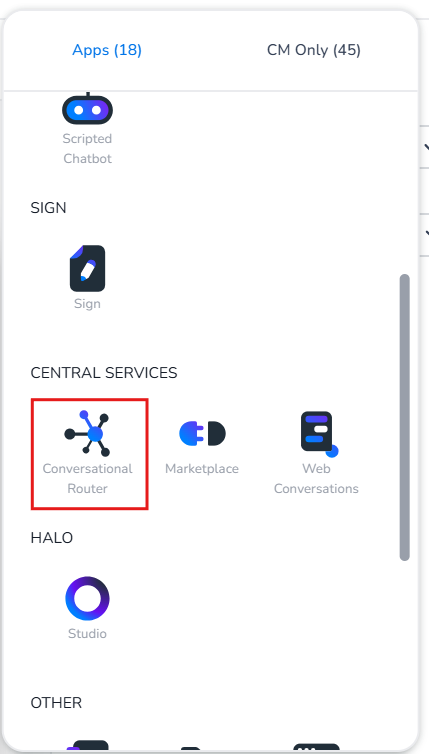
Step 1: Access the Conversational Router App
Log in to the CM.com platform and open the 9-tile menu in the top-right corner of your dashboard.
Navigate to the Central Services section and select the Conversational Router app.
Step 2: Retrieve Router Tokens
Within the Conversational Router app, locate the External Access Info section.
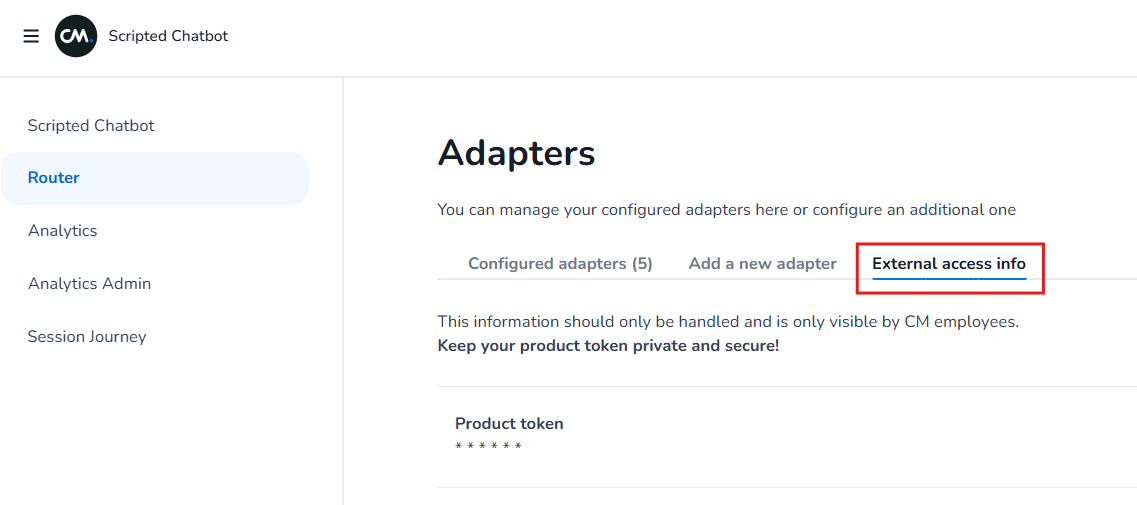
Copy the following tokens:
Product Token: This is your Conversational Router product token.
Technical Link: This is your unique account identifier.
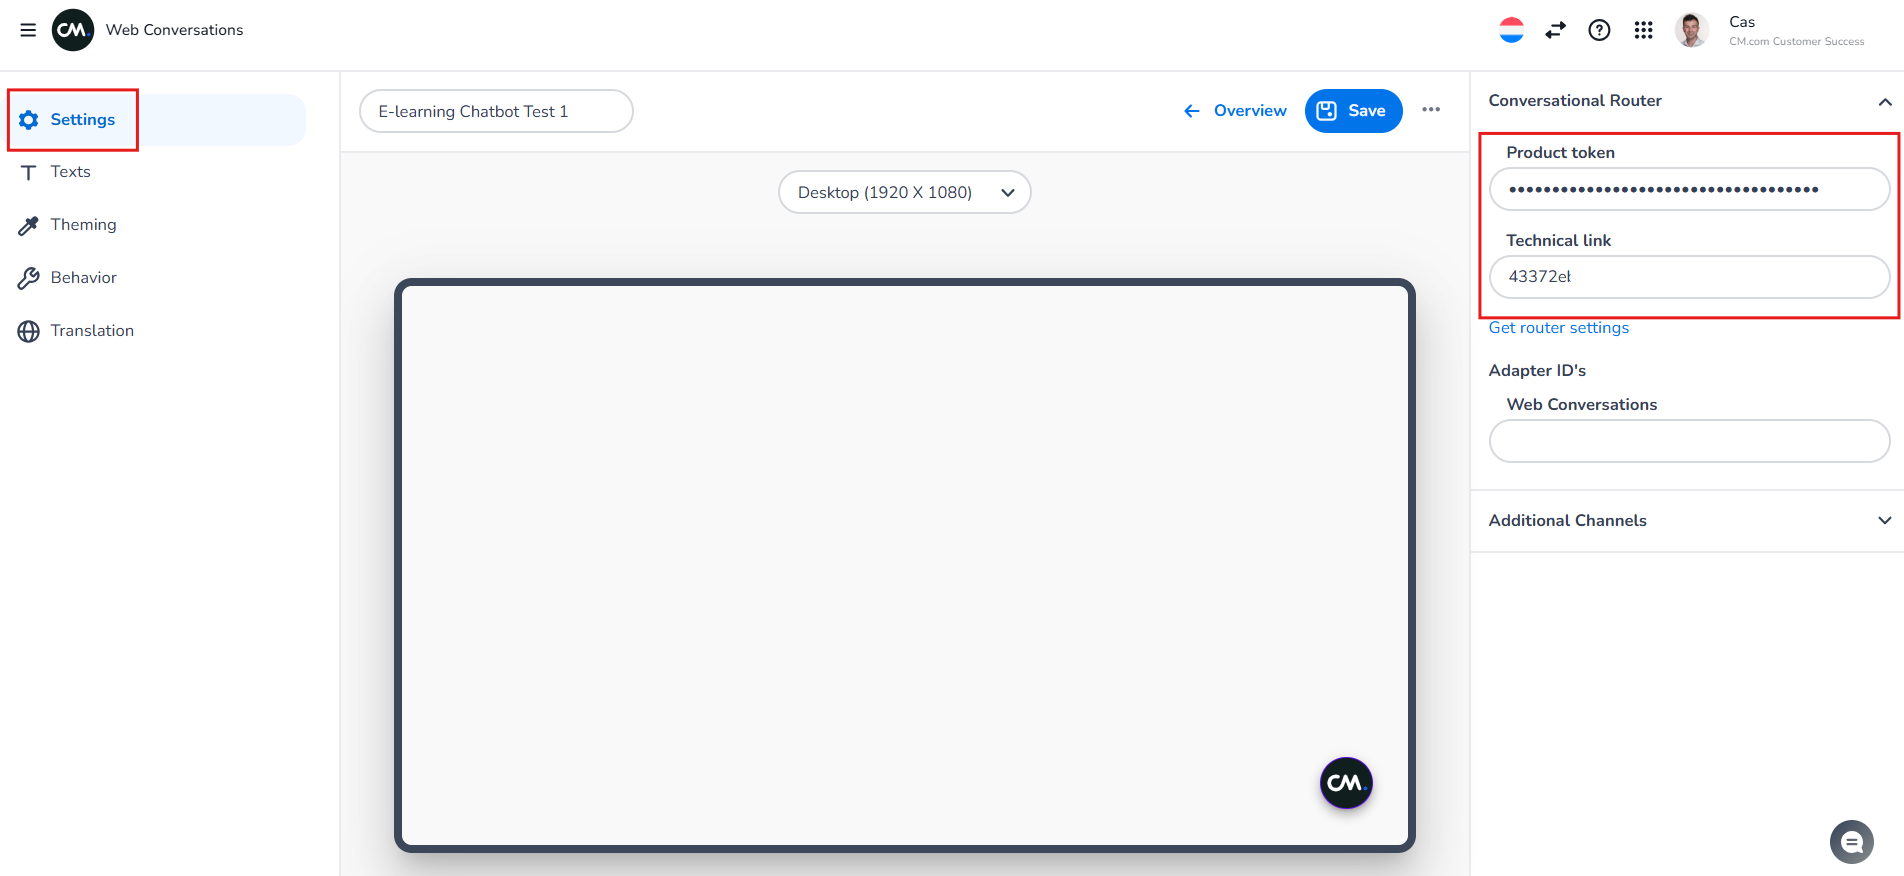
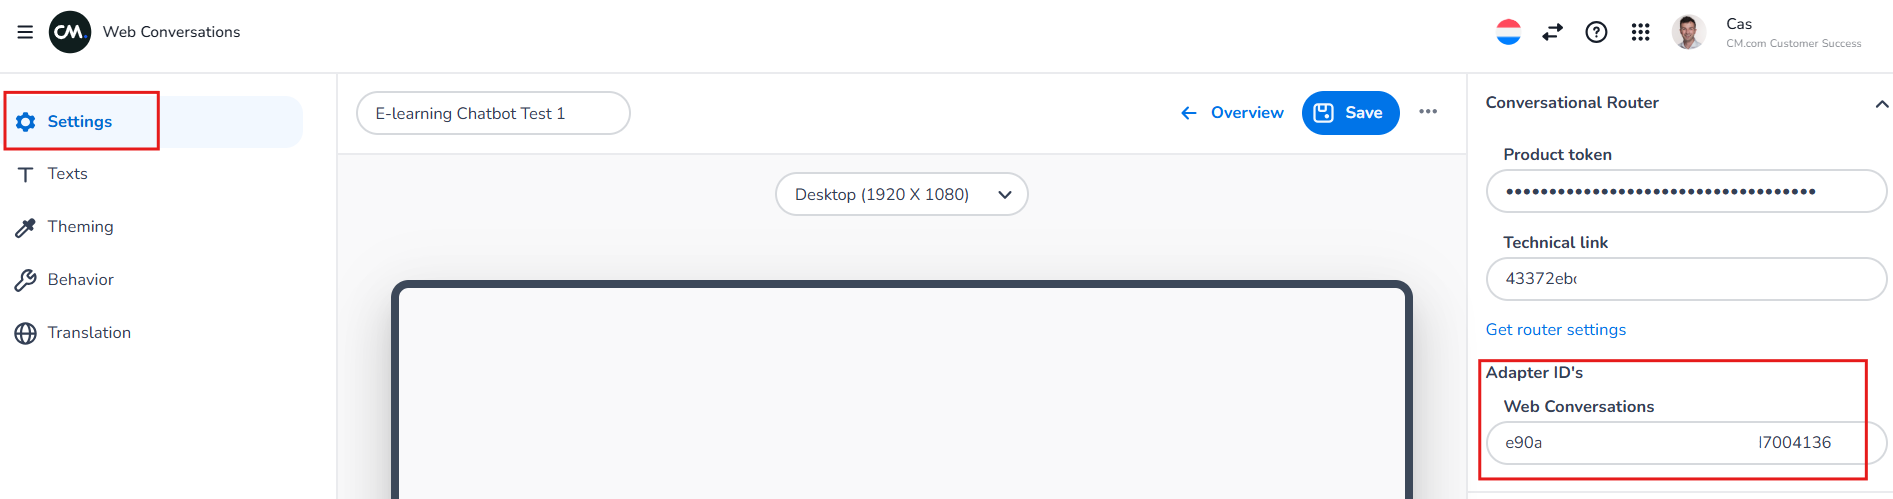
Step 3: Configure Web Conversations
Open your Web Conversations instance in the Web Chat Editor.
Navigate to the Conversational Router settings within the Settings tab.
Paste the Product Token and Technical Link into their respective fields.
Step 4: Add a New Adapter
In the Conversational Router app, click on the Add a New Adapter tab.
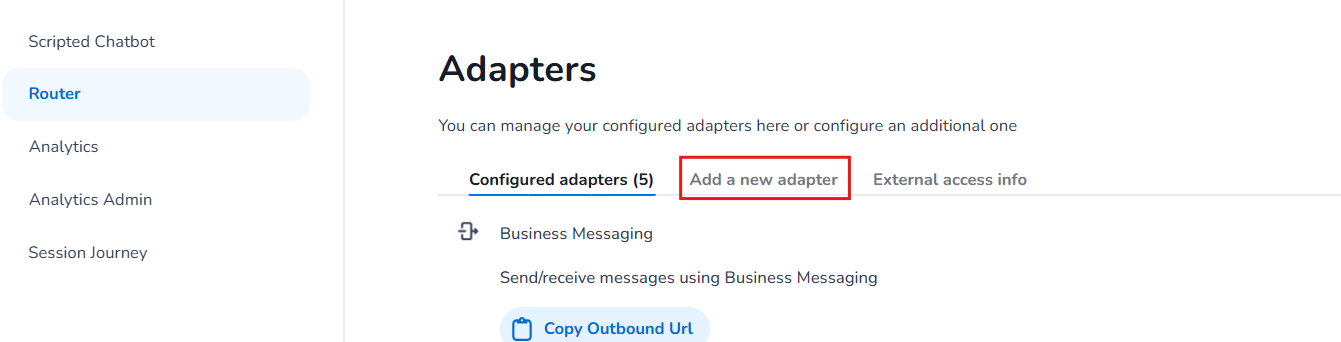
Select Web Conversations as the adapter type and choose version V2.
Save the adapter configuration.
Step 5: Retrieve the Adapter ID
After creating the Web Conversations adapter, locate the Copy Outbound URL option. Go to your Web Conversations adapter and copy the outbound URL.
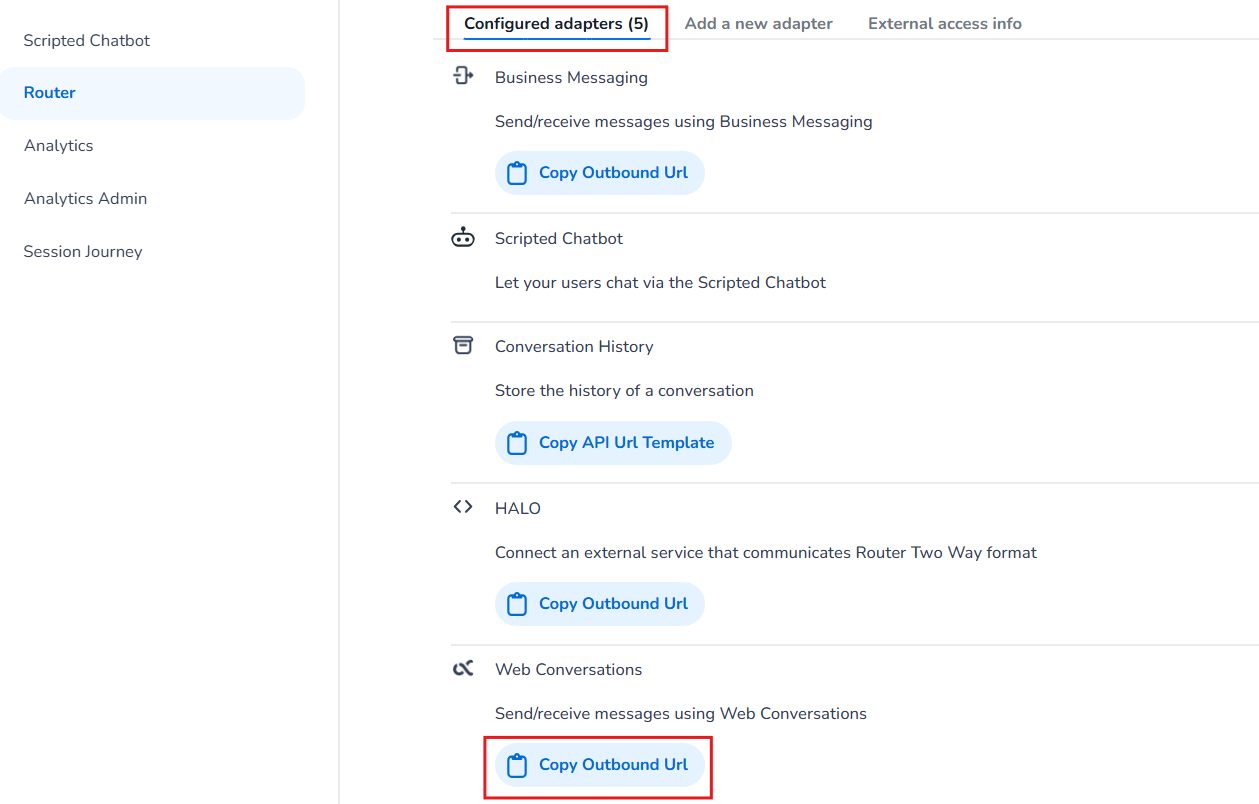
Copy the URL and extract the SECOND ID from the URL structure. For example:
URL:
https://api.conversational.cm.com/conversational/twoway/v2/accounts/FIRSTID/adapters/SECONDIDAdapter ID:
SECONDID
Paste this Adapter ID into the Web Conversations field under Adapter IDs in your Web Conversations configuration.
Step 6: Save Your Configuration
Click the blue Save button in the Web Chat Editor to apply your changes.
Test your Web Conversations instance to ensure that the router is functioning correctly.
Best Practices for Router Configuration
Handle with Care
Router values are critical for your chatbot’s functionality. Avoid modifying these settings unless absolutely necessary.
Double-Check IDs
Ensure that the Product Token, Technical Link, and Adapter ID are entered correctly. Any misalignment can disrupt communication and cause your chatbot to stop working.
Test Thoroughly
After configuring the router, test your Web Conversations instance to confirm that messages are being routed correctly.
Conclusion
The Conversational Router Configuration is the foundation of your Web Conversations setup, ensuring that messages are routed seamlessly between users and your chatbot. By following the steps outlined in this article and adhering to best practices, you can create a stable and functional chatbot environment that supports effective communication across multiple channels.