This article will guide you through the various building blocks available in the Email Campaigns app. By the end, you'll have a clear understanding of how to design engaging emails.
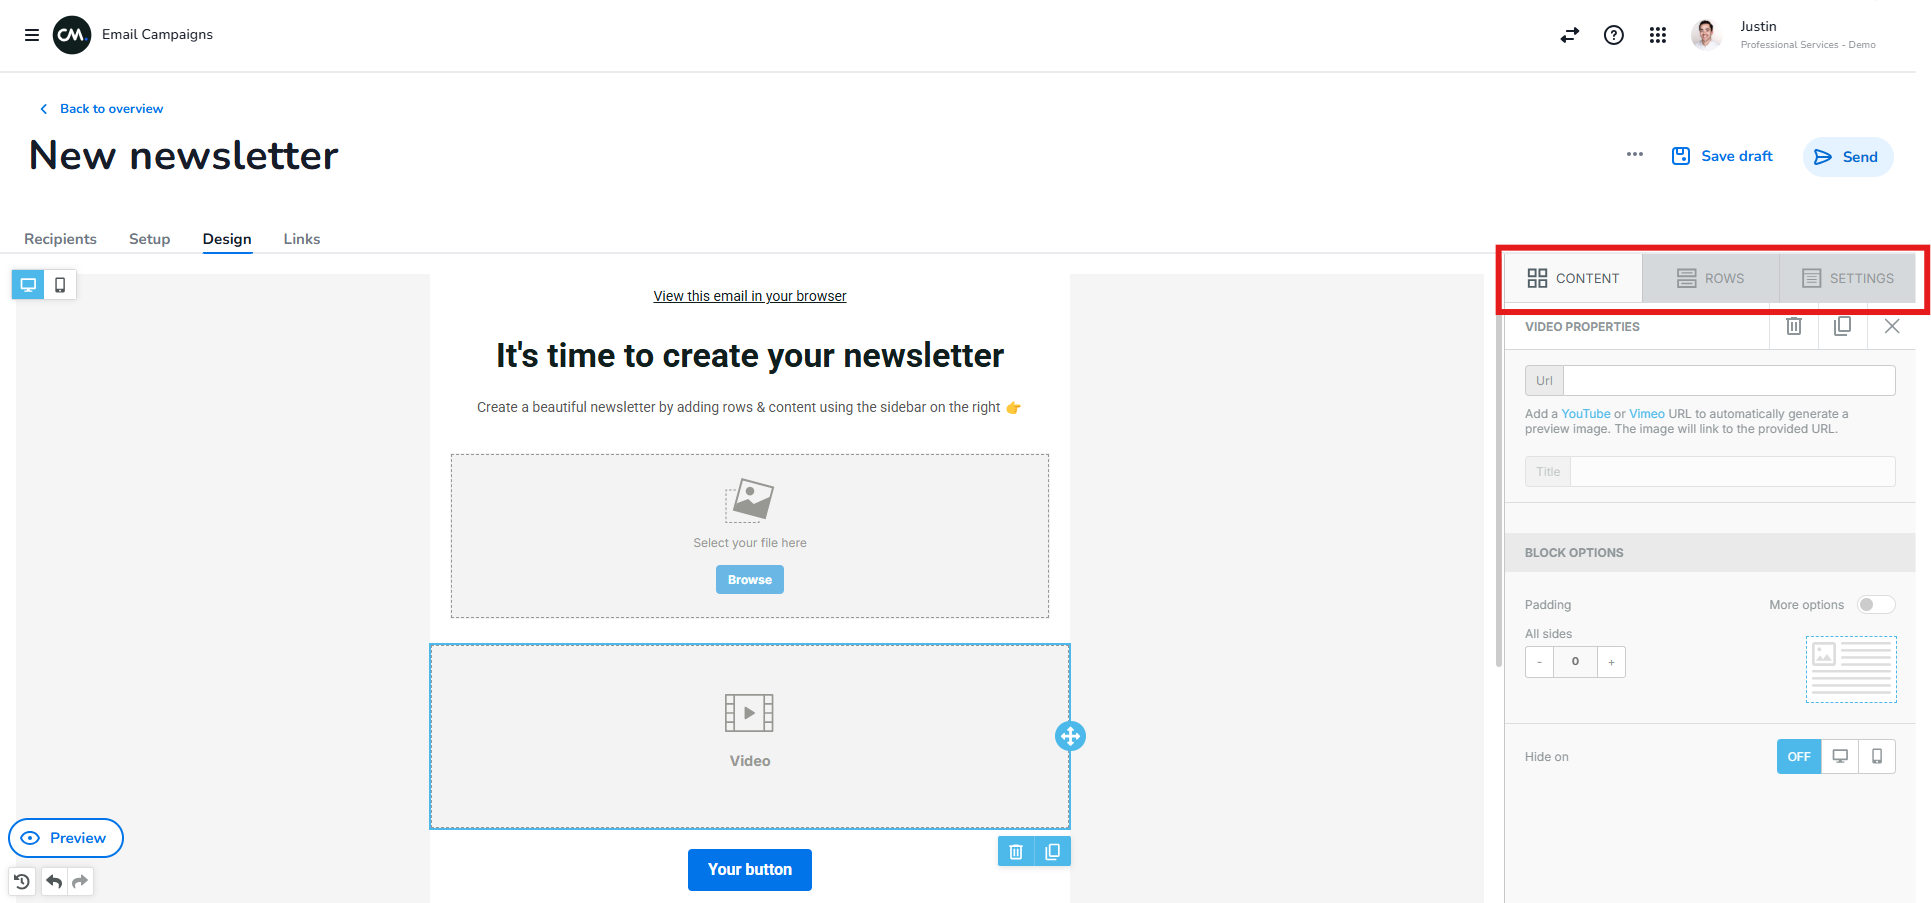
There are three main sections in the design tab: Content, Rows, and Settings. Let’s go through them one by one.
Content
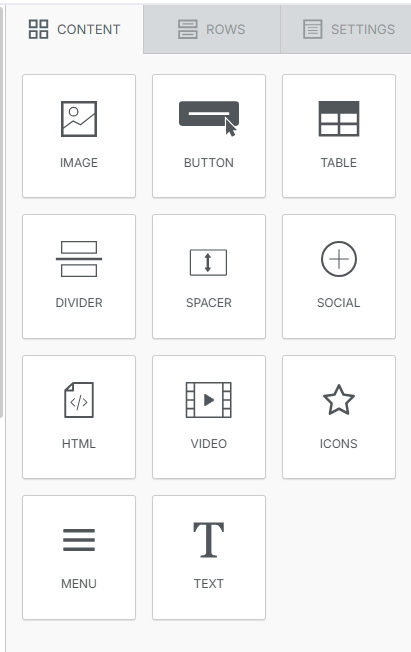
The content section contains all the content blocks you can use to build your email campaign. These blocks can be dragged into a row on the canvas. Below are the available content blocks:
-
Image: Insert images or GIFs via the Content Manager.
-
Button: Add buttons to your email campaign for actions like opening a webpage or sending an email.
-
Table: Add a table to your email campaign for structured data or layouts.
-
Divider: Add dividers in the form of lines to separate sections in your email campaign.
-
Spacer: Add space between content blocks to improve readability and layout.
-
Socials: Easily add social media buttons to your campaign in various styles.
-
HTML: Add custom designs by inserting HTML code while still using the drag-and-drop editor.
-
Video: Embed a video in your email using a YouTube or Vimeo link.
-
Icons: Add your own clickable icons to enhance interactivity.
-
Menu: Add a menu to your email for easy navigation.
-
Text: Add text to your email campaign, with options for personalization.
Once a content block is added and selected, the menu on the right side of the screen allows you to customize its settings. You can adjust options such as padding, visibility (e.g., hide on desktop or mobile), and other settings specific to the content block.
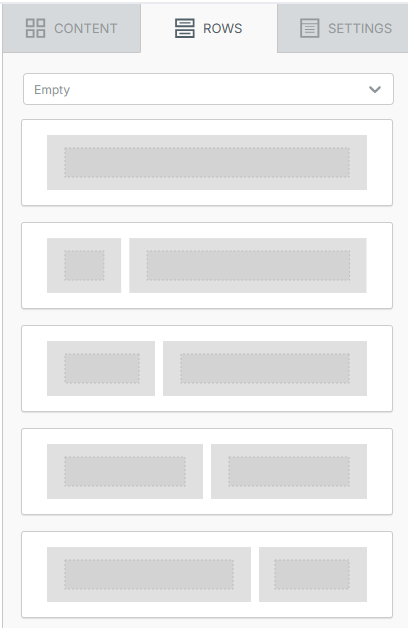
Rows
The rows section allows users to drag rows into the canvas, determining the structure of the email. Rows define how many content blocks can be placed next to each other. For example, if you want to display text alongside an image, you’ll need to use a row with two blocks.
Once a row is dragged into the canvas and selected, a settings menu will appear on the right side of the screen. This menu allows you to configure various settings for the selected row, such as:
-
Making the row conditional (e.g., showing it only to specific recipients).
-
Adding a background to the row for enhanced visual appeal.
Additionally, the dropdown menu at the top of the screen allows users to select predefined rows that already contain content blocks. This can save time and simplify the design process.
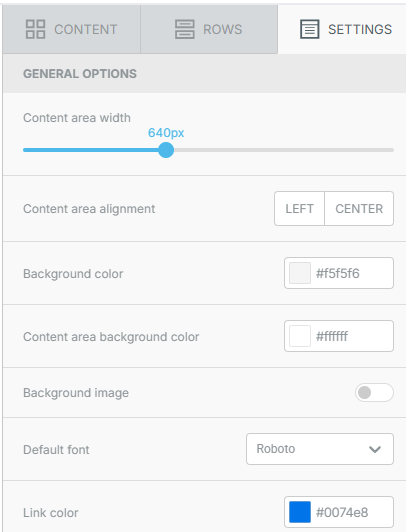
Settings
The settings section allows you to configure the overall design of your email. You can adjust elements such as the background color, email width, and default font to ensure a consistent and professional look throughout your campaign. However, some overall settings, like font and background, can be overwritten by specific content blocks or rows.