Integrating Web Conversations into your website is a straightforward process that allows you to deploy powerful chatbots directly on your web pages. Whether you’re using an inline web chat or a floating web chat widget, the integration process ensures that your chatbot is seamlessly connected to your website, ready to engage with users in real time.
This guide will walk you through the steps to integrate Web Conversations into your website, from exporting the JavaScript snippet to embedding it into your webpage.
Why Integrate Web Conversations?
Integrating Web Conversations into your website provides several key benefits:
-
Enhanced User Engagement: Allow users to interact with your chatbot directly on your website, improving customer support and engagement.
-
Seamless Communication: Provide real-time assistance without requiring users to leave your website.
-
Customizable Placement: Choose between inline web chat or a floating widget to fit your website’s design and user experience goals.
-
Multichannel Support: Enable additional communication channels, such as WhatsApp or phone numbers, directly within the chat interface.
Steps to Integrate Web Conversations
Step 1: Configure Your Web Chat Instance
Before integrating Web Conversations into your website, you’ll need to create and configure a web chat instance in the Web Conversations app. Follow these steps:
-
Access the Web Conversations App:
Log in to the CM.com platform and navigate to the 9-tile menu in the top-right corner of your dashboard. Select Web Conversations to open the app. -
Create a New Instance:
On the Web Conversations homepage, click the blue plus sign to create a new instance. Choose between:-
Web Chat: A floating widget that appears as an icon or bubble on your website.
-
Web Chat Inline: An embedded chat interface that integrates directly into a webpage.
-
-
Customize Your Instance:
Use the Web Chat Editor to configure the appearance, behavior, and functionality of your web chat. Adjust settings such as theme colors, dimensions, and text to align with your brand.
Step 2: Export the JavaScript Snippet
Once your web chat instance is configured, you’ll need to export the JavaScript snippet that connects it to your website.
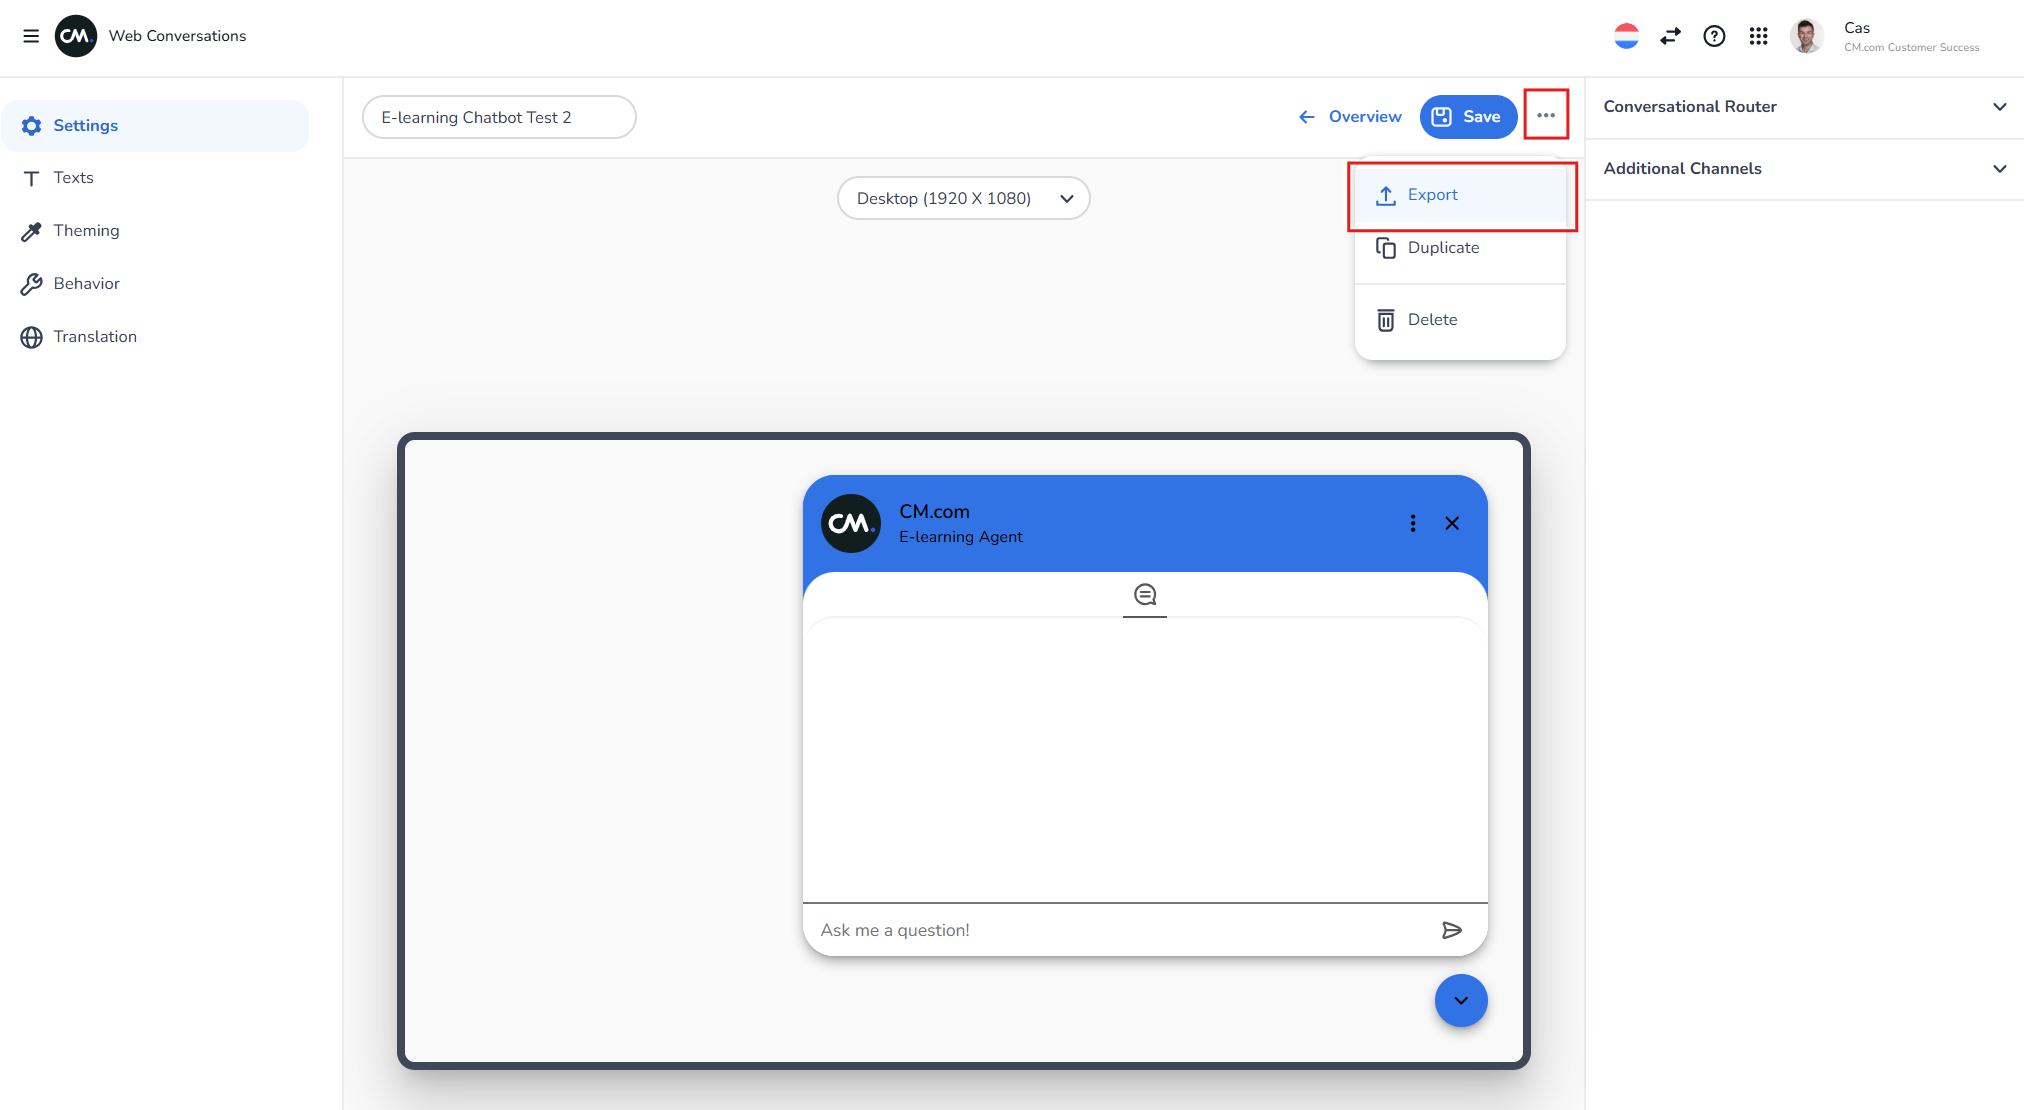
-
Click Export:
In the Web Chat Editor, click the Export button at the top of the screen via the 3 dots. This will generate a JavaScript snippet specific to your web chat instance. -
Copy the Snippet:
Click Copy to Clipboard to copy the JavaScript snippet. This snippet contains the code needed to embed your web chat on your website.
Step 3: Embed the Snippet into Your Website
The JavaScript snippet must be added to the HTML code of the webpage where you want the web chat to appear.
-
Open Your Website’s HTML Code:
Use a code editor (e.g., Notepad++, Visual Studio Code) or your website’s content management system (CMS) to access the HTML file of the target webpage. -
Paste the Snippet:
Paste the JavaScript snippet into the head section of the HTML file. This ensures that the web chat is loaded when the webpage is accessed. -
Save and Refresh:
Save the changes to your HTML file and refresh the webpage in your browser. The web chat interface should now be visible and functional.
Testing Your Integration
After embedding the JavaScript snippet, it’s important to test the integration to ensure everything is working as expected:
-
Open the Webpage:
Navigate to the webpage where the web chat is embedded. -
Interact with the Chatbot:
Test the chatbot by sending messages and verifying that it responds correctly. If you’ve enabled additional channels (e.g., WhatsApp), test those as well. -
Check Device Compatibility:
Use the Web Chat Editor’s device views or test the webpage on different devices (desktop, tablet, mobile) to ensure the web chat interface is responsive and functional across platforms.
Best Practices for Integration
-
Keep It Lightweight: Avoid embedding multiple instances of the web chat on the same page to reduce load times and improve performance.
-
Test Across Browsers: Ensure the web chat works consistently across different browsers (e.g., Chrome, Firefox, Safari).
-
Collaborate with IT Teams: If you’re not familiar with editing website code, involve your IT or web development team to ensure a smooth integration process.
-
Monitor Performance: Use analytics tools to track user interactions with the web chat and identify areas for improvement.
Troubleshooting Integration Issues
If you encounter issues during the integration process, consider the following troubleshooting steps:
-
Check the Snippet: Ensure the JavaScript snippet is correctly copied and pasted into the HTML file.
-
Verify the Instance ID: Confirm that the instance ID in the snippet matches the ID of your configured web chat instance.
-
Inspect the Console: Use your browser’s developer tools to check for JavaScript errors or warnings related to the web chat.
Learn More with E-Learning Videos
For a step-by-step demonstration of how to integrate Web Conversations into your website, watch our dedicated e-learning video. This video walks you through the entire integration process, from creating a new web chat instance to exporting the JavaScript snippet and embedding it into your website. It also includes practical examples of integrating both inline web chat and floating web chat widgets.
Conclusion
Integrating Web Conversations with your website is a simple yet powerful way to enhance user engagement and provide real-time support. By following this guide, you can ensure a seamless integration process and create a web chat experience that aligns with your brand and meets your users’ needs.