How Do I Navigate the Customer Data Platform?
Introduction
Welcome to the guide on how to use the Customer Data Platform (CDP) provided by CM.com.
How to Access the Customer Data Platform
After logging into the CM.com platform, click on the nine dots located in the top right corner and select "Customer Data Platform".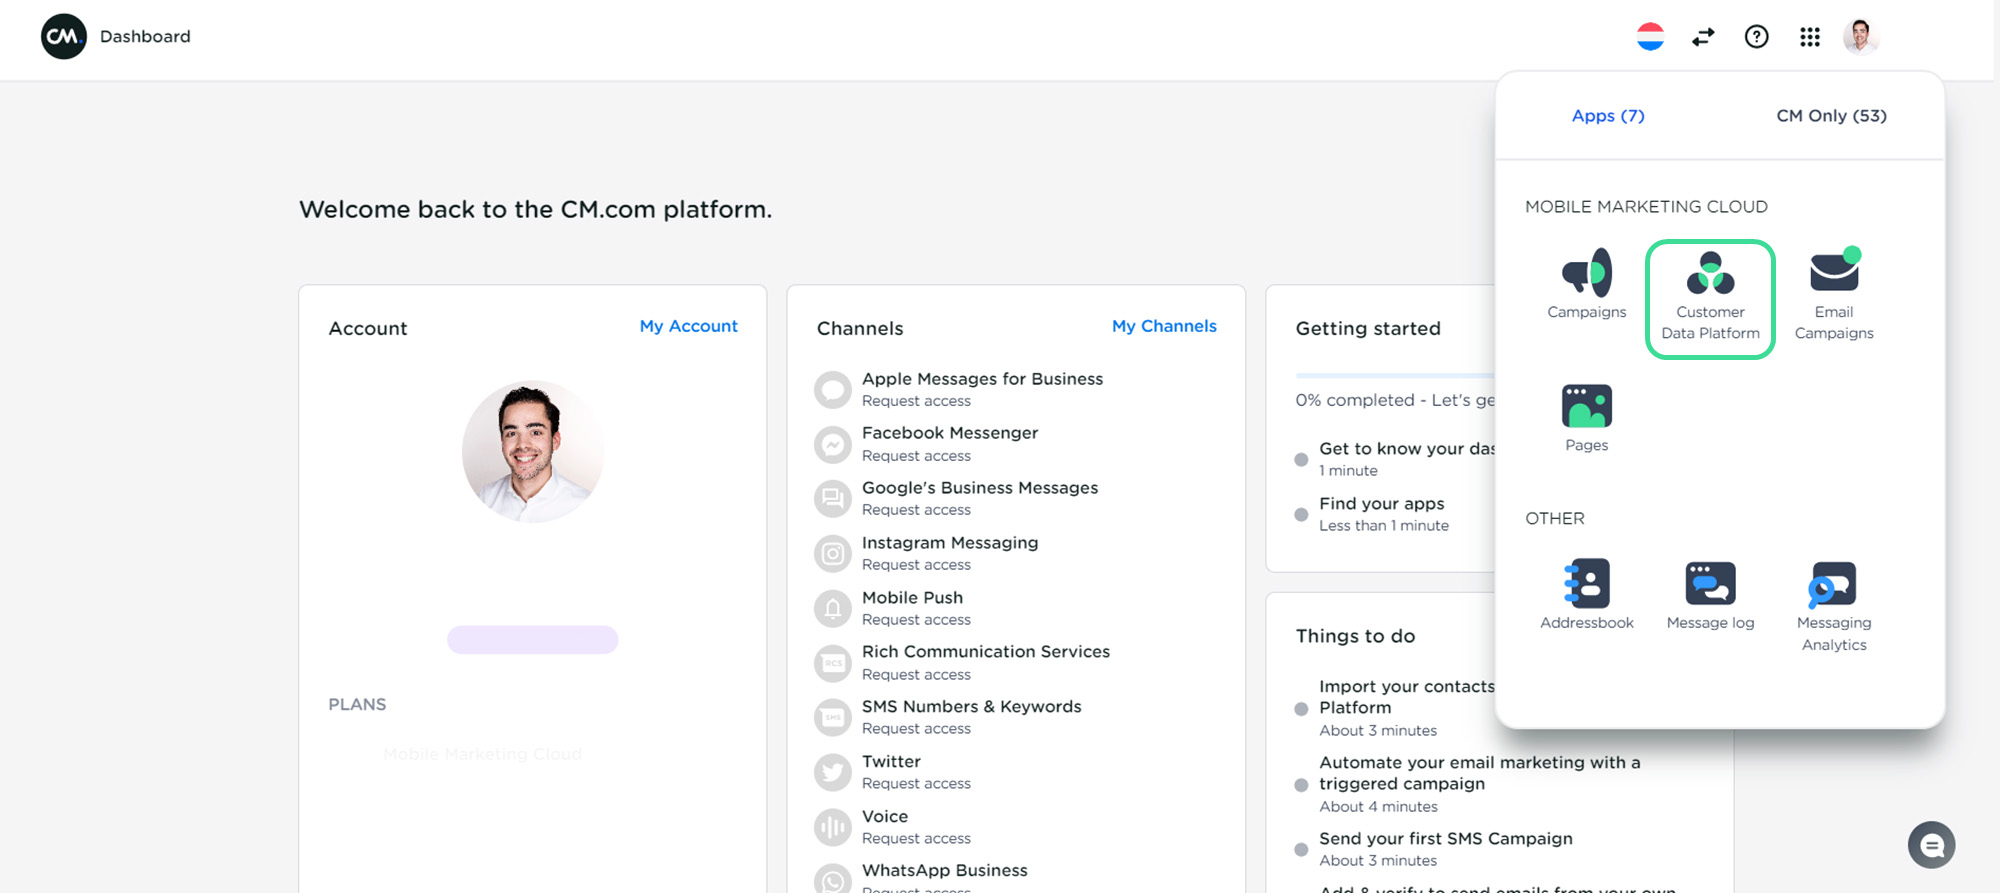
Navigating the Customer Data Platform
Once you are in the CDP, you will see a menu on the left side of the screen. Below is an overview and explanation of the menu items.
Insights
Profile Insights
In Profile Insights, you can find all the profiles collected in the CDP. You can easily filter, create segments, and add profiles within this menu item.
Additionally, by clicking "Actions" at the top of your screen, you can edit profile properties or export all filtered profiles.
Click "Add profiles" to upload a file or add a single profile to your CDP.
Event Insights
Profiles are built from events, with each data source having its own event type. In Event Insights, you can filter by a specific event type, scroll through, or download all data for that event type.
For more information on the difference between profiles and events, click here.
Segments
This menu item provides an overview of all the segments you have created. By clicking the three dots on the right side of a segment, you have the following options:
- Synchronize to Address Book
- Export to Facebook Audience (Pro only)
- Rename the segment
- Duplicate the segment
- Delete the segment
In the top right corner, you will find a blue button to create a new segment.
For more information on creating segments based on profile and event information, click here.
Dashboard
The dashboards in the CDP allow you to visualize the data you have collected. To help you get started, there are standard dashboards based on the sources you have activated.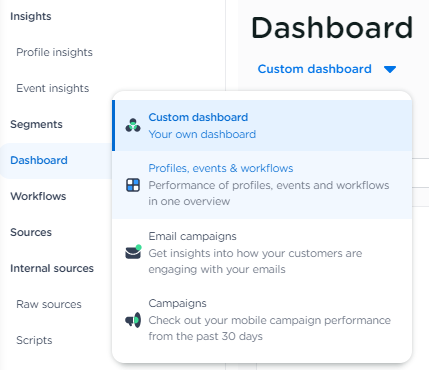
By choosing "Custom dashboard," you can create your own dashboards with a selected time range.
Note: The dashboard is only available for Advanced and Pro packages.
Workflows
In the Workflows section, you can create automated flows using a drag-and-drop interface. You can easily add a new workflow by clicking the blue button in the top right corner or edit an existing one by clicking on the workflow you want to change.
Note: Only Advanced and Pro packages allow you to create multi-step workflows.
Sources
In the Sources section, you can find standard integrations. To activate these integrations, click the blue plus button in the top right corner and select the integration you want to activate. The availability of some integrations depends on your package.
Once you have added an integration, it will appear in the list where you can edit it.
Sources is also where you can manage your consents, which is active by default.
Settings
In the bottom left corner, you will find "Settings," where you can edit your retention settings, global settings, and profile properties.
Video Tutorial
Below is a video tutorial on how to navigate to and through the CDP in Mobile Marketing Cloud.