
Add Mobile order
This guide will walk you through the process of configuring the Mobile Order Settings in your POS system. Mobile ordering allows customers to place orders directly from their devices using a unique QR code or URL. Follow the steps below to enable and customize this feature.
Step-by-Step Guide
1. Accessing Mobile Order Settings
Navigate to the Mobile Order Settings section in your POS system.
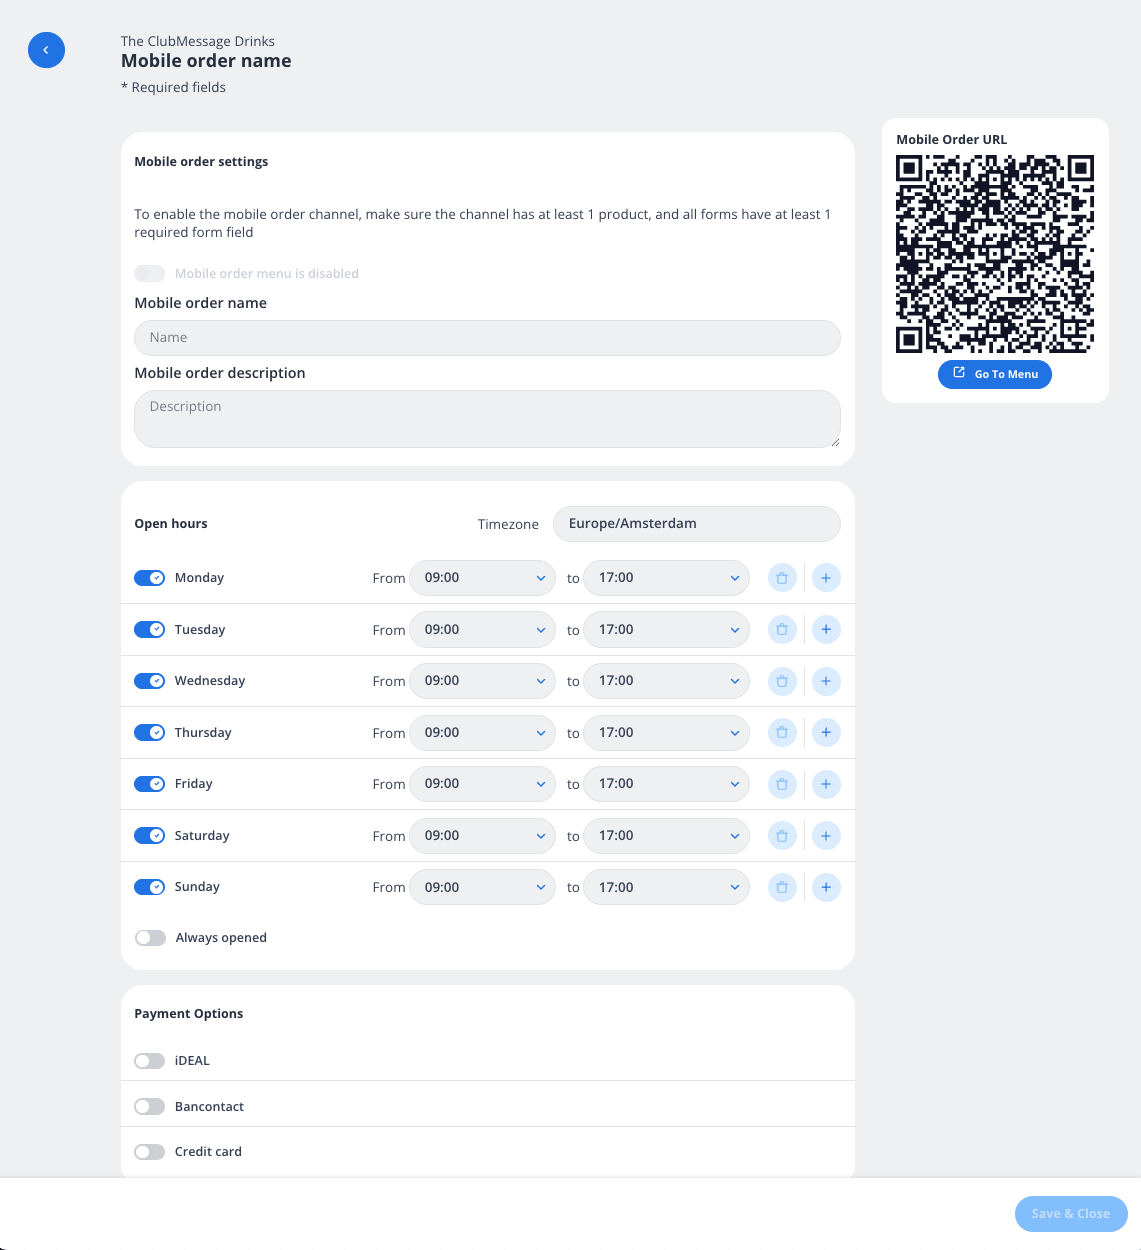
Ensure that the mobile order channel has at least one product and all forms include at least one required field. Without these, the mobile order menu cannot be enabled.
2. Enable Mobile Ordering
Toggle the switch labeled Mobile order menu is disabled to enable the feature. Once enabled, you can proceed with customization.
3. Set Mobile Order Name and Description
Mobile Order Name: Enter a name for your mobile order channel. This will help you identify it in the system.
Mobile Order Description: Optionally, provide a description to give more context about this channel (e.g., "Order drinks and snacks directly from your phone").
4. Configure Open Hours
Set the operating hours for mobile orders:
Use the dropdown menus to specify the opening and closing times for each day of the week.
Toggle the switch next to each day to enable or disable mobile ordering for that day.
If your business operates 24/7, check the Always opened box to bypass specific time settings.
Ensure the correct Timezone is selected (e.g., Europe/Amsterdam).
5. Set Payment Options
Choose the payment methods you want to accept for mobile orders:
iDEAL
Bancontact
Credit card
Toggle the switches to enable or disable each payment option.
6. Generate and Share the Mobile Order URL
A unique Mobile Order URL is automatically generated for your mobile order channel.
Share the URL with customers by:
Displaying the QR code in your venue for easy scanning.
Clicking the Go To Menu button to preview the mobile order page.
7. Save Your Settings
Once all configurations are complete, click the Save & Close button at the bottom right of the screen to apply your changes.
Additional Notes
QR Code: The QR code displayed in the settings can be printed and placed in your venue for customers to scan and access the mobile order menu.
Testing: Before going live, test the mobile order menu to ensure all products, forms, and payment methods are functioning correctly.
Updates: You can revisit this section anytime to update your settings, such as changing operating hours or adding new payment methods.
By following these steps, you can successfully set up and manage mobile ordering for your business, providing a seamless and convenient experience for your customers.