Navigation: Point of sale → Point of sale
Channels represent the different ways customers can place orders with your business. This guide covers all your sales channels, both offline and online, including Cash Register for traditional in-store transactions, Mobile Order for purchases through your app, and Kiosk for self-service ordering stations. Properly configuring these channels ensures a consistent customer experience across all touchpoints.
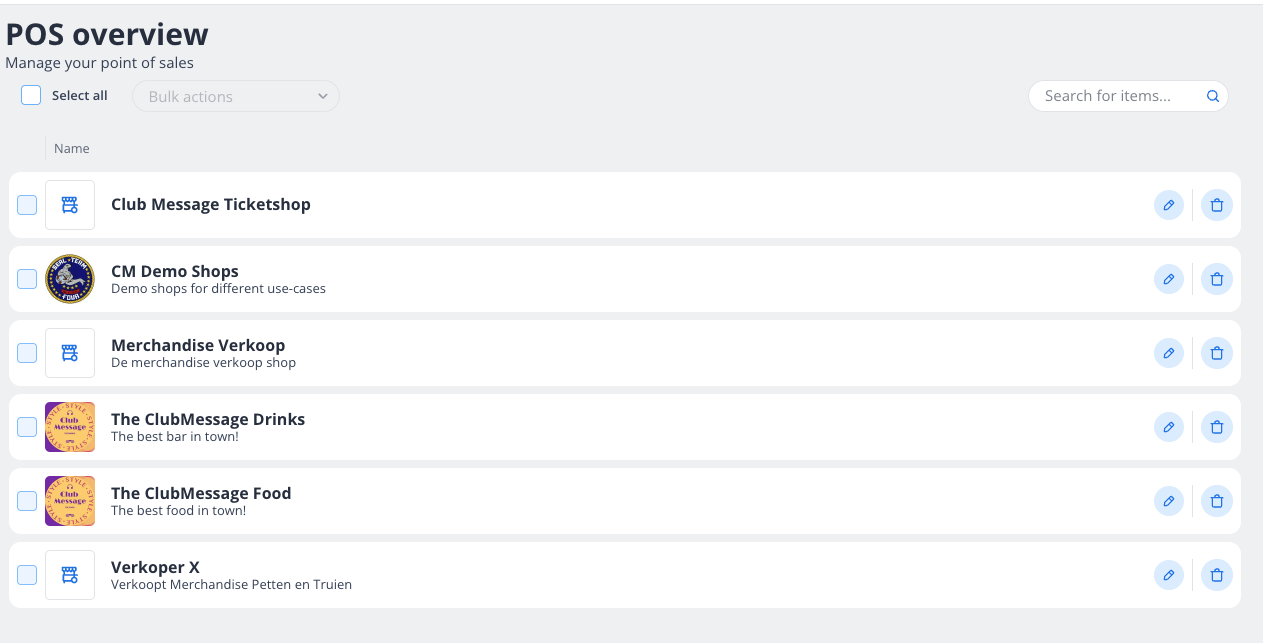
POS Overview Screen
The POS Overview screen is your central hub for managing all your Points of Sale. Here's what you can do on this screen:
-
View Existing Points of Sale:
-
Each Point of Sale is listed with its name, description, and an optional logo.
-
Examples include:
-
Club Message Ticketshop: A ticketing shop.
-
Merchandise Verkoop: A shop for selling merchandise.
-
The ClubMessage Drinks: A bar.
-
The ClubMessage Food: A food outlet.
-
-
-
Search for Items:
-
Use the search bar in the top-right corner to quickly find a specific Point of Sale.
-
-
Bulk Actions:
-
Select multiple Points of Sale using the checkboxes on the left and apply bulk actions.
-
-
Edit or Delete:
-
Use the pencil icon to edit a Point of Sale.
-
Use the trash bin icon to delete a Point of Sale.
-
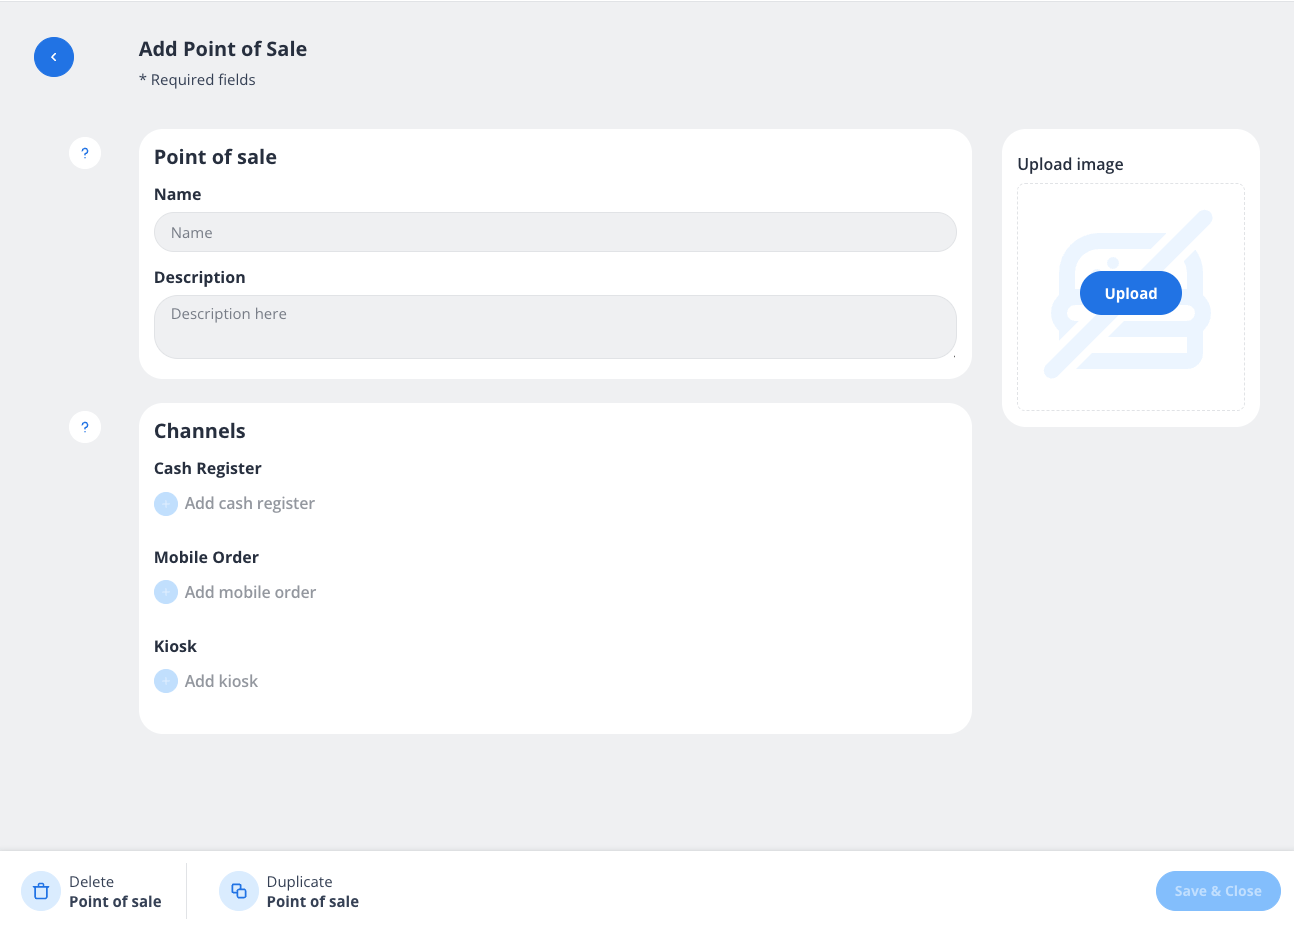
Adding or Editing a Point of Sale
To add a new Point of Sale or edit an existing one, follow these steps:
1. Access the Add/Edit Screen
-
Click the pencil icon to edit an existing Point of Sale.
-
To add a new Point of Sale, look for an "Add" button (not shown in the screenshot but typically available in the interface).
2. Fill in the Details
On the Add Point of Sale screen, you’ll see the following fields and options:
-
Point of Sale Details:
-
Name: Enter the name of the Point of Sale (e.g., "Club Message Drinks").
-
Description: Provide a brief description (e.g., "The best bar in town!").
-
Upload Image: Add a logo or image to represent the Point of Sale.
-
-
Channels:
-
Cash Register: Add a cash register for in-person transactions.
-
Mobile Order: Enable mobile ordering for customers.
-
Kiosk: Set up a self-service kiosk.
-
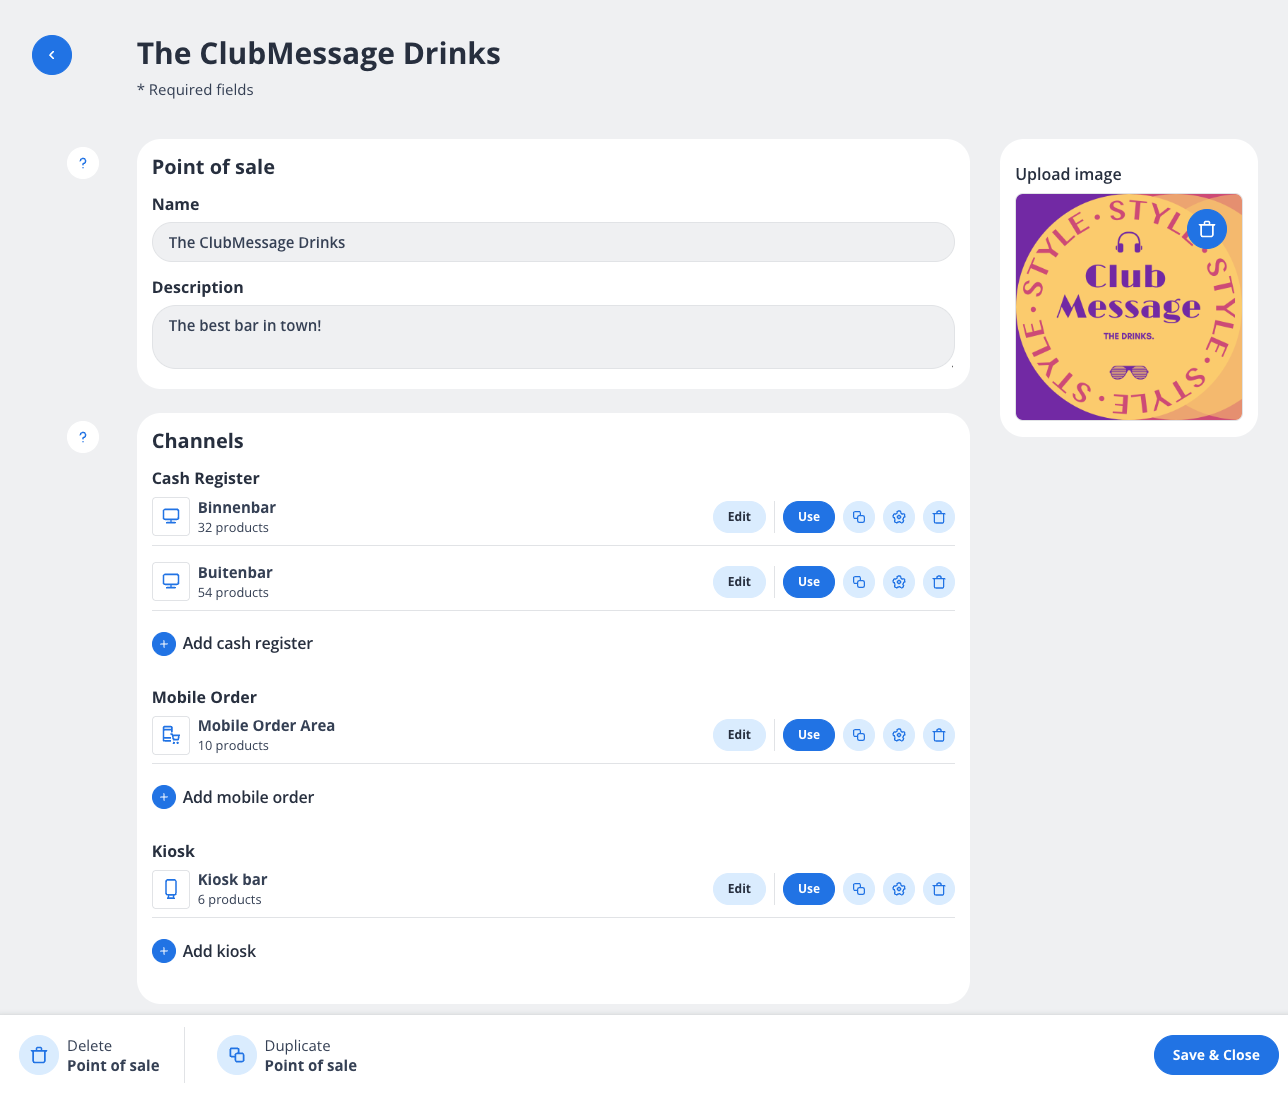
3. Save or Manage the Point of Sale
-
Save & Close: Click this button to save your changes and return to the POS Overview screen.
-
Delete Point of Sale: Permanently remove the Point of Sale.
-
Duplicate Point of Sale: Create a copy of the current Point of Sale for similar setups.
Tips for Managing Points of Sale
-
Organize by Function: Use clear names and descriptions to differentiate Points of Sale.
-
Use Logos: Adding images helps visually identify Points of Sale quickly.
-
Enable Relevant Channels: Only activate the channels (e.g., Cash Register, Mobile Order) that are necessary for the specific Point of Sale.
By following this guide, you can efficiently manage your Points of Sale and ensure a smooth operation for your business. If you encounter any issues, contact support for assistance.