
Edit Kiosk
This guide will walk you through the steps to configure your kiosk-based point-of-sale (POS) system. By customizing the kiosk's interface, you can enhance the customer experience and streamline operations.
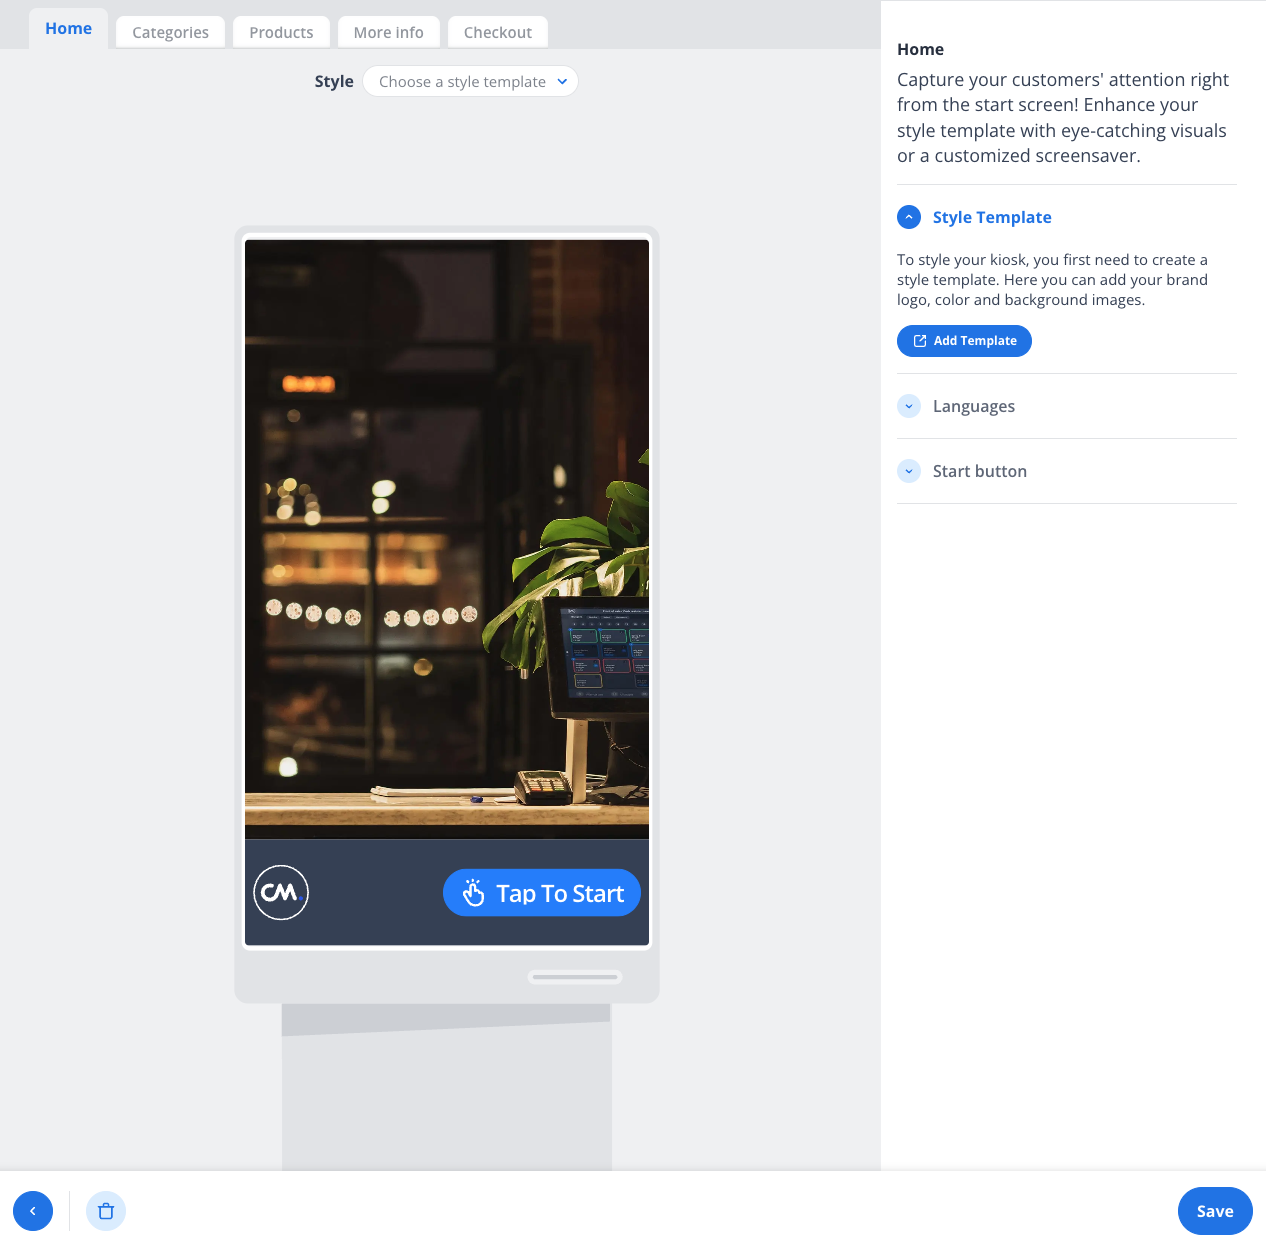
1. Home Screen Setup
The home screen is the first thing your customers see. Here's how to customize it:
Navigate to the Home tab.
Click on Add Template to go to the style templates section.
Choose which languages the Kiosk can be used by the customer.
Change the call to action text for the Start button and choose the icon you want.
Save your changes by clicking the Save button.
2. Organizing Categories
Categories help customers navigate your products easily. To set up categories:
Go to the Categories tab.
Click Add for adding an description that will be shown to the customer.
Click Add Category to create a new category (e.g., Drinks, Food, Merchandise).
Enable or disable the Category Selection Screen depending on your kiosk flow:
Enabled: Customers can browse categories before selecting products.
Disabled: Customers are taken directly to the product list.
Allow expand / collapse category panels
Save your changes.

3. Adding Products
To add products to your kiosk:
Open the Products tab.
Select a category from the list or create a new one.
Add products (e.g., Cocktails, Beers, Tickets) to the selected category.
Save your changes.

4. Collecting Additional Information
If you need to gather specific customer details during the checkout process:
Navigate to the More Info tab.
Click Add New Form to create a custom form.
Add fields for the information you want to collect (e.g., email, phone number). These fields are being shown to the customer during the checkout flow.
Save your changes.

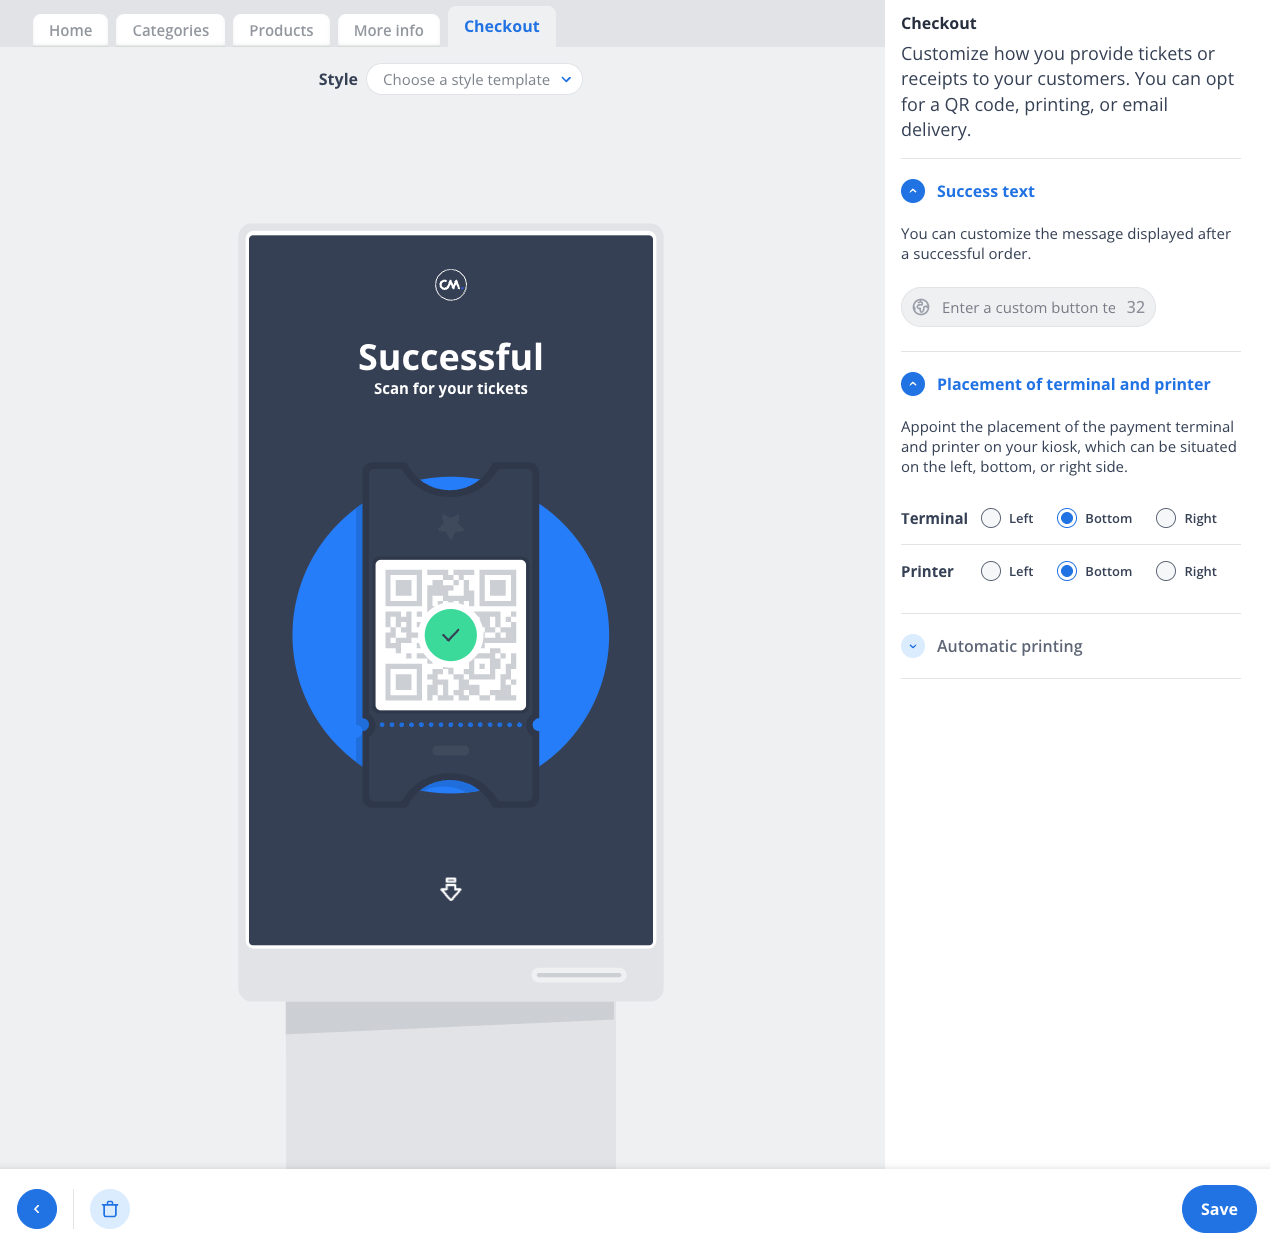
5. Customizing the Checkout Experience
To configure the checkout process:
Go to the Checkout tab.
Edit Success Message:
Customize the message displayed after a successful transaction (e.g., "Thank you for your purchase!").
Configure Terminal and Printer Placement:
Choose the placement of the payment terminal and printer (left, bottom, or right).
Enable Automatic Printing:
Turn on automatic printing for receipts or tickets if needed.
Save your changes.
Tips for a Seamless Setup
Test your kiosk after making changes to ensure everything works as expected.
Use high-quality images and clear text for a professional appearance.
Regularly update your product list and categories to reflect your current offerings.
By following these steps, you can create a user-friendly and efficient kiosk experience for your customers. For further assistance, contact our support team.