
Basics and creation process
Begin by navigating to the Tools Overview section. Click the blue '+' icon to start creating a tool. You can choose 'Add New Tool' to build from scratch or 'Import from Template' to use existing structures.
Add New Tool: Provides a blank canvas for creating a tool tailored to your needs.
Import from Template: Offers pre-existing templates to streamline the creation process. Refer to Tool Templates for more details.
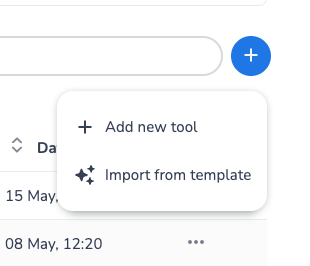
Add a new tool menu
Tool Structure
Each tool follows a consistent format:
Name & Description
Start: The entry point of the tool defines input parameters for the tool.
Steps: Includes various actions and conditions. Check Steps, branches and ouputs for more information.
Output: Sends the processed output back to the AI agent. More info on the Output page.
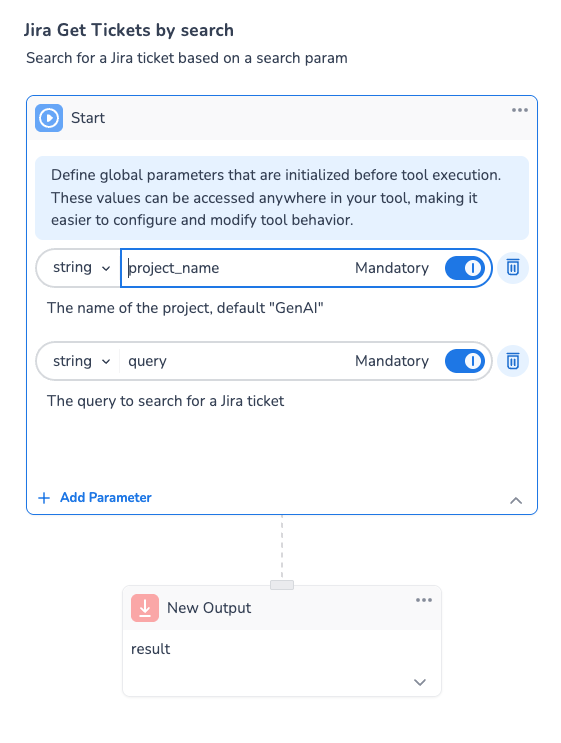
Tool structure including name, description, Start parameters and Output
Building a Tool from Scratch
Initial Setup
Name the tool and describe it to clarify its purpose.
Name: should contain only alpha-numeric characters, dashes, and underscores, it should be descriptive and to the point.
Description: should contain more details about the tool, what it does, and when to use it.
Pay special attention to defining the name and description of the tool, they will be used by the Agent to determine if the tool is best for the task.
Configuring Input Parameters
Specify input parameters in the Start step. Add parameters, define names and descriptions, set data types, and mark mandatory fields to ensure the tool receives necessary data. Check Parameters, variables, context and data flow to get a better understanding of how the parameters are used.
Name: it should contain only alpha-numeric characters, dashes, or underscore, it should be short, but descriptive. Avoid parameter names like “x” or “param”. Example, “order_id”, “user_name”, “country_code”, etc.
Description: it should contain additional information about the parameter, what it represents, what it can be used for, and examples of values or validation rules. For example, “This parameter is used to identify an order. Every order ID has 6 characters, they always start with the country code (e.g. NL) followed by 4 additional digits (e.g. NL4252).
Type: we support 4 parameter types:
String: represents plain text, it can be safely used when you are not sure what the exact type of your parameter
Number: any number, can be an integer like “123” negative, “-123” or floating point, “1,23”
Integer: used for strict integer numbers without floating point
Boolean: it can be either True or False
Required: Mark a parameter as required if the tool always needs it. The agent will always try to fill this parameter by asking for additional questions or retrieving it from the conversation
Pay attention when defining these parameters. Make sure all the fields are filled in according to the needs. Spending additional attention to this will improve the quality and performance of your tools.
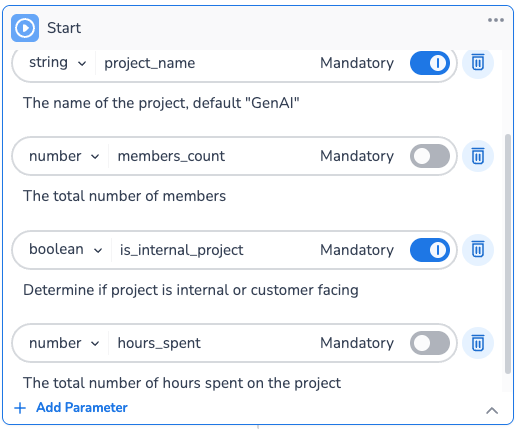
Examples for all parameter types
Managing Steps
Add steps to construct the tool's workflow. Click the plus icon under existing steps to add new actions. Choose from options like API Calls, LLM Interaction, or Code Execution.
Using the Assistant: You can describe what step should be added to the tool. Describe as best as you can what you’d like to add, the assistant will leverage its knowledge to select the proper step and fill in its attributes
Manage: You can manage steps by clicking on the 3-dots menu
Copy-Paste: You can copy-paste a step in the current tool or to another tool. Press the Copy button, find the place where you want to paste it and press the Paste button
Deleting Steps: when a step is deleted its parent and children will be reconnected
When a step is added, (from the + menu, via copy-paste, or by the assistant) it will be focused, brought into view and opened.
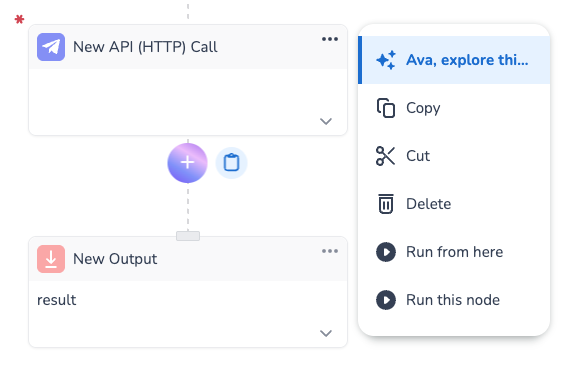
Manage steps
Testing and running the tool
Test the tool with sample parameters to ensure it works correctly. Use the execution window to troubleshoot your tool, and investigate step outputs and errors in the logic.
Start the execution by either pressing the Play button at the bottom of the page, pressing Run from here (to execute the tool from this step), or Run this step (to execute only the current step) from the 3-dots menu. More about this on Debugging Tools .
Example Tool: Order Information Retrieval
To demonstrate, consider an example tool designed to retrieve order information based on an order ID.
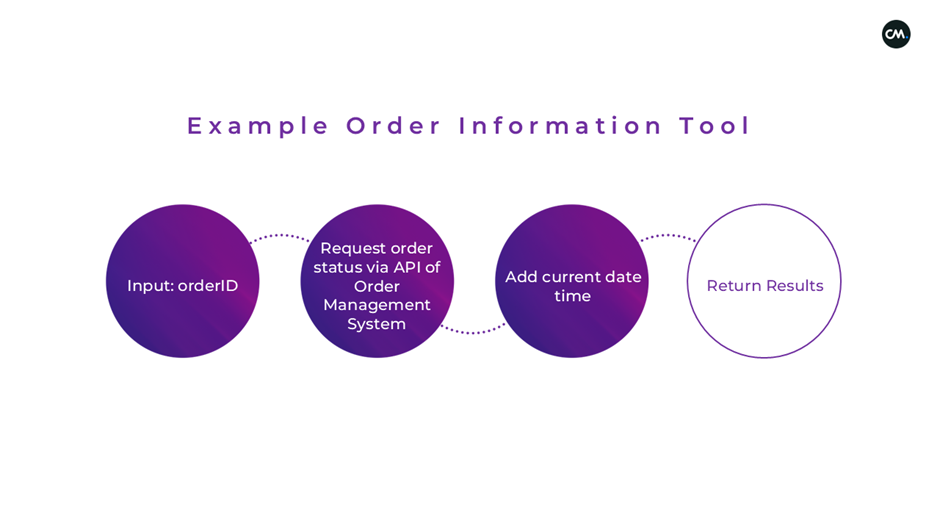
Input: Begin with the
orderIDProcess: Request order status from the order information system's API.
Enhancement: Add the current date and time.
Output: Send all results back to the AI Agent.
This concludes our introductory explanation of creating tools in HALO.
By following these steps and examples, you can effectively create and customize tools that meet your specific needs in the HALO platform.
E-learning Video
For further guidance, watch our e-learning videos:
https://vimeo.com/1060522521/a937e0207ahttps://vimeo.com/1060532449/2b1cde9c49