This guide explains how to customize the product layout in your Point of Sale (POS) system. The layout editor allows you to organize products and folders for quick and easy access during transactions. This article will walk you through the steps to add, arrange, and save products and folders in your POS interface.
Layout Editor
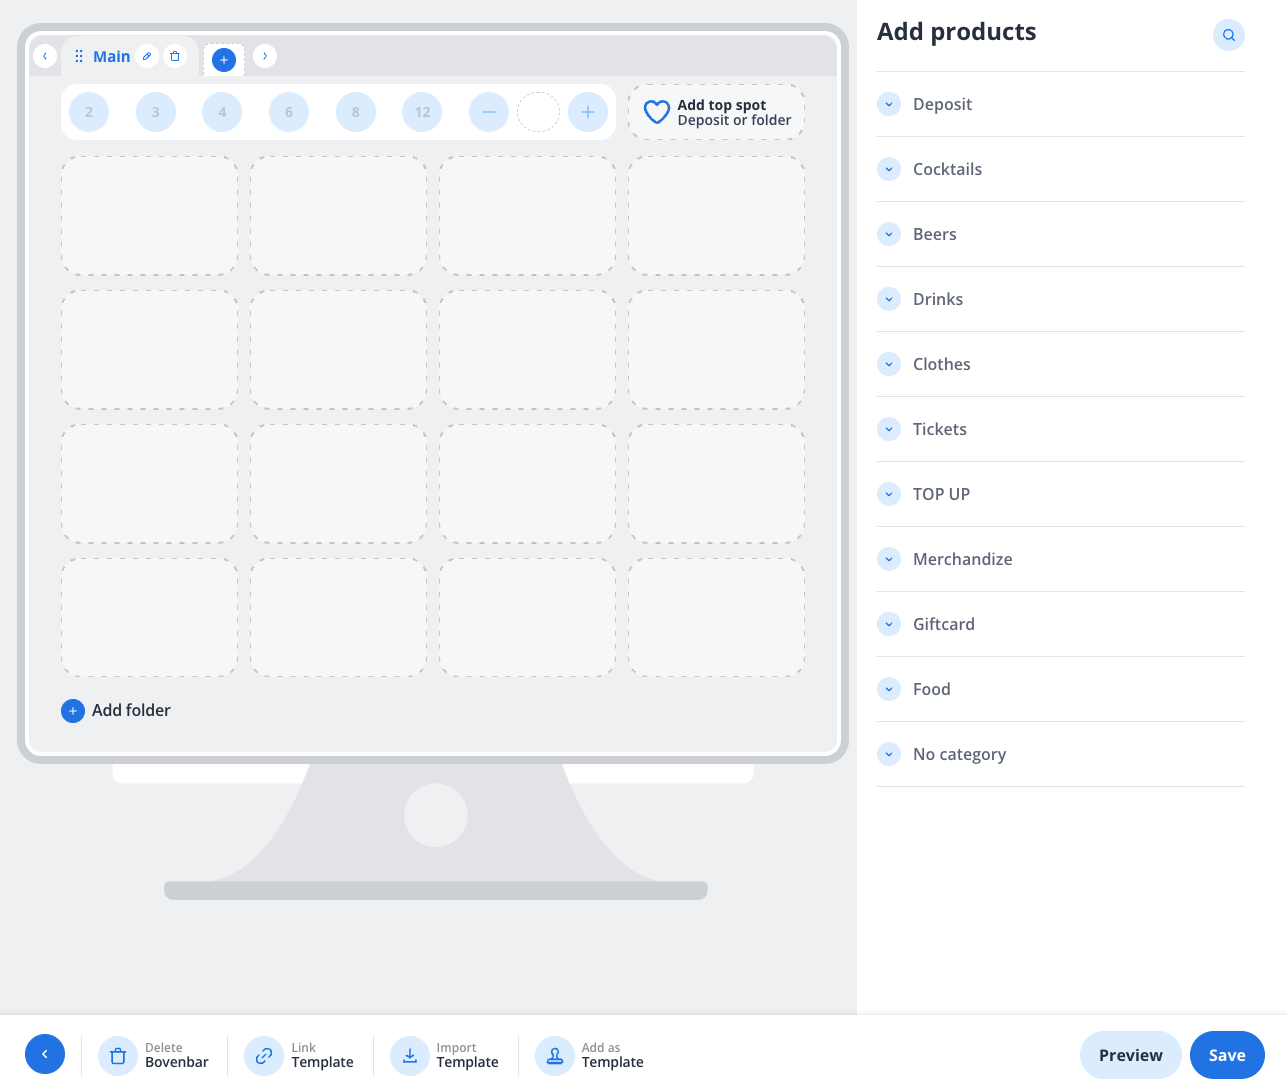
The screenshot above shows the layout editor interface of the POS system. Here's a breakdown of the key elements:
-
Grid Area (Center):
-
This is where you can arrange products and folders. Each square represents a spot where you can place a product or folder.
-
The "Add top spot" button allows you to highlight specific products or folders for quick access.
-
-
Product List (Right Panel):
-
A list of available product categories (e.g., Deposit, Cocktails, Beers, Drinks, etc.) that you can add to the grid.
-
Products are grouped by categories for easy navigation.
-
-
Bottom Toolbar (Bottom Panel):
-
Delete Bovenbar: Removes the current layout or folder.
-
Link Template: Links a pre-existing template to the layout.
-
Import Template: Allows you to import a saved template.
-
Add as Template: Saves the current layout as a reusable template.
-
Preview: Lets you preview the layout before saving.
-
Save: Saves the changes made to the layout.
-
-
Navigation Bar (Top Left):
-
Displays the current folder or layout you are editing (e.g., "Main").
-
Use the "+" and "-" buttons to add or remove rows in the grid.
-
Step-by-Step Instructions
1. Adding Products to the Layout
-
Locate the product you want to add in the Product List on the right-hand side.
-
Drag and drop the product into an empty square in the Grid Area.
-
Repeat this process for all the products you want to add.
2. Adding Folders
-
Click the Add folder button at the bottom of the grid.
-
Name the folder (e.g., "Drinks" or "Food").
-
Drag and drop products into the folder to organize them.
-
Click on the folder to open it and customize its layout.
3. Highlighting Top Products or Folders
-
Click the Add top spot button in the grid.
-
Select a product or folder to feature in the top spot.
-
This will make the selected item easily accessible during transactions.
4. Adjusting the Grid
-
Use the "+" button in the top navigation bar to add tabs to the layout.
-
Ensure the layout is optimized for your workflow.
5. Saving and Previewing
-
Click Preview in the bottom toolbar to see how the layout will appear in the POS system.
-
If satisfied, click Save to apply the changes.
Tips for Organizing Your Layout
-
Group similar products together (e.g., all beverages in one folder).
-
Use folders to reduce clutter and make navigation easier.
-
Highlight frequently sold items using the "Add top spot" feature.
-
Save your layout as a template for future use by clicking Add as Template.
Troubleshooting
-
Products not appearing in the grid: Ensure you have dragged the product from the right panel into the grid.
-
Changes not saving: Double-check that you clicked the Save button after making edits.
-
Accidentally deleted a layout: Use the Import Template option to restore a previously saved template.
By following these steps, you can create a customized and efficient product layout in your POS system, tailored to your business needs.