
Product
-
Mobile Marketing Cloud
-
Webtracking
-
Resolution
Installing Webtracking on your website requires two technical steps, which are explained in this guide. You don't need any coding skills to follow and execute these steps.
Step 1: Adjust DNS records
To allow Webtracking to run on your website, you have to add an A Record to your DNS configuration. You do this online, in the DNS settings of your hosting provider.
What is an A record?
An A record is a type of DNS record that maps your subdomain (alias) to an IP address. The implementation of Webtracking relies on A records to serve the Webtracking code and to become a first-party user identification and data collection service.
In the Webtracking user portal, you will get instructions about which A record you have to add to your DNS settings:
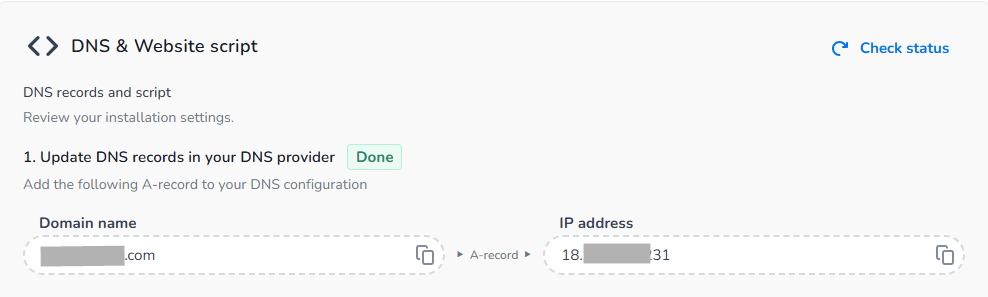
Webtracking user portal: See which A record you have to add
The A record has to be added in the portal of your own domain host (e.g. GoDaddy).
Log in at your domain host, go to the DNS settings where you add the A record.
You have to take care of the following:
-
Key is the subdomain that you receive.
-
Type is A record.
-
Value is the IP address that we provide.
-
TTL ('Time to Live') decides for how long the record can be cached. We advise at least 1 hour.
Do you want a different sub-domain?
We pre-selected a random subdomain from a list of 1000 most commonly used subdomains. If you require a different subdomain for your company, please contact us.
Are you using Cloudflare?
If you have Cloudflare enabled, you also need to adjust the Proxy Status of the endpoint in your Cloudflare dashboard so their caching is disabled. Adjusting your Cloudflare DNS settings to enable Webtracking can ben done in the 3 simple steps. Have a look at this help section.
Step 2: Install the Webtracking code
To activate Webtracking on your website, add the code in the < head > section of your website, before any Google Analytics or Tag Manager code. This snippet contains the JavaScript to activate Webtracking.
In the Webtracking user portal, you will see the instructions about which code you have to paste:
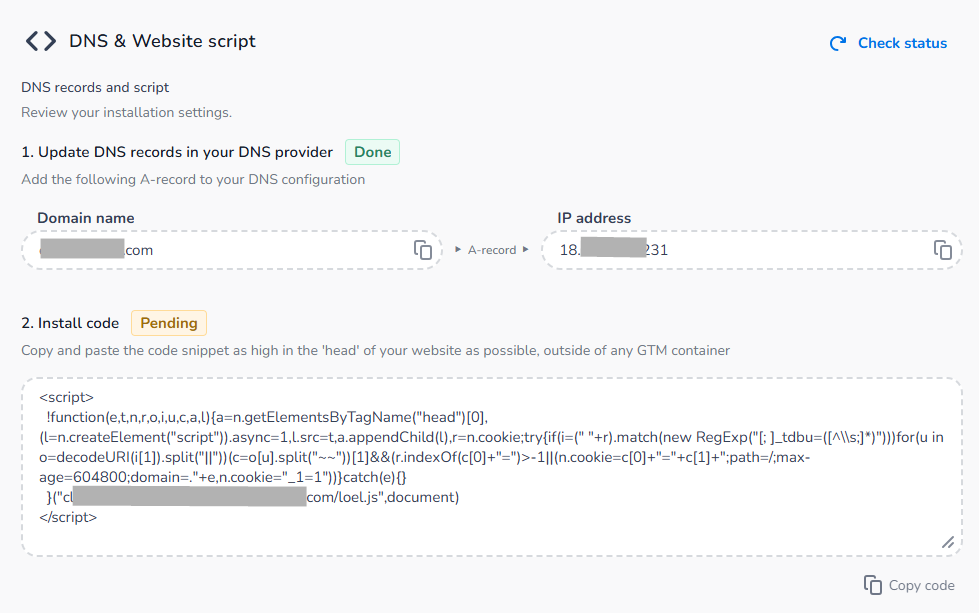
Copy and paste the code into the < head > of your website
The snippet needs to be added to every page you want to track on your website. We recommend you to add it to your website template to make sure the snippet is automatically added to every page of your website.