Werkinstructie – Scan-app / Work Instruction – Scan App
Voor scanmedewerkers bij de ingang van festivals en musea / For entrance scan staff at festivals and museums.
Deze pagina bevat de stapsgewijze werkinstructie. Schermafbeeldingen zijn nog niet geüpload via deze pagina; de volledige versie mét visuals staat in het bijbehorende Word-document. / This page contains the step-by-step instructions. Screenshots have not yet been uploaded to this page; the full version with visuals is available in the accompanying Word document.
1. Inloggen / Log in
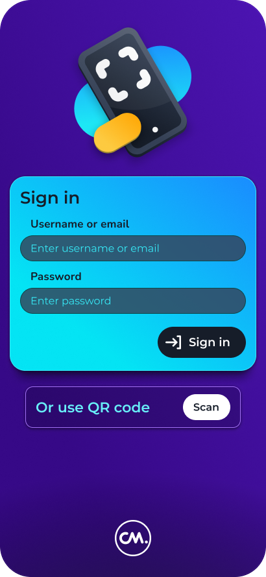
NL: Open de scan-app op je telefoon of op het scanapparaat. Je kunt op beide apparaten inloggen. Log in met de gebruikersnaam en het wachtwoord die je van je Customer Success Manager of de Support afdeling hebt gekregen. Heb je in plaats daarvan een QR-code gekregen? Tik dan op “Scan” naast “Of gebruik QR-code” en scan de code. Je bent dan automatisch ingelogd.
EN: Open the scan app on your phone or on the handheld scan device — you can log in on either. Sign in with the username and password provided by your Customer Success Manager or the Support department. If you received a QR code instead, tap “Scan” next to “Or use QR code” and scan it — you will be logged in automatically.
NL: Heb je de app nog niet op je telefoon? Download deze via de Play Store of App Store.
EN: Don’t have the app on your phone yet? Download it via the Play Store or App Store.
Download: Google Play Store · Apple App Store
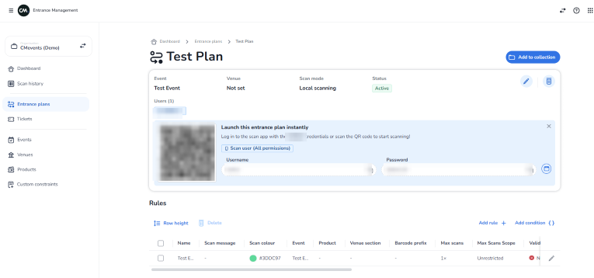
Beheerders vinden de QR-code per entreeplan in het CMS (Entrance plans) / Admins can find the QR code per entrance plan in the CMS (Entrance plans).
2. Startscherm herkennen / Recognize the home screen
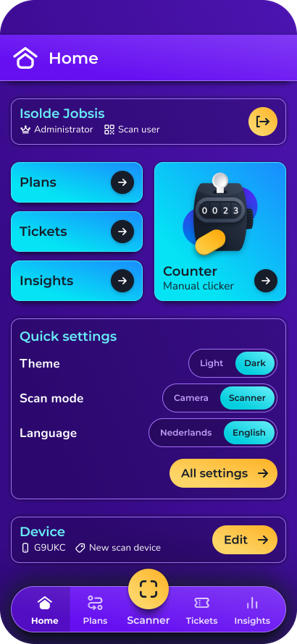
NL: Na het inloggen zie je het Startscherm: bovenaan je naam en rol, daaronder snelkoppelingen (Plans, Tickets, Insights, Counter) en onderin de navigatiebalk (Home, Plans, Scanner, Tickets, Insights).
EN: After logging in you'll see the Home screen: your name and role at the top, quick links below (Plans, Tickets, Insights, Counter), and the navigation bar at the bottom (Home, Plans, Scanner, Tickets, Insights).
3. Instellingen controleren / Check the settings
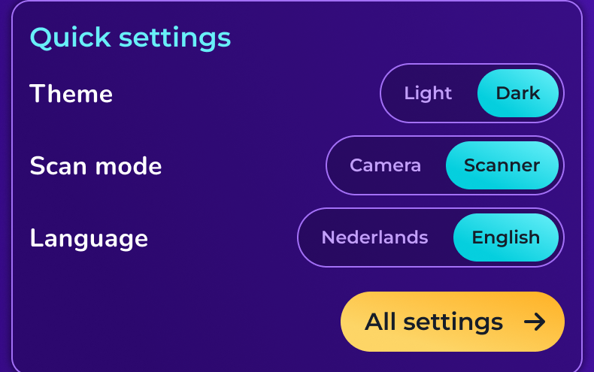
NL: Controleer bij “Quick settings” of de juiste Scanmodus is geselecteerd: Camera (telefoon-camera) of Scanner (los scanapparaat). Stel ook de gewenste taal in (Nederlands/Engels). Twijfel je? Vraag het je Customer Success Manager of neem contact op met Support.
EN: Under “Quick settings”, check that the correct Scan mode is selected: Camera (phone camera) or Scanner (handheld scan device). Also set the preferred language (Dutch/English). Not sure? Ask your Customer Success Manager or contact Support.
4. Entreeplan kiezen / Choose an entrance plan
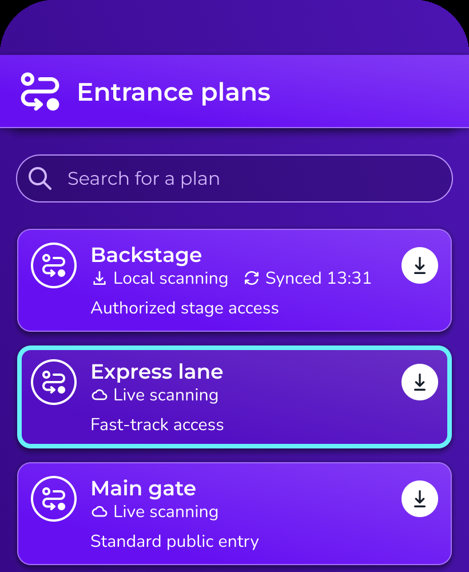
NL: Tik onderin op “Plans” om je entreeplan te kiezen (bijvoorbeeld Main gate, VIP entrance of Backstage). Het actieve plan is gemarkeerd met een gekleurde rand. Werkt de locatie met “Local scanning”? Download het plan dan vooraf door op het pijl-icoon te tikken, zodat je ook zonder internetverbinding kunt scannen. Bij “Live scanning” is juist een actieve internetverbinding nodig.
EN: Tap “Plans” at the bottom to choose your entrance plan (for example Main gate, VIP entrance or Backstage). The active plan is marked with a coloured border. If the location uses “Local scanning”, download the plan in advance by tapping the arrow icon so you can scan without an internet connection. “Live scanning” requires an active internet connection.
5. Naar de Scanner gaan / Go to the Scanner
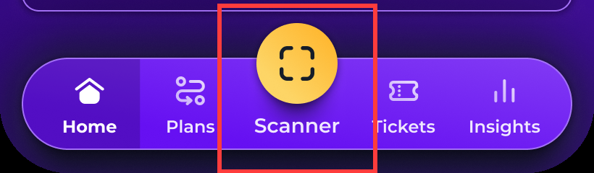
NL: Tik onderin op het grote scan-icoon (Scanner) om te beginnen met scannen.
EN: Tap the large scan icon (Scanner) at the bottom to start scanning.
6. Bezoekers inchecken (ticket scannen) / Check in visitors (scan a ticket)
NL: Zorg dat bovenin de Scanner “Check in” is geselecteerd. Richt de camera of scanner op de QR-code/barcode van het ticket. Wacht op het resultaat: groen = geldig ticket, toegang verlenen; rood = ongeldig ticket, geen toegang.
EN: Make sure “Check in” is selected at the top of the Scanner. Point the camera or scanner at the ticket's QR code/barcode. Wait for the result: green = valid ticket, allow entry; red = invalid ticket, deny entry.
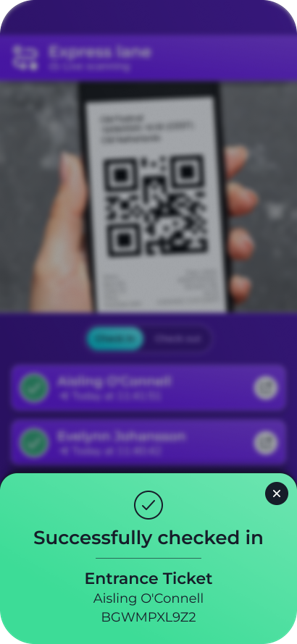
Geslaagd / Successful Groen bevestigingsscherm “Successfully checked in” met ticketgegevens / Green “Successfully checked in” confirmation with ticket details.
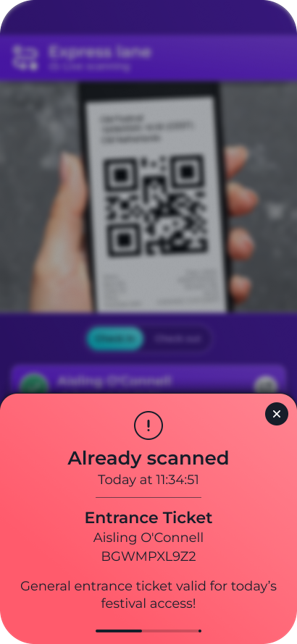
Mislukt / Failed Rood scherm met foutmelding, bijvoorbeeld “Already scanned” — met reden en ticketgegevens. Geen toegang verlenen / Red error screen, e.g. “Already scanned” — with reason and ticket details. Do not allow entry.
7. Bezoekers uitchecken / Check out visitors
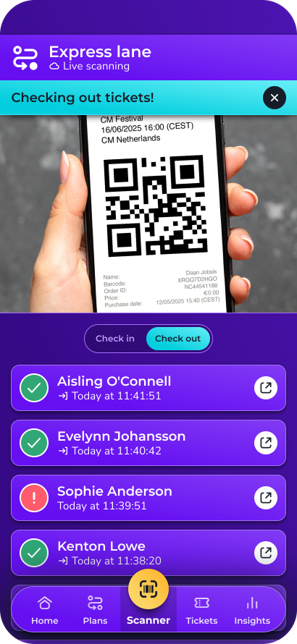
NL: Wil je bijhouden wie de locatie verlaat? Tik bovenin de Scanner op “Check out” (naast “Check in”). Scan het ticket van de vertrekkende bezoeker: bij een geslaagde uitcheck verschijnt de melding “Checking out tickets!” en krijgt de bezoeker een groen vinkje met tijdstip in de lijst. Zet de knop na afloop weer terug op “Check in”.
EN: Want to track who leaves the venue? At the top of the Scanner, tap “Check out” (next to “Check in”). Scan the departing visitor's ticket: a successful check-out shows “Checking out tickets!” and the visitor gets a green checkmark with a timestamp in the list. Switch the toggle back to “Check in” afterwards.
8. Tickets opzoeken en controleren / Look up and check tickets
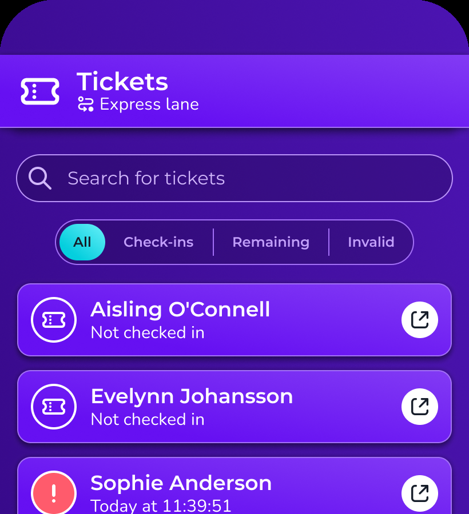
NL: Via de tab “Tickets” onderin zie je een overzicht van alle tickets. Gebruik de zoekbalk om een naam of ticketnummer op te zoeken, of filter op “Check-ins”, “Remaining” (nog niet gescand) of “Invalid” (ongeldig). Zo kun je snel controleren of iemand al is ingecheckt.
EN: Via the “Tickets” tab at the bottom you'll see an overview of all tickets. Use the search bar to look up a name or ticket number, or filter by “Check-ins”, “Remaining” (not yet scanned), or “Invalid”. This lets you quickly check whether someone has already checked in.
9. Insights bekijken (optioneel) / View insights (optional)
Optioneel / Optional
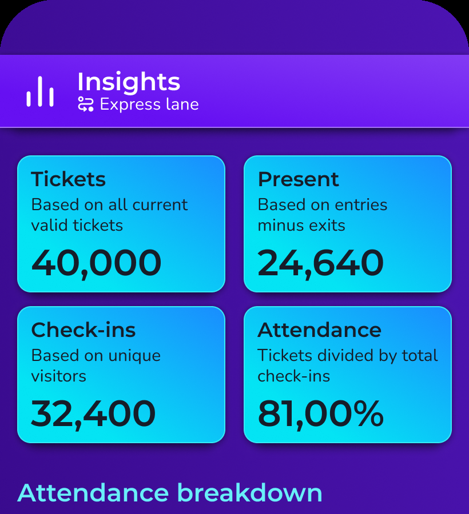
NL: Wil je de voortgang van het evenement volgen? Tik onderin op “Insights” voor een overzicht van het aantal tickets, aanwezige bezoekers, check-ins en de attendance-rate, uitgesplitst per ticketsoort. Handig voor de organisatie, niet noodzakelijk voor het scanproces zelf.
EN: Want to follow the event's progress? Tap “Insights” at the bottom for an overview of ticket counts, visitors present, check-ins, and the attendance rate, broken down per ticket type. Useful for the organizers, not required for the scanning process itself.
10. Problemen oplossen / Troubleshooting
-
NL: Ticket wordt niet herkend: houd het ticket rustig en op de juiste afstand, zorg voor voldoende licht en probeer opnieuw.
EN: Ticket not recognized: hold the ticket steady at the right distance, make sure there's enough light, and try again. -
NL: Geen internetverbinding: gebruik de handmatige teller (stap 11) en waarschuw je Customer Success Manager of de Support afdeling.
EN: No internet connection: use the manual counter (step 11) and notify your Customer Success Manager or the Support department. -
NL: Scanner/app reageert niet: sluit de app en open deze opnieuw, of herstart het apparaat.
EN: Scanner/app not responding: close and reopen the app, or restart the device.
11. Handmatig tellen (optioneel) / Manual counting (optional)
Optioneel / Optional
NL: Gebruik de tegel “Counter” op het Startscherm als je bezoekers handmatig wilt in- of uitchecken en het totale aantal bezoekers wilt bijhouden — bijvoorbeeld als back-up wanneer scannen even niet lukt. Deze stap is niet verplicht voor het normale scanproces.
EN: Use the “Counter” tile on the Home screen if you want to manually check visitors in or out and keep track of the total number of visitors — for example as a back-up when scanning is temporarily not possible. This step is not required for the normal scanning process.