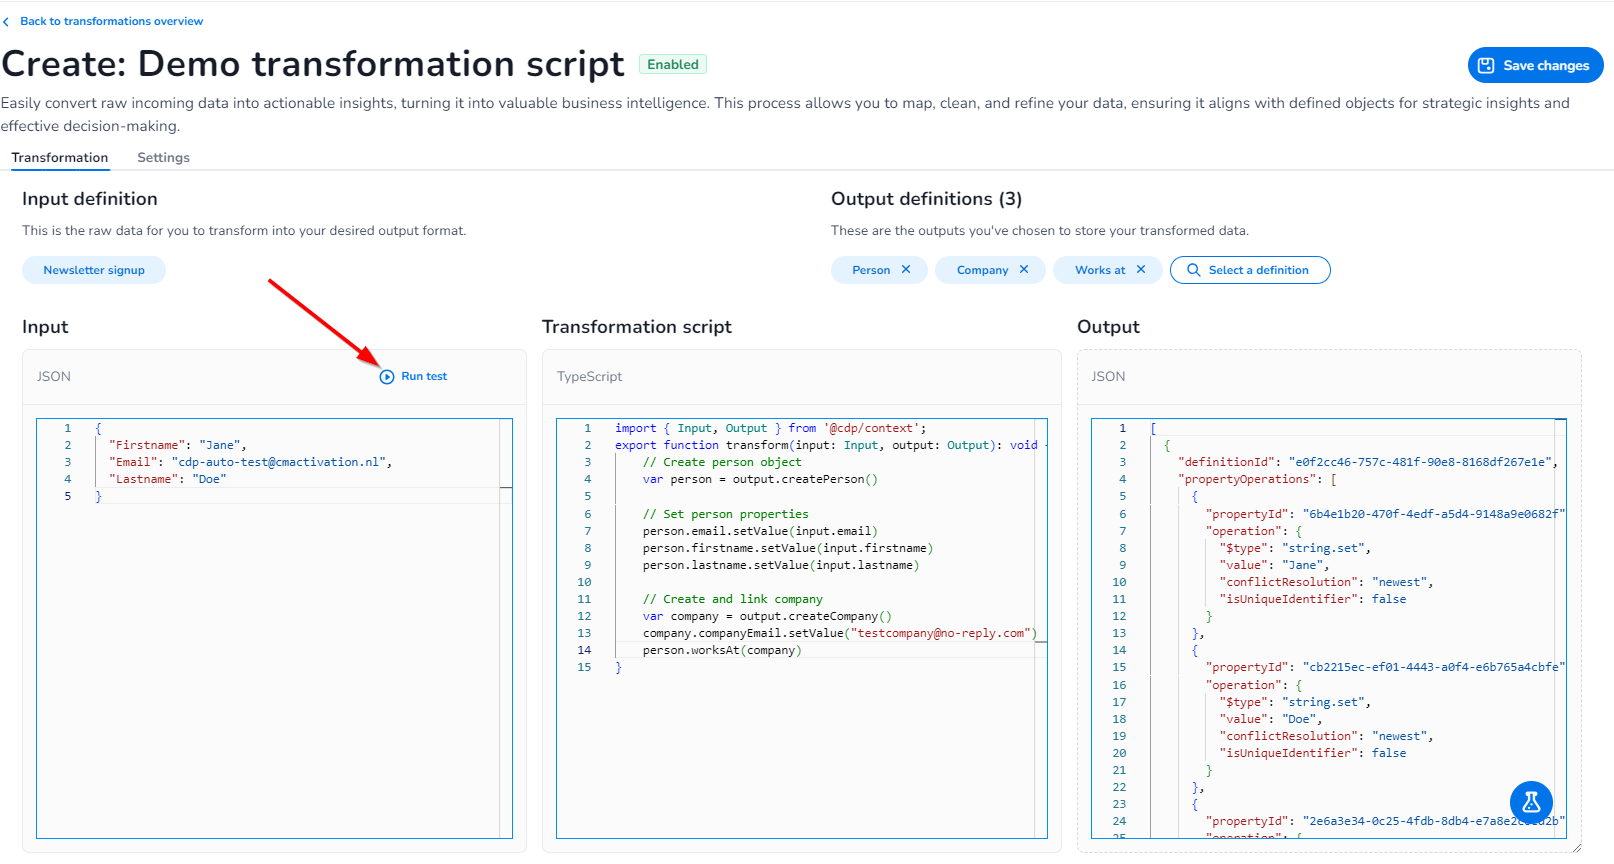
How to create a transformation
Transformations convert incoming event data (definitions of type event) into structured objects (definitions of type object) that are easier to use and understand. During this process, raw data is reshaped and organized to create clear, meaningful representations. These transformed objects help you see the bigger picture of customer interactions, enabling more informed decisions and effective engagement strategies.
Plan the Transformation
Before jumping into the transformations, clearly define the purpose of the transformation. Identify the event definition you're working with and the object(s) you aim to create. Consider any data mapping, filtering, or calculations needed to achieve the desired outcome. Then decide if you need a basic transformation or an advanced one, basic transformations allow you to 'map' your input definition data to 1 output object definition, so for example a 'Newsletter subscribed' event to object 'Person'. If you want to create relations, multiple outputs or do custom scripting you need advanced transformations.
Advanced transformation
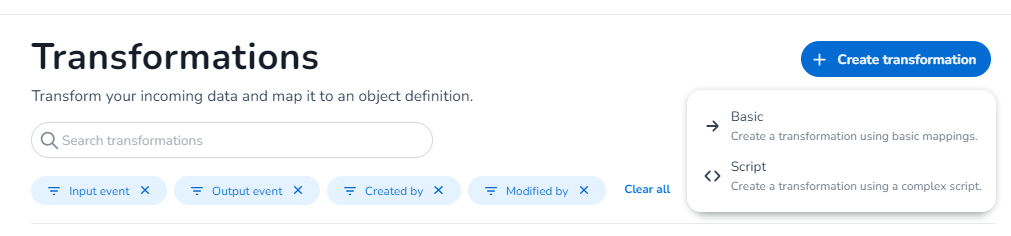
Navigate to the transformation section within the CXP interface. Create new transformation and select the script type. Use this type if you want to do more to your data then just 'mapping' it from an event definition to an object definition, you can use Typescript with IntelliSense to do your magic. IntelliSense shows you intelligent code completion, hover information, and signature help so that you can write code more quickly and correctly. You can use it for setting if statements, setting relations, create multiple outputs etc.
Define the input and output definition(s)
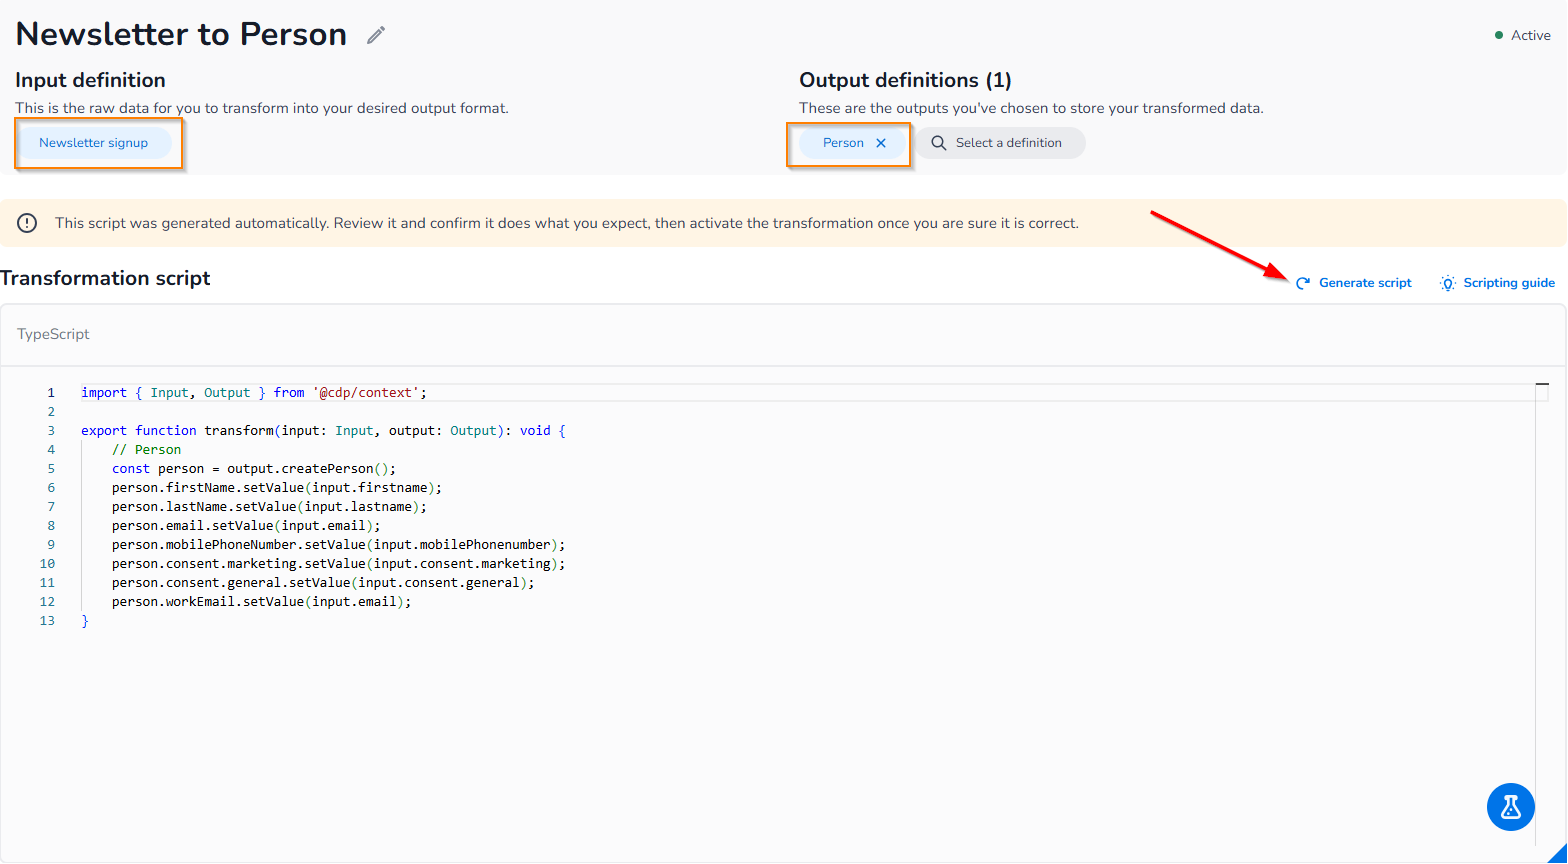
Begin your transformation by specifying the event definition that serves as the input for your transformation (only 1). Then select the output definition(s) where you want to output your event data to or which relation you want to to create. This is always a definition of type object and/or a relation, this cannot be an event definition.
To make things easier we have a script generator, which auto generates the script based on your input and outputs definitions. Do not it does not hold any logic like if/else etc.
Script the Transformation Logic
If the basic screen does not meet your needs, you can use the scripting logic to use the desired outcome. The presence of IntelliSense can assist you in writing scripts efficiently by providing auto-completion, syntax highlighting, and helpful hints. The scrity generator can help you get started initially with the script, advanced logic like if/else is not yet supported here.
TypeScript knowledge required!
Why Typescript & IntelliSense
The primary advantage of using TypeScript is its ability to introduce static typing to JavaScript. Static typing ensures that a variable's type remains consistent throughout the script, which helps prevent many common errors with robust type checking. This feature not only significantly reduces the likelihood of bugs but also enhances code clarity. With TypeScript, it's easier to understand what the code is intended to accomplish. Additionally, in a team setting, TypeScript provides clearer insights into the intentions of other writers, facilitating better collaboration and code maintenance.
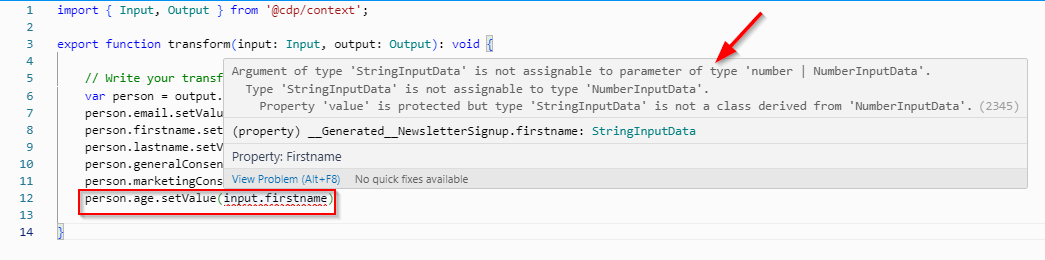
When your script encounters a compilation issue, it is highlighted with a red underline. By hovering over the underlined area, you can view the problem details, which offer insights into the potential issue. For instance, in the case below, there is a type mismatch between the variables "age" and "firstName." These details assist you in quickly identifying and addressing the root cause of the error.
Input
-
The
Inputcontains all data coming from your data source, which is captured in the event definition. -
This can come from various sources such as:
-
CSV files
-
API calls
-
Web forms
-
CRM systems
-
etc.
-
Output
-
The
Outputdefines how data should be stored in the CXP -
Creates objects according to the predefined data model/definition
-
Ensures proper relationships between different objects
Practical Example
Let's break down this example step by step
import { Input, Output } from '@cdp/context';
export function transform(input: Input, output: Output): void {
    // Create person object
    var person = output.createPerson()

    // Set person properties
    person.email.setValue(input.email)
    person.firstname.setValue(input.firstname)
    person.lastname.setValue(input.lastname)

    // Create and link company
    var company = output.createCompany()
    company.companyEmail.setValue("[email protected]")
    person.worksAt(company)
}
typescript/code
What's Happening Here?
Object Creation
var person = output.createPerson() creates a new person object
var company = output.createCompany() creates a new company object
These objects will follows the definition model as build in the CXP.
Data Mapping
person.email.setValue(input.email) takes the email from the input and sets it in the person object
The same happens for firstname and lastname, you can do the same for any other object definition you might have like company.
You can choose from the 3 actions below, of which the setValue is the most commonly used.
-
setValue:
-
Purpose: This is the most frequently used option where you assign a new value to a property, replacing any existing value.
-
Use Case: When updating a person's email, such as
person.email.setValue(input.email), this action sets the person's email to the value provided in the input, regardless of whether there was an existing email.
-
-
clearValue:
-
Purpose: This option is used when you want to remove or reset a specific property value within an object.
-
Use Case: For instance, if a person's middle name is stored in a property and you no longer wish to keep that information, you can use
person.middleName.clearValue()to erase it.
-
-
setValueIfNotExists:
-
Purpose: This option sets a value only if the property does not already have a value. If there is already a value present, it leaves the existing value unchanged.
-
Use Case: This is particularly useful for properties that should only be set once, such as a user's initial signup date. If you're mapping a signup date and want to ensure it reflects the first time a user signed up, you might use
person.signupDate.setValueIfNotExists(input.signupDate). This helps prevent overwriting the original signup date.clearValue:-
Purpose: This option is used when you want to remove or reset a specific property value within an object.
-
Use Case: For instance, if a person's middle name is stored in a property and you no longer wish to keep that information, you can use
person.middleName.clearValue()to erase it.
-
-
Objects
If you are working with properties of type object, simply follow the path of the object using dots to come to the right property to transform.
    person.employeeInformation.employeeSince.setValue(input.employeeInformation.employeeSince)
    person.employeeInformation.employeeUntil.setValue(input.employeeInformation.employeeUntil)
    person.employeeInformation.fixedContract.setValue(input.employeeInformation.fixedContract)
Arrays
Arrays in your system are used to manage collections of items, such as a list of favorite songs or past purchases. Handling arrays requires a bit more code logic, particularly if you want to modify the elements in specific ways. Here's how you can work with arrays based on the provided methods:
-
Appending Items:
-
Purpose: When you want to add new items to an existing array without removing the current elements, you use the
appendItemmethod. -
Example: Suppose you have a "favoriteSongs" array associated with a person object, and you want to add a list of songs provided by the input:
var person = output.createPerson(); for (const song of input.songs) { person.favoriteSongs.appendItem().setValue(song); } -
Explanation: Each song from the
input.songsarray is appended to thefavoriteSongsarray, preserving any existing songs already in the list.
-
-
Overwriting the List:
-
Purpose: If you require a clean slate and want to replace the entire list with new items, you must first clear the existing array and then append the new items.
-
Example:
var person = output.createPerson(); person.favoriteSongs.clear(); // Clears all current songs for (const song of input.songs) { person.favoriteSongs.appendItem().setValue(song); } -
Explanation: The
clear()method is used to remove all current items in thefavoriteSongsarray before adding the new songs. This ensures only the new list of songs is stored.
-
Relations
person.worksAt(company) creates a relationship between the person and company using the worksAt relation definition. You can also set the properties of the worksAt relation the same as you would do for the examples above.
Review and Test
Use the script editor to review your transformation script for accuracy. IntelliSense will help by flagging potential errors and suggesting improvements.
Test the transformation with sample data to ensure it behaves as expected. Click on the test icon in the below right corner of the script editor and enter your JSON input and click run test. Validate the output by comparing against your goals.