The team section within the Agent Inbox can be used to configure and manage the users within your Agent Inbox. Within the Team settings pages you can (among other things) create, edit and delete users from Agent Inbox.
Seats
In order for a user to be created within the Agent Inbox, a seat needs to be assigned. Seats are licences that grant access to Agent Inbox. Seats are included in the Mobile Service Cloud starter packs (1 for Basic, 5 for Advanced/Pro), or may be acquired as an additional user licence.
Would you like to increase the amount of seats within your account? Contact your dedicated success manager.
User types
When acquiring a licence, keep in mind that there are two types of users that grant access to functionality within the Agent Inbox.
Regular: Regular users are provided all access required to fully function as an Agent within Agent Inbox. They can have conversations automatically routed to them, communicate with customers without restriction, and have access to all productivity tools.
Collaboration: Collaboration users are provided all access required to collaborate with Regular users within Agent Inbox. They cannot have conversations automatically routed to them, are limited in their direct communication with customers, but can communicate and collaborate with agents to support customer cases.
Overview
When navigating to the team settings page, you land on a searchable list of all configured users within the Agent Inbox. Use the search bar to quickly find any agent by name — no more scrolling through entire departments.
This overview is available to all users with access to settings.
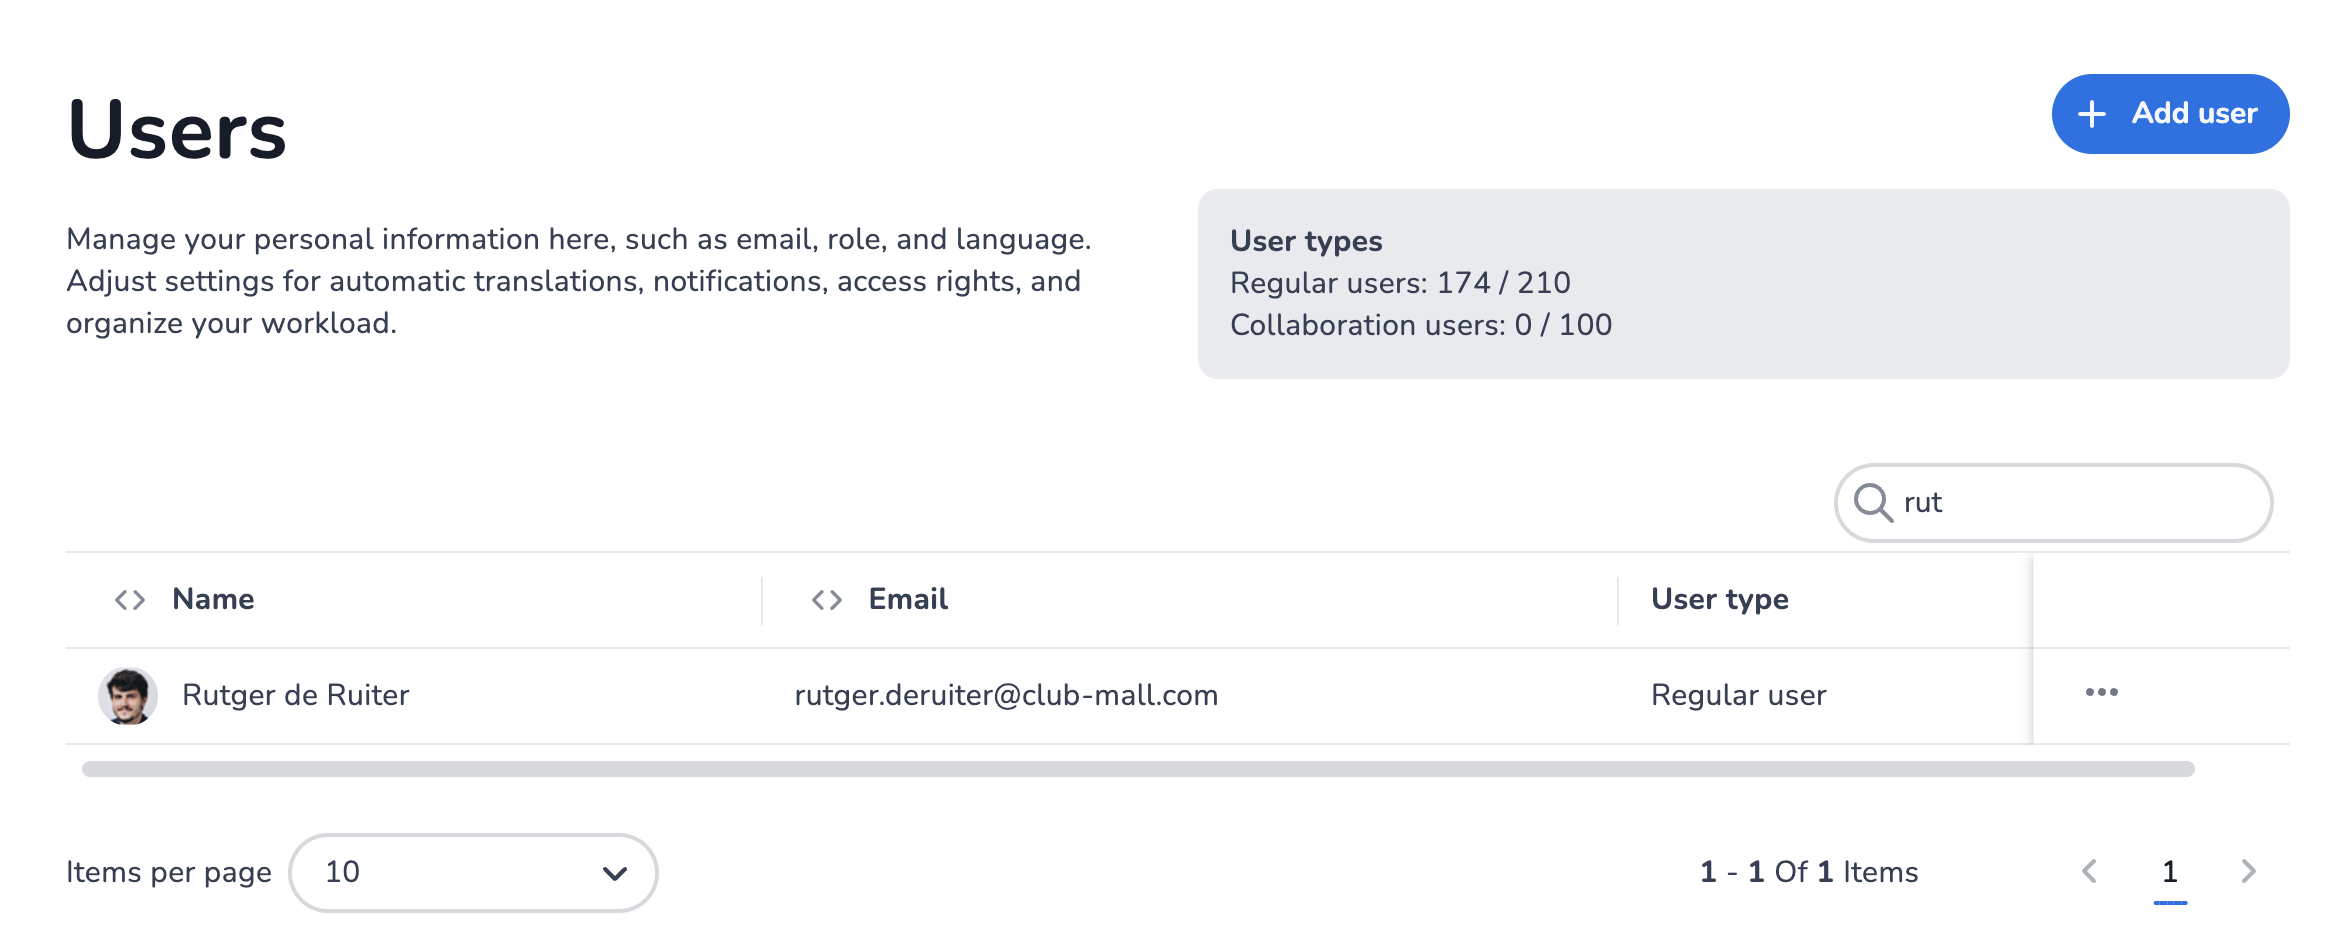
The new Users overview — searchable list. Available to all users with access to settings.
Agent assignment view
Clicking on any user in the overview opens their personal assignment view. This shows a complete overview of everything that agent has access to, including their assigned webstores — all in one place.
From this view, users with access to settings can make changes directly without having to navigate through separate configuration pages. Changes apply consistently across the entire application.
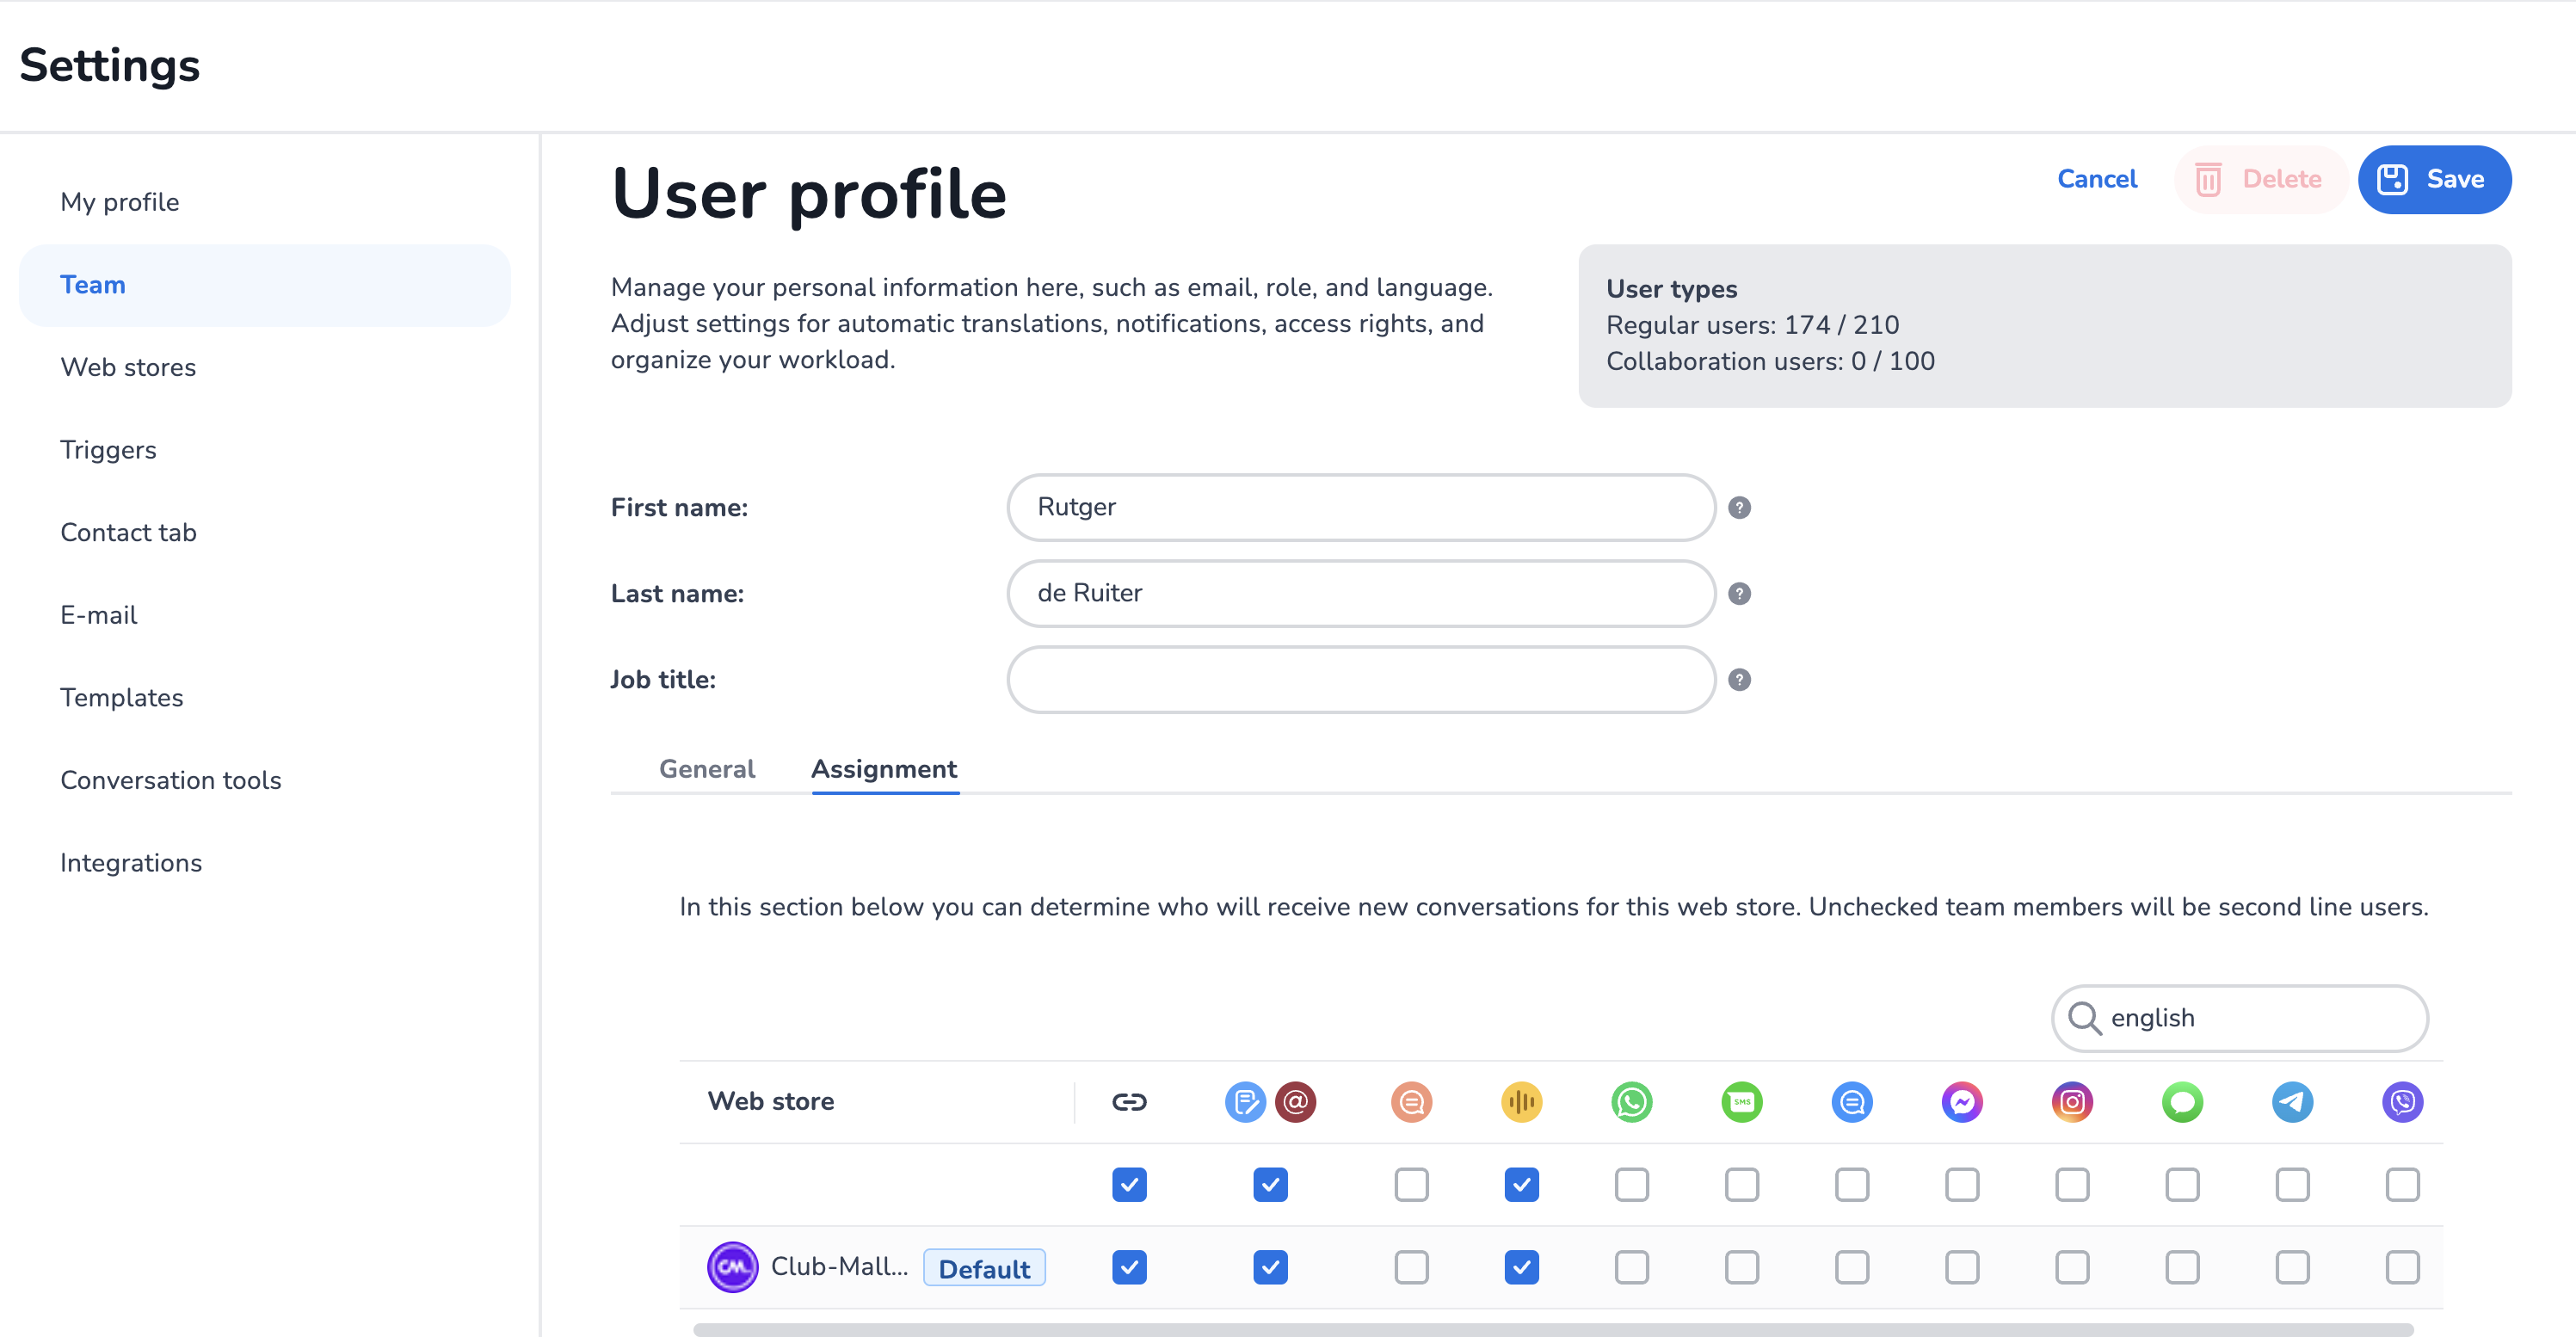
User profile view — Admin sees the same view a user gets for themselves.
Prerequisite
The personal assignment view must be enabled on your account before the new team settings overview becomes available. This feature is available in all tiers of Service Cloud. Contact your success manager to enable it, or wait for the platform-wide activation.
Adding users
In order to configure users, click on one of the users within the overview, or click the Add user button to create a new user. Guides are available for the user creation process:
E-learning video
For further guidance, watch our e-learning video on Teams Settings Mobile Service Cloud: