
Step 1 - Define Your Data Requirements
Before setting up a webhook, it's crucial to understand what data you want to sent to the CXP.
Step 2 - Does a matching definition already exist?
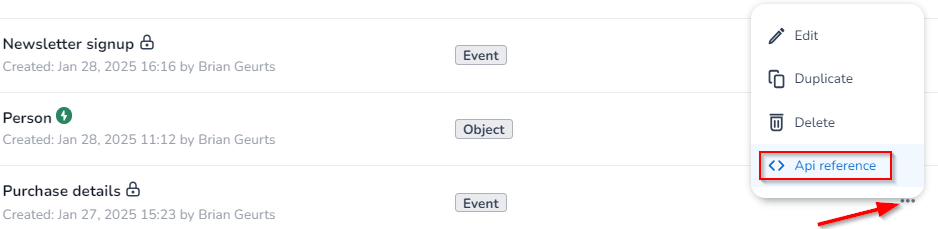
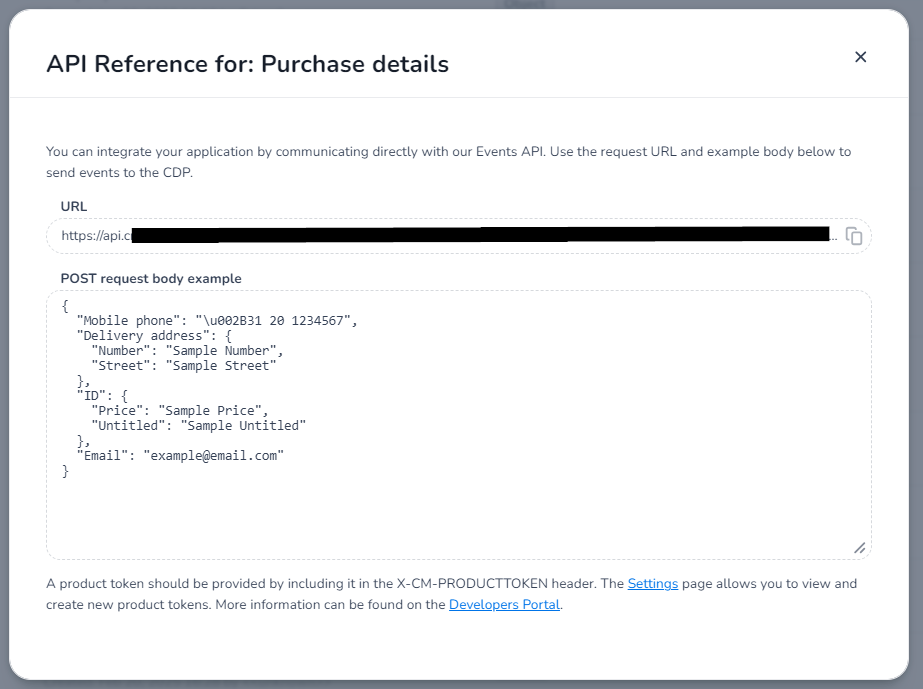
There might already be an event definition that fits your needs, so try to avoid creating unnecessary definitions to keep things simple. Check the definitions overview to see if you can use one of the existing event definitions for posting data. If needed, ensure there’s a transformation from your event definition to an object definition. Use the API reference in the three-dot menu of your chosen event definition to find the details for posting.
Step 3 - Create a new definition
If in step 2 you came to the conclusion you need a new definition, go to the definition page to create a new event definition. More details on how to do that can be found on the new definition page.
API reference
Once you’ve created you new event definition, you can get the API reference to start sending data to.
For development purposes, the product token to authenticate you can get from the settings and you can use the copy as cURL functionality to fetch the cURL details.
For testing purposes and/or adding a specific event you can use the API reference logic to enter your own JSON body values and sent an event directly.
Step 4 - Setup a transformation
Setup a transformation from your incoming event definition to an output definition, an incoming purchase event to a person for example to link your event data to a person.
Step 5 - Post data to the CXP & check activity logs
Post data to the URL mentioned in the API reference and check the activity logs to see if all is working well, if not, you can troubleshoot from there.