This article explains how to link a triggered campaign to a CXP automation trigger, using Halo Studio to build the underlying workflow.
Part 1: Build the workflow in Halo Studio
-
Go to Halo Studio.
-
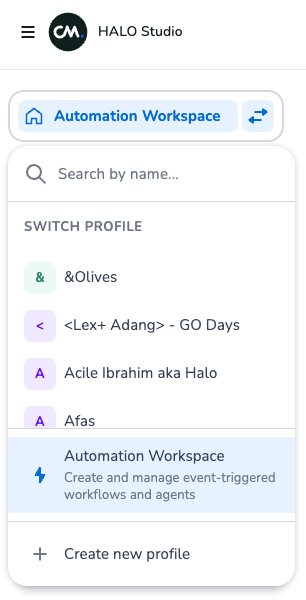
Find the Automation workspace.
-
Create a new workflow, and add a name and description.
When adding a step to the workflow, you have the following options:
-
Reuse — run an existing workflow
-
Get information — get CDP data
-
Process data — call an API, run code
-
Control flow — if/else branch, wait
-
Take action — send campaign, push CDP event
-
Finish — return result
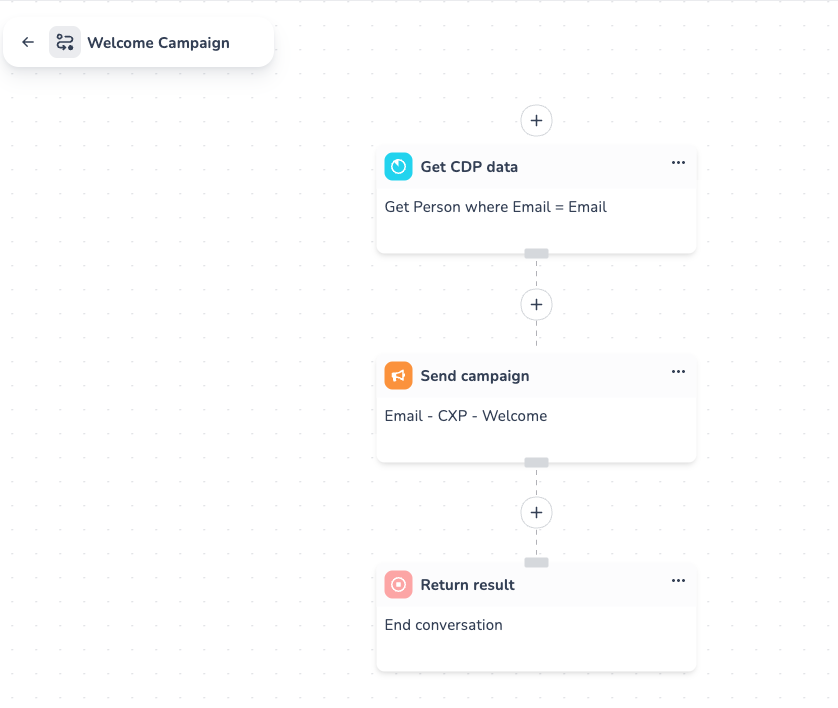
Example: building a welcome flow
-
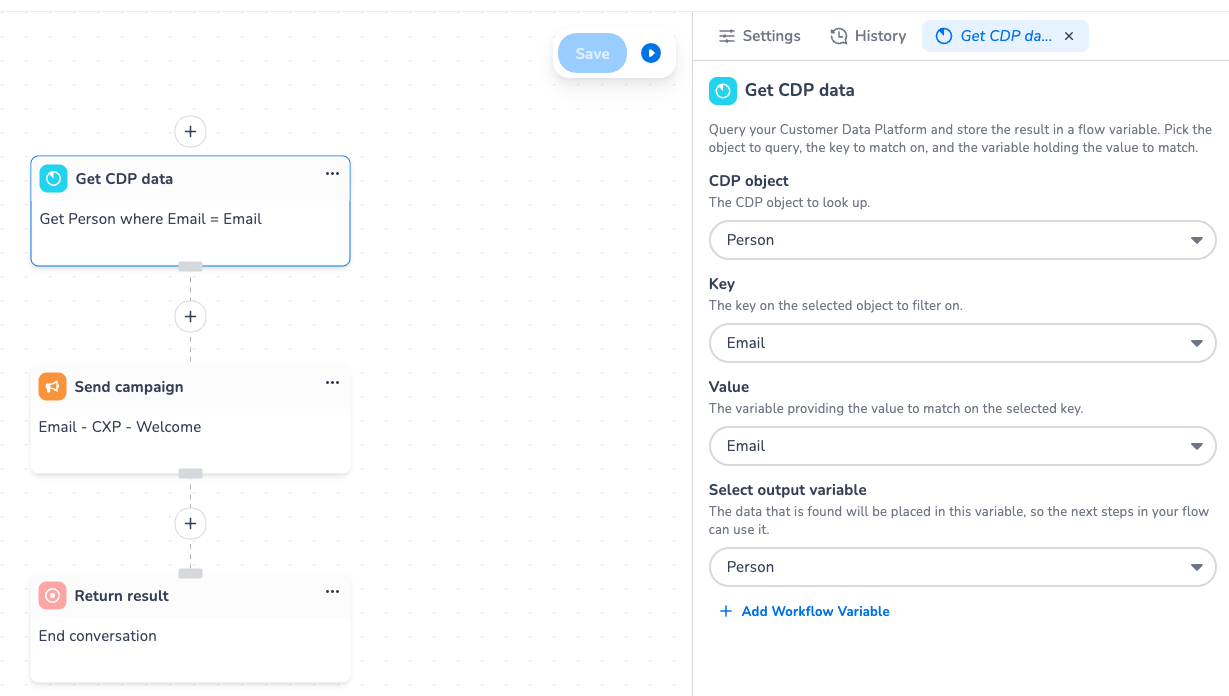
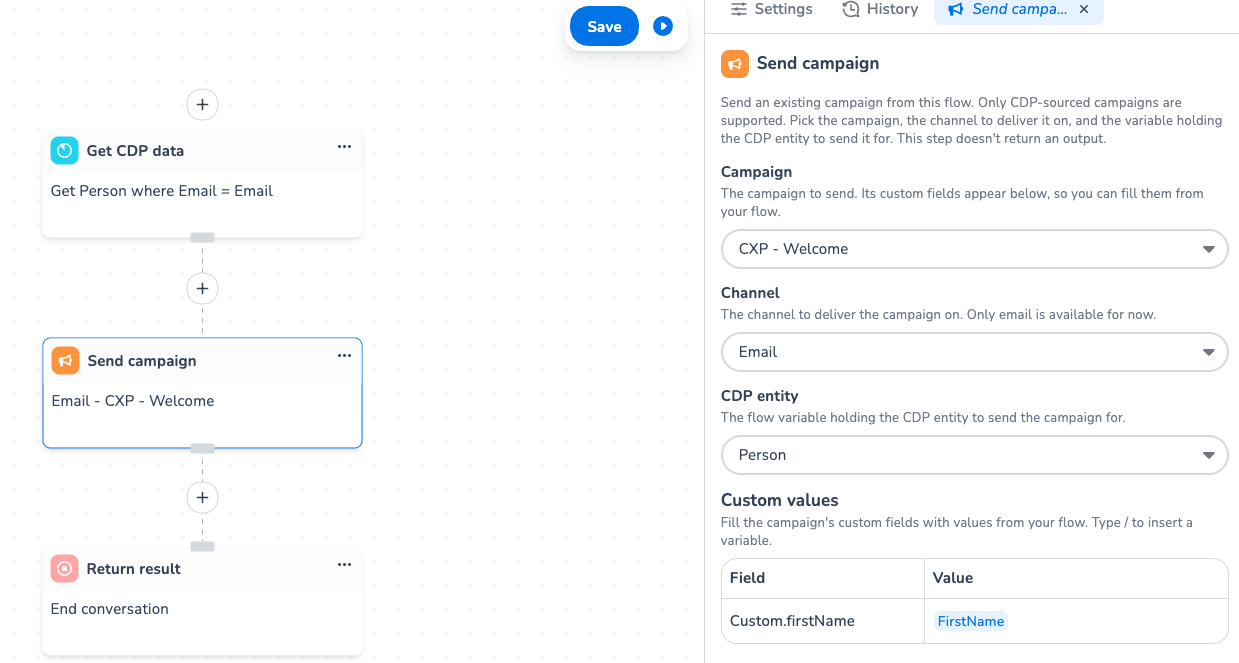
Get CDP data — object is "person", key is "email", and the value to watch the key is "email".
-
Send campaign — select the campaign, channel, and object (CDP entity), then add custom values as merge tags used in the triggered campaign.
-
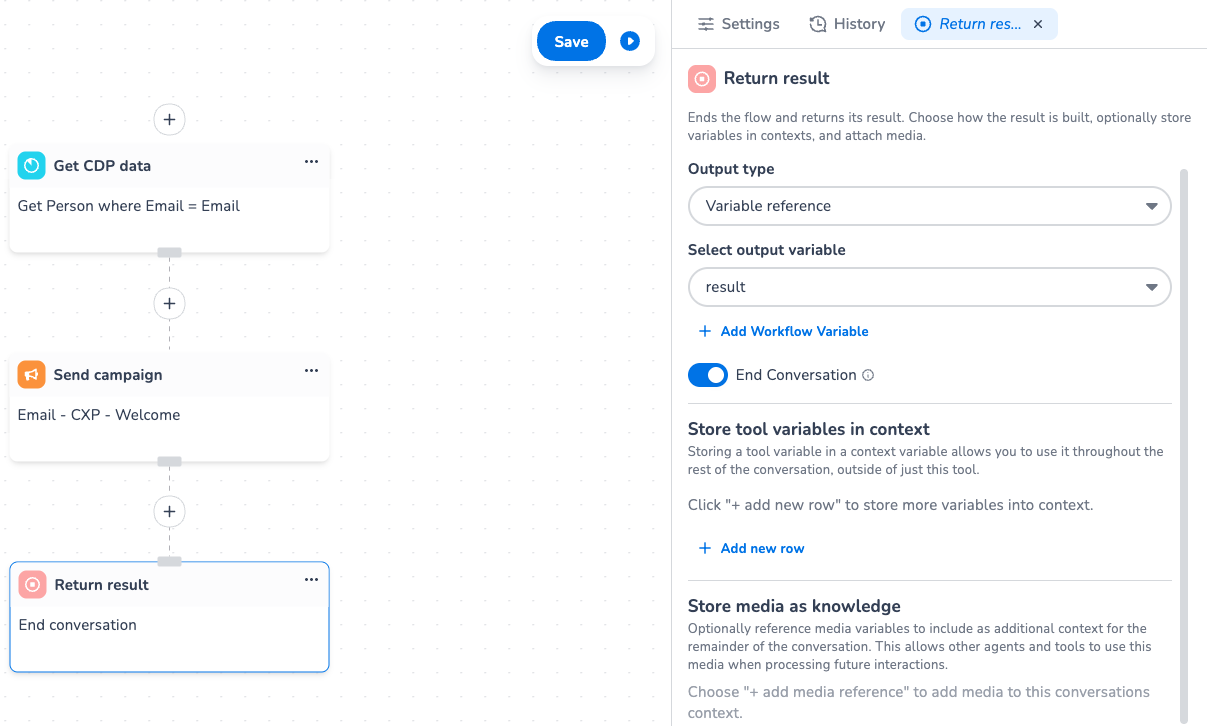
Return result — end the flow.
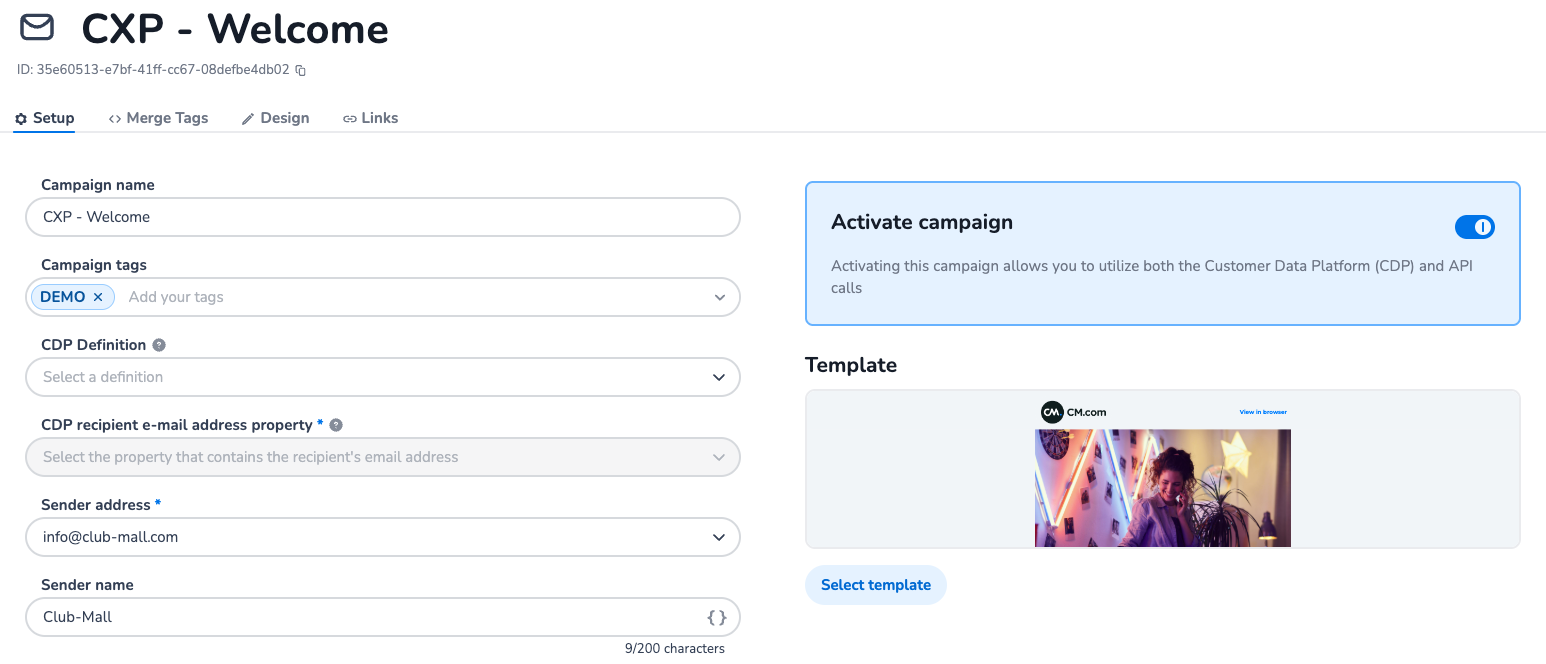
Before publishing the workflow, activate the campaign in Email Campaigns.
Now publish and save the workflow in Halo Studio — it needs to be published before it will show up as an option in CXP.
Part 2: Set up the trigger in CXP
-
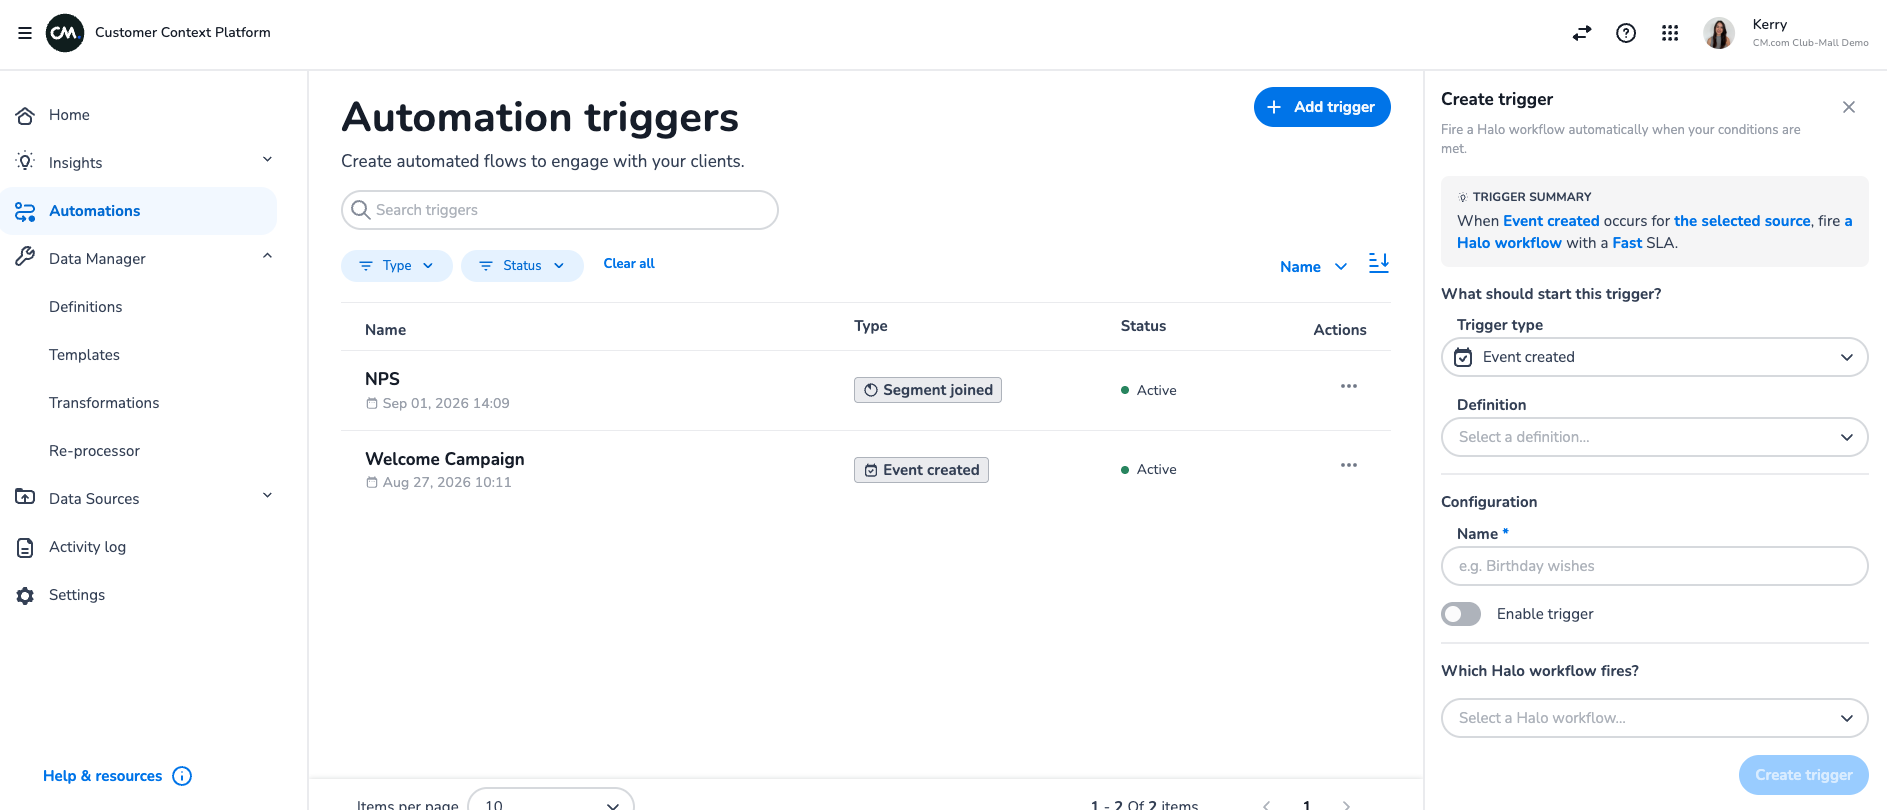
Go to Automations in CXP and select + Add trigger.
-
Configure the trigger. In this example, the trigger is for a welcome email: the trigger type is "Event created", the definition is on the submitted form page, and it's connected to the published Halo workflow from Part 1.
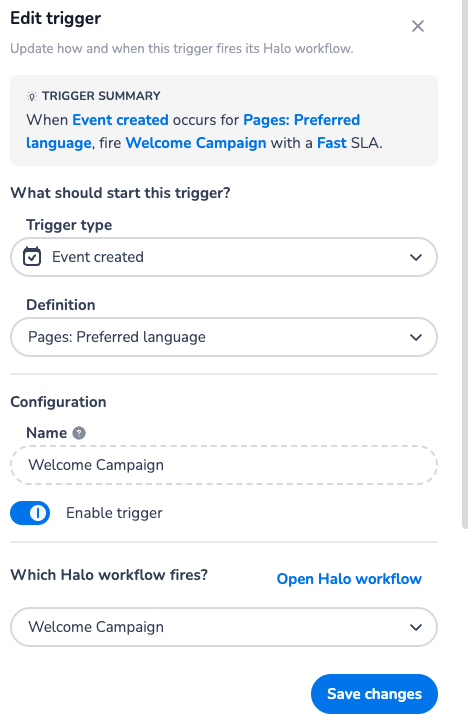
The trigger is now ready to be set live.