When running automated workflows on the Customer Data Platform(CDP), you may not want to send the same email to a recipient more than once within a certain period — or ever again. Common use cases include:
-
Review request after purchase: A customer who buys multiple times in a short period should only receive one review request, not one after every order.
-
Abandoned cart reminders: A shopper who abandons their cart multiple times in a week should not receive a reminder for each individual session.
-
Any recurring trigger workflow: Any time a workflow is triggered by a repeating event, but the email should only go out once (or once per defined window).
The solution is to add a Filter step before the Send Email step that checks whether the recipient has already been sent that specific campaign. If they have, they are routed to the False path and the email is skipped.
How it works
The filter checks the EmailCampaigns: Email Sent event log for the recipient. If the selected campaign was sent to them at least once, the filter evaluates as True (yes, they received it). You then route the False output (meaning: they have not received it yet) to your Send Email step — and leave the True output unconnected or ended.
This means:
-
False path → recipient has not received the email → send it
-
True path → recipient already received the email → do nothing
Step-by-step setup
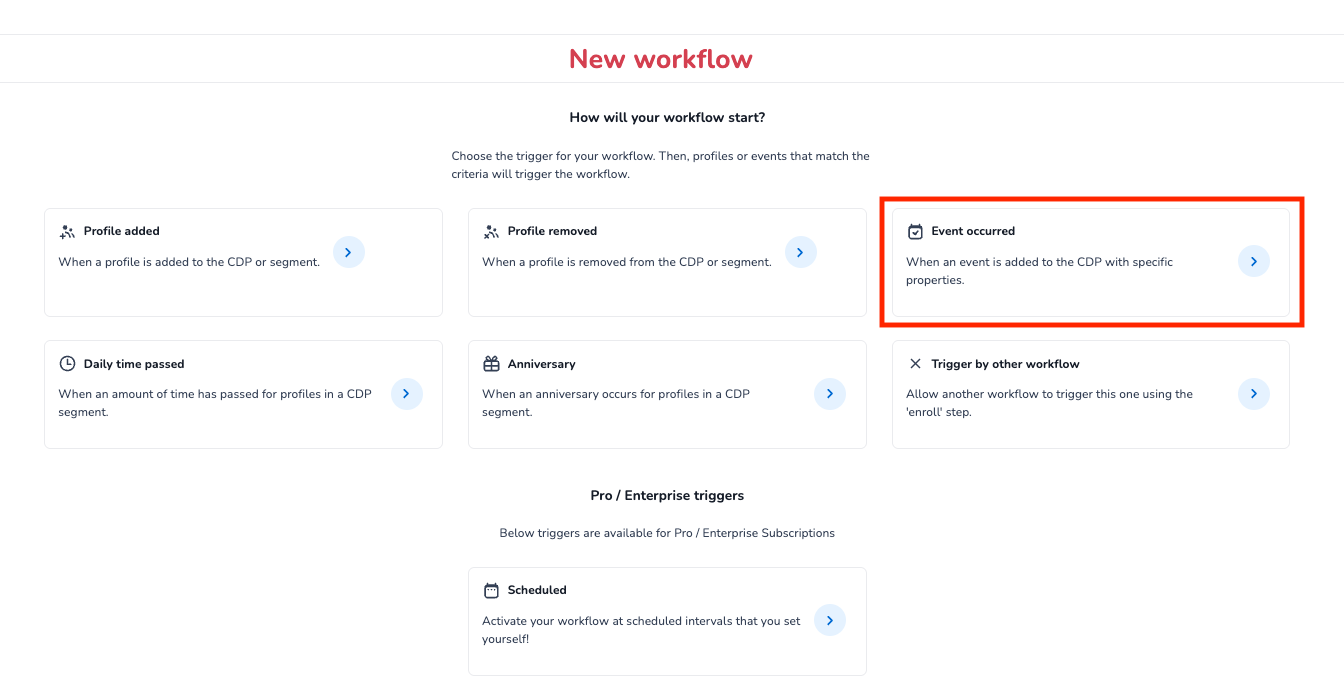
Step 1: Create your workflow trigger
-
Open Workflows and create a new workflow (or open an existing one).
-
Add an Event occurred trigger.
-
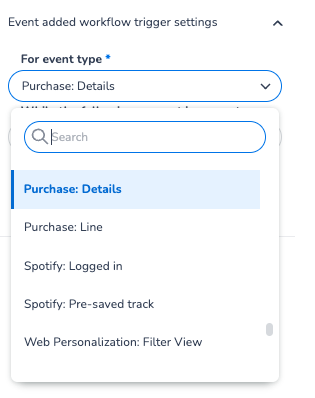
Select the relevant event type, for example Purchase: Details for post-purchase review requests, or Cart: Abandoned for abandoned cart flows.
Step 2: Add a Filter step
-
Drag a Filter step onto the canvas and connect it to your trigger.
-
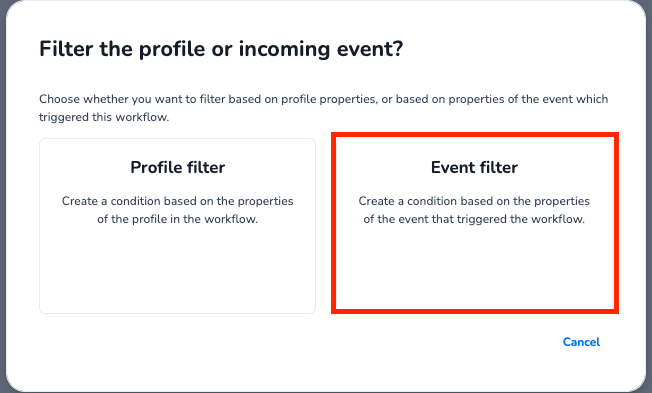
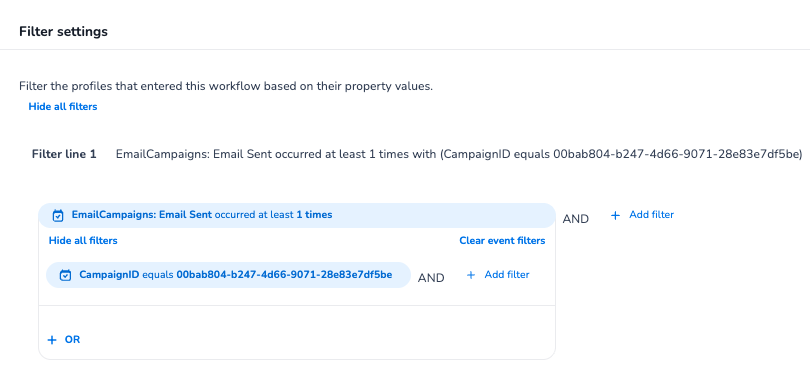
Select “Event filter” option and then click the Filter step to open Filter settings.
-
Under Filter line 1, add the following condition:
EmailCampaigns: Email Sent occurred at least 1 times with CampaignID equals
[your campaign ID]Select the email campaign ID you want to suppress. You can find the Campaign ID by opening the Email campaign, then directly below the campaign name you can find the ID. Click the copy icon next to it to copy it to your clipboard.
-
Leave any additional OR/AND conditions empty unless you have more complex logic.
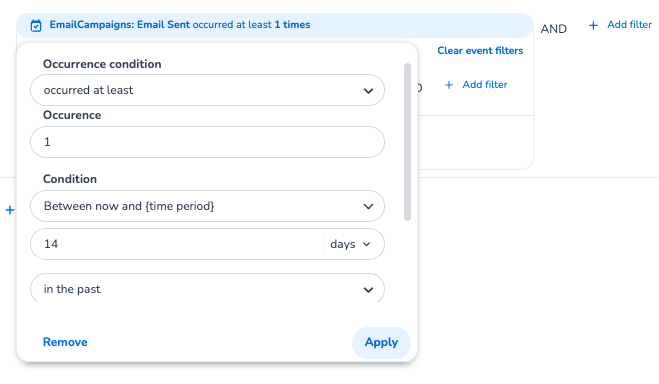
Tip: By default, the filter checks the recipient's full email history. If you only want to suppress within a rolling time window, click the EmailCampaigns: Email Sent condition to expand it and configure the following:
-
Occurred at least → set Occurrence to
1 -
Condition → select
Between now and {time period} -
Set the number of days (e.g.
14) and selectin the past
This limits the suppression to the past 14 days — so a recipient who was emailed more than 14 days ago will receive the email again. Adjust the number of days to match your desired suppression window.
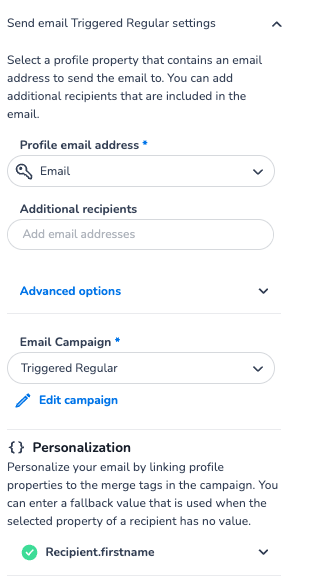
Step 3: Add the Send Email step
-
Drag a Send email step onto the canvas.
-
In the step settings:
-
Profile email address — select
Email(or the relevant key identifier field). -
Email Campaign — select the campaign you want to send.
-
-
Do not connect this step yet — see Step 4.
Step 4: Connect False → Send Email
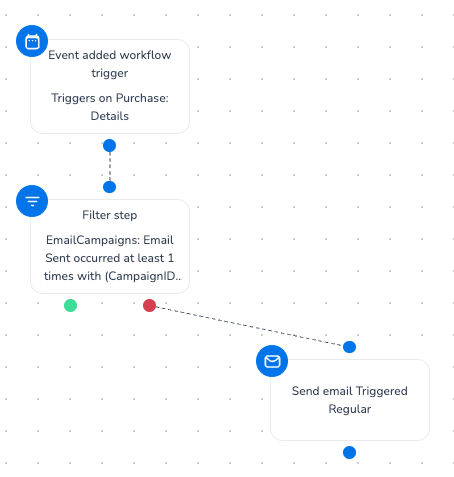
This is the key step that makes the suppression work:
-
Look at the Filter step outputs. There are two connection points:
-
🟢 True (green) — recipient has already received the email
-
🔴 False (red) — recipient has not yet received the email
-
-
Drag the False (red) output and connect it to the Send Email step.
-
Leave the True (green) output unconnected (or connect it to an End step if you prefer a clean canvas).
The logic is now: only send the email if the recipient has not received this campaign before.
What the finished workflow looks like
This is an example of what the finished workflow looks like:
