In this article, you will learn how to create and send a triggered campaign using the Email Campaigns tool within the Mobile Marketing Cloud. This app allows you to build triggered email campaigns with ease, helping you engage your audience effectively.
1. Before you start
Here are a few things to know before sending an email campaign:
-
A workflow in the Customer Data Platform is required: A triggered email campaign always needs to be triggered by a workflow in the Customer Data Platform. First create the email campaign, then add it to the workflow.
-
Verify your domain: Be sure to verify your own domain before creating a triggered email campaign.
2. Create an email
To create your first newsletter, follow these steps:
-
Open the Email Campaigns app.
-
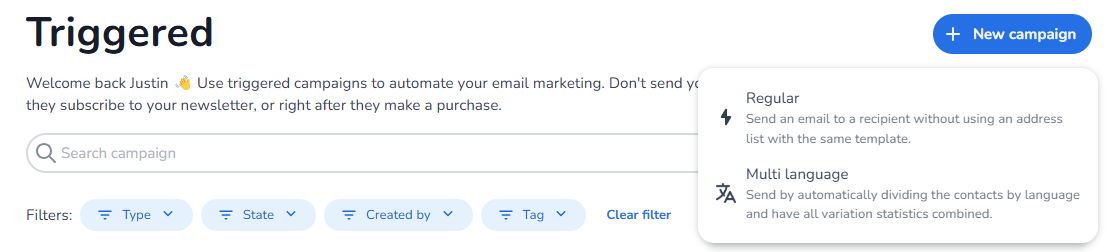
Navigate to the Triggered section, and click on New campaign
-
Choose the type Regular
Find more information here about Multi-language campaigns.
This will take you to the email builder, where you can configure your settings and design your content.
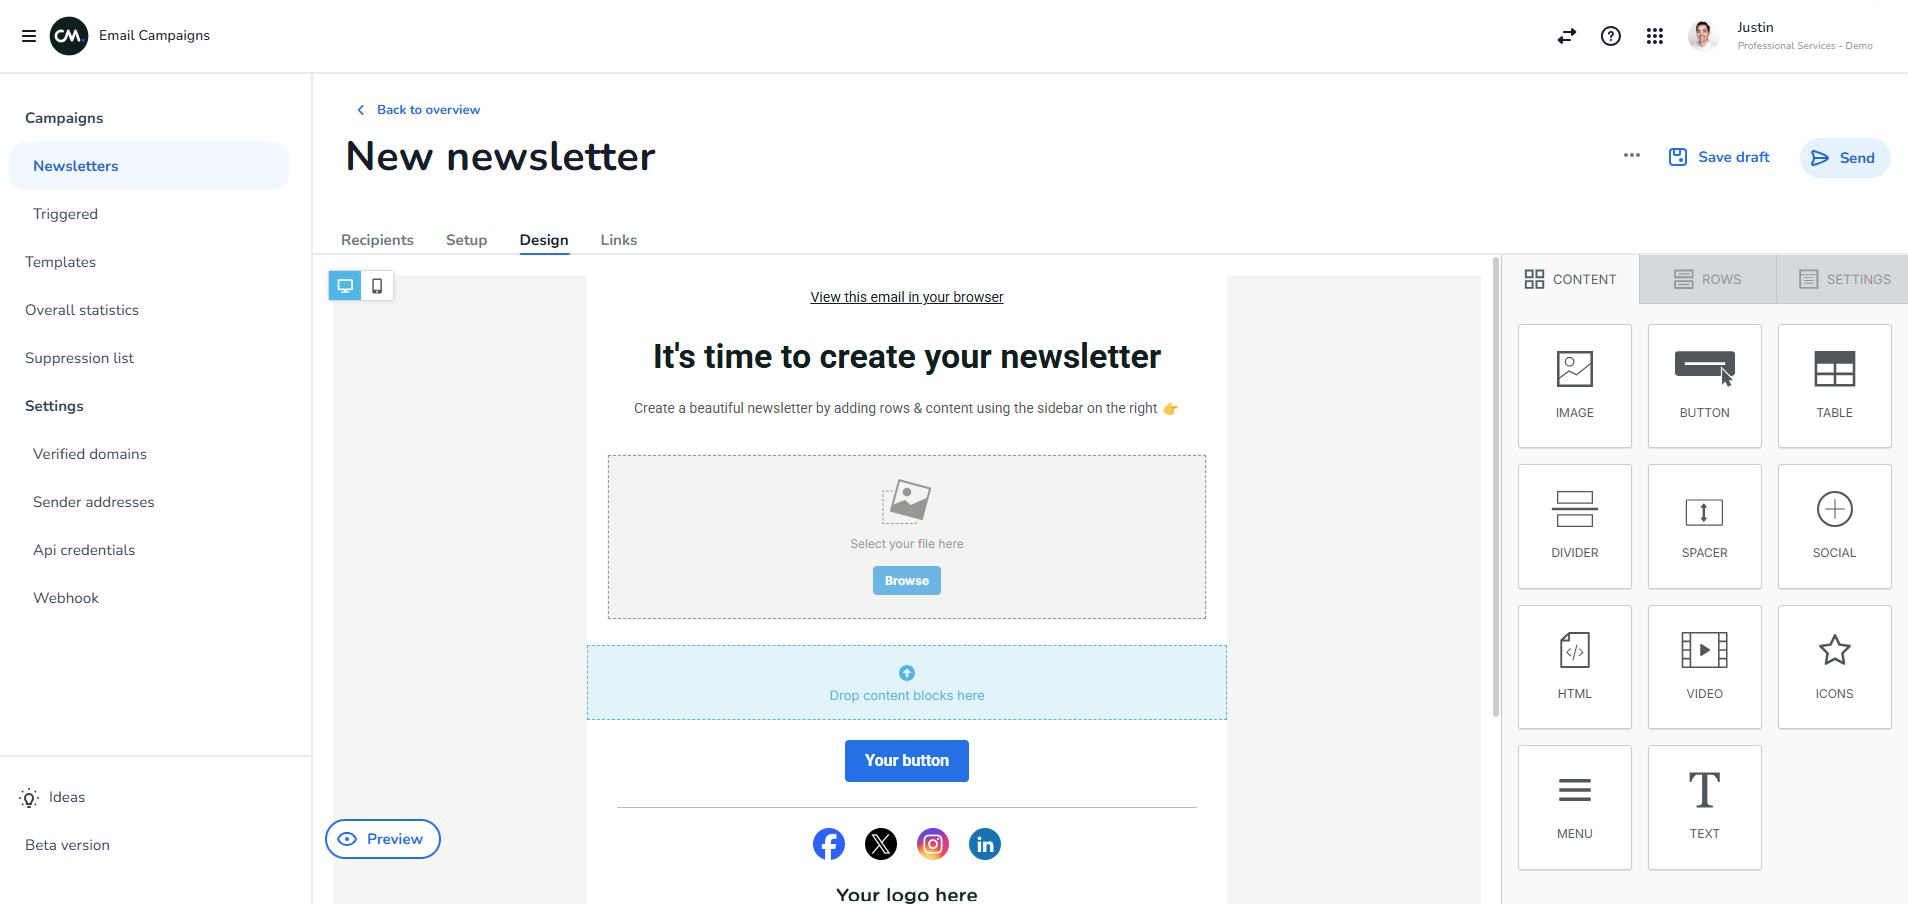
3. Setup & Design
The campaign builder consists of three tabs, each serving a specific purpose to help you create and configure your email campaign:
-
Setup:
Configure the general settings of your campaign, such as the subject line, sender address, sender name, template selection, and more. Unlike newsletter campaigns, merge tags need to be added in this step. Once added, they can be selected and used in the design tab. The merge tag fields you add can be connected to an event, session, or profile property in the workflow. -
Design:
Use the drag-and-drop editor to easily create and customize the content and layout of your email campaign. More information about the building blocks of a campaign can be found here. -
Link:
If onboarded, select a custom domain to shorten links, enable UTM tracking, and activate link tagging for performance monitoring.
4. Control and send your email
Once you’re satisfied with the settings and design of your email, follow these final steps to send your first newsletter:
-
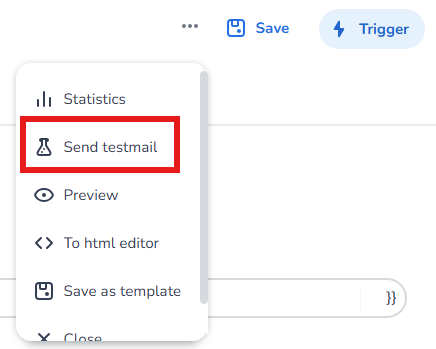
Save your design by clicking Save draft.
-
Click the three dots and select Send test mail to test your email. Note that when sending a test mail, the merge tags will be populated with random data from the recipients list you’ve selected.
-
If you’re satisfied with the test email, activate and save the email. To do this, toggle the Activate campaign option on the setup page and click the Save button.
-
Click Trigger to create a new workflow, or navigate to an existing workflow and select the email from the dropdown menu.
Congratulations! You’ve successfully created your first triggered email campaign! 🎉