This guide explains what you, as the customer, need to provide to enable the integration between your Microsoft Dynamics 365 Business Central CRM and our platform.
1. Prerequisites
Before proceeding, ensure you have the following:
-
Admin access to your Microsoft Dynamics 365 Business Central account.
-
Admin access to the Microsoft Entra ID (Azure Active Directory) portal.
2. Create an Azure App Registration
To enable the integration, you need to create an Azure App Registration. Follow these steps:
Steps to Create an Azure App Registration
-
Open your web browser and go to the Microsoft Entra ID Center.
-
Sign in with your credentials (the same credentials you use for accessing Business Central).
-
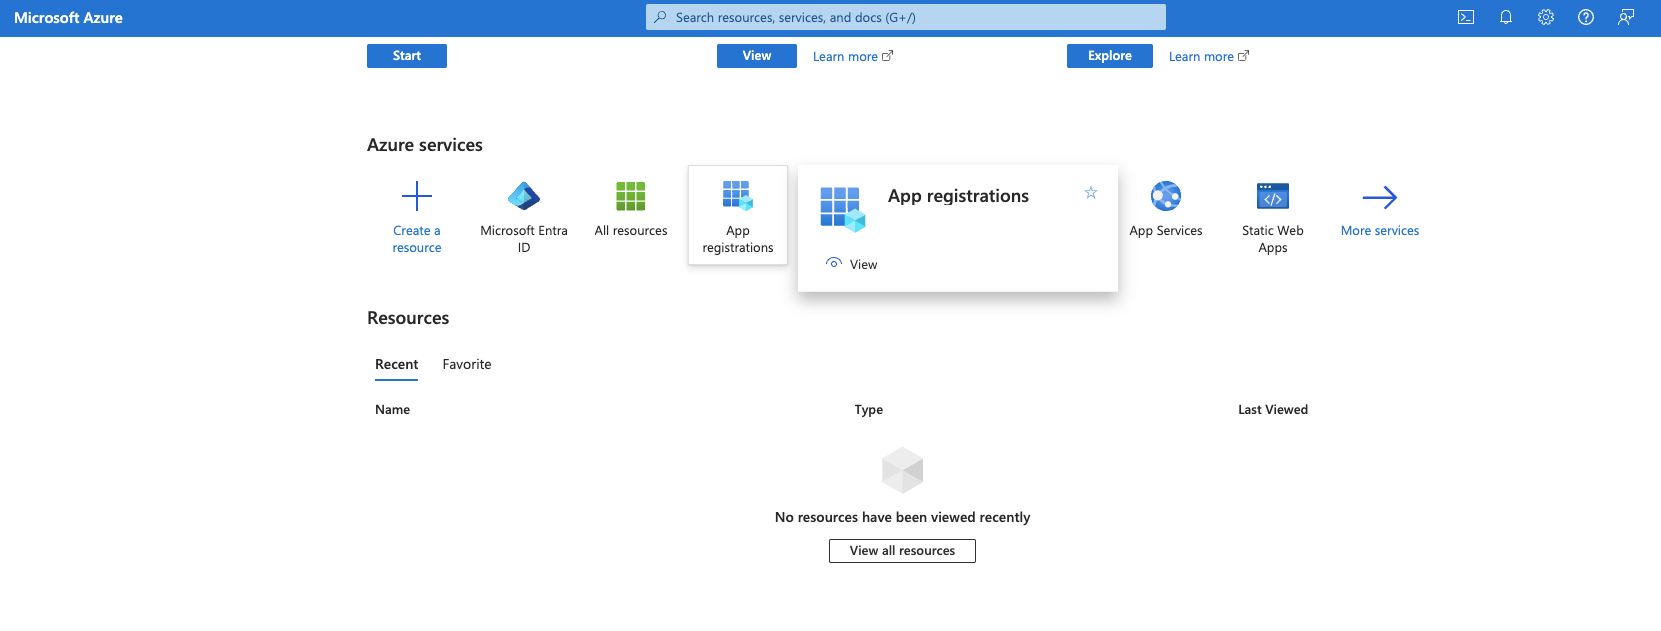
In the left-hand menu, select App registrations and click on New registration.
-
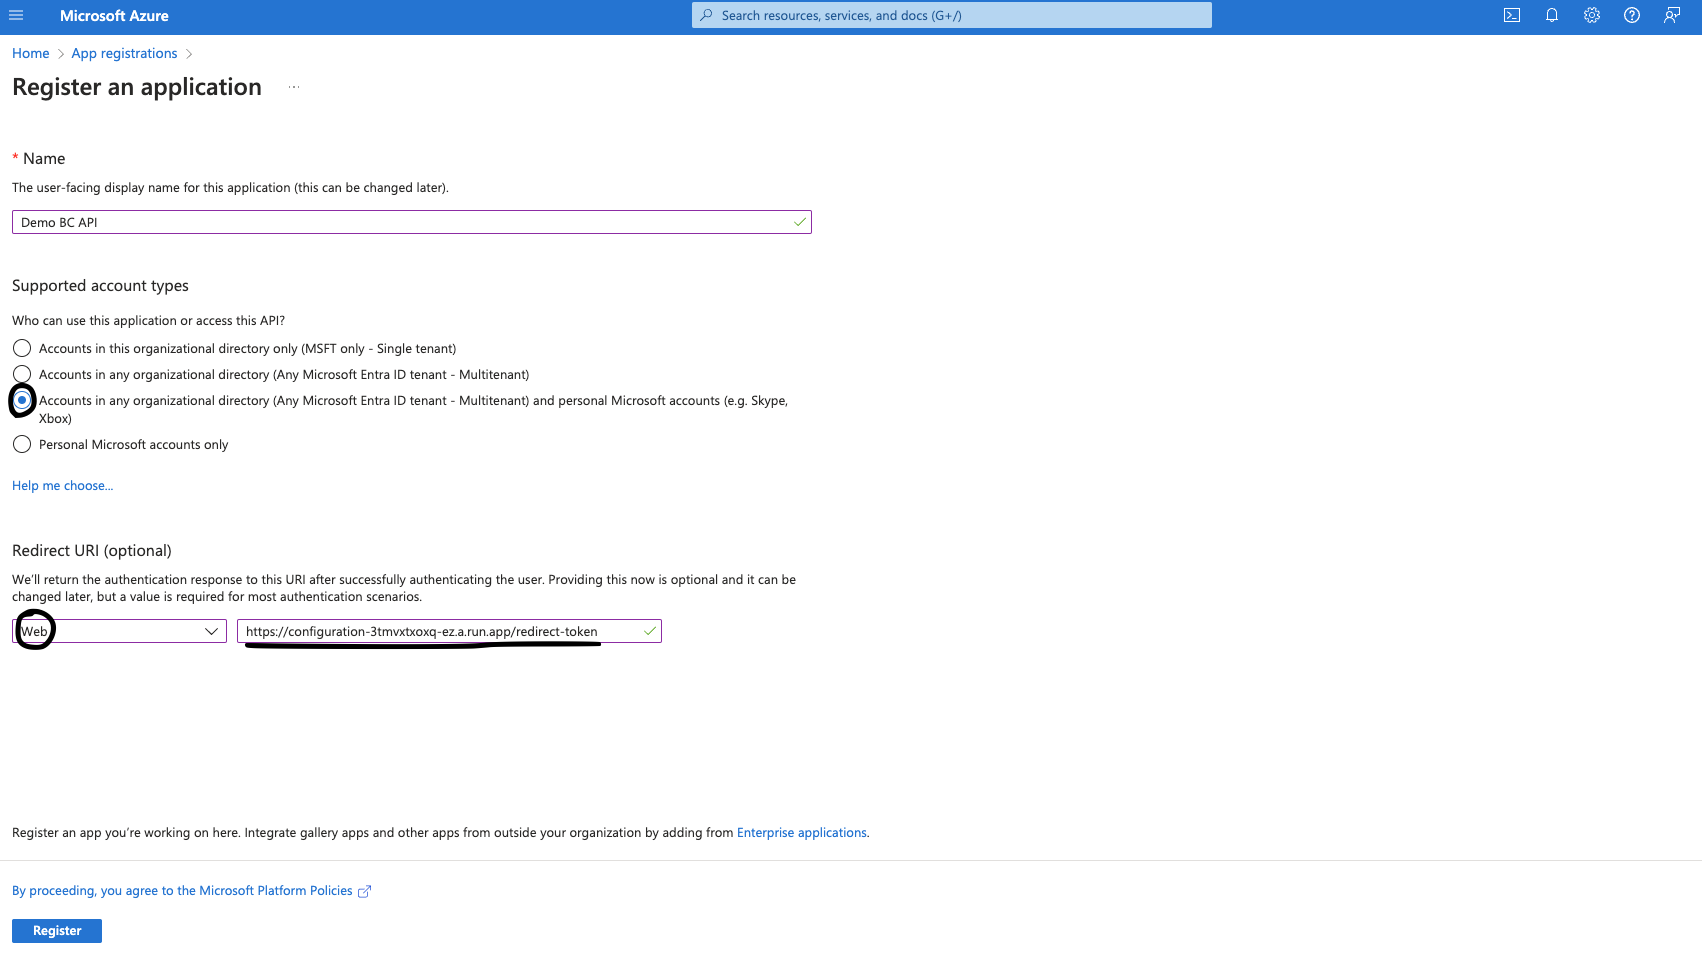
Provide a name for your application (e.g.,
Demo BC API). -
Under Supported account types, select Accounts in this organizational directory only.
-
In the Redirect URI field, select Web and enter the following URI:
https://api.cm.com/marketplace/configuration/redirect-token -
Click Register to finalize the registration.
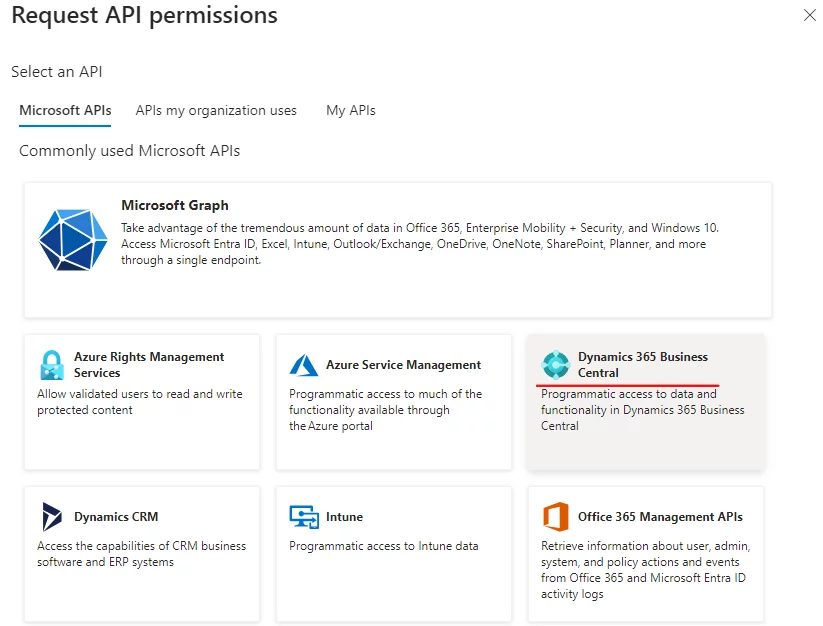
3. Configure API Permissions
Steps to Add API Permissions
-
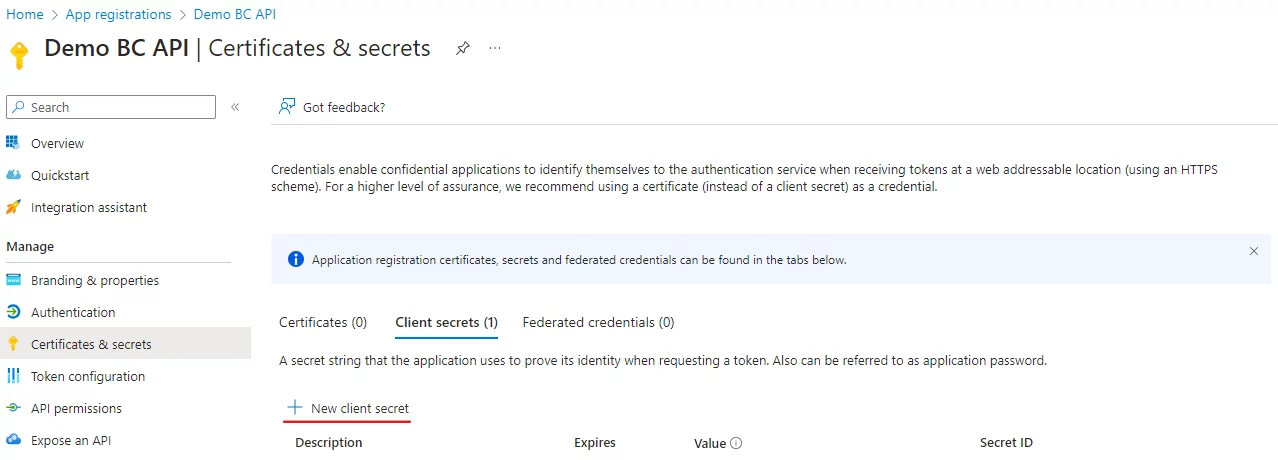
Navigate to 'Certificates & secrets' in the central menu. Click on the 'New client secret' button, and provide a description along with an expiry date (maximum 24 months). Finally, click 'Add' to finish the process.
-
In the Azure App Registration, navigate to API Permissions in the left-hand menu.
-
Click on Add a permission.
-
Select Dynamics 365 Business Central from the list.
-
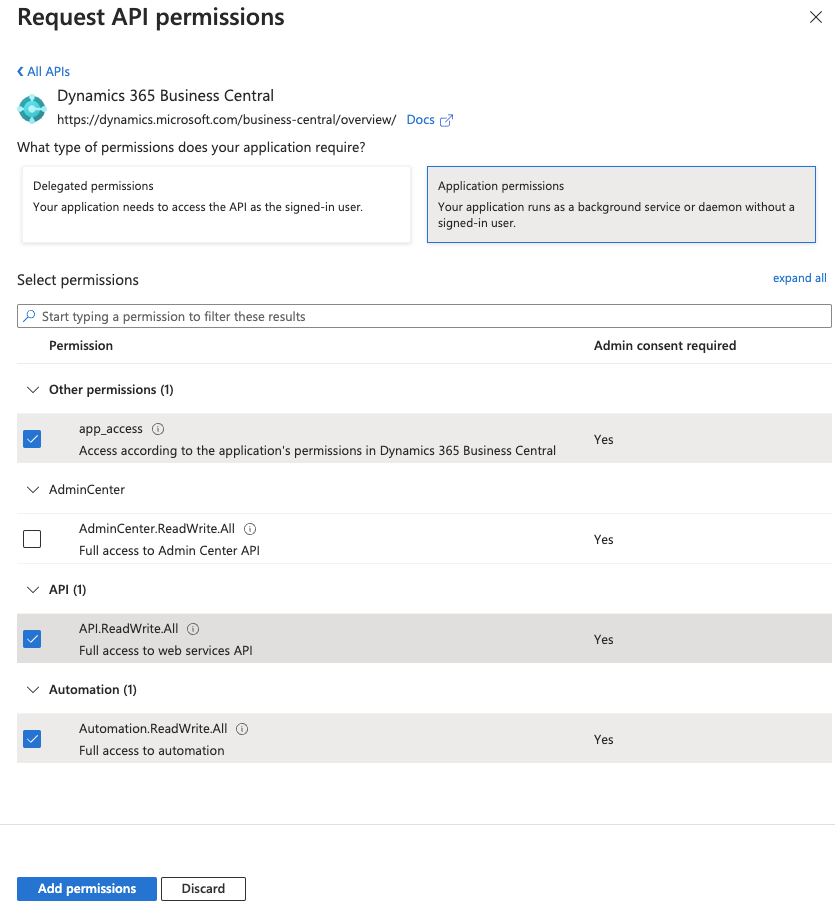
Add the following permissions:
-
Delegated Permissions:
API.ReadWrite.All,Automation.ReadWrite.All -
Application Permissions:
app_access
-
-
Grant admin consent for the permissions.
4. Generate Client Secret
Steps to Generate Client Secret
-
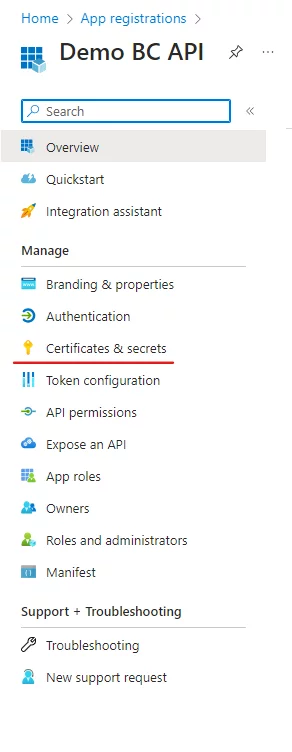
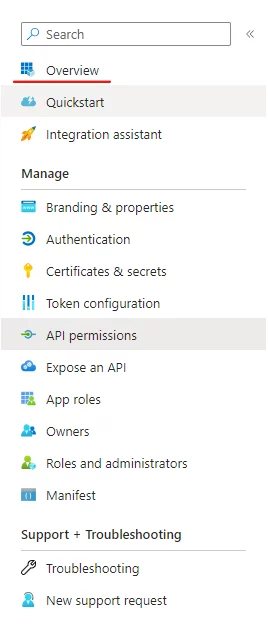
In the Azure App Registration, navigate to Certificates & Secrets in the left-hand menu.
-
Click on New client secret.
-
Provide a description (e.g.,
Marketplace Integration) and set an expiry date (maximum 24 months). -
Click Add and copy the Client Secret value. Save it securely, as it will not be displayed again.
5. Retrieve Required Credentials
Steps to Gather Credentials
-
Navigate to the Overview section of the Azure App Registration.
-
Copy the following values:
-
Application (client) ID: This is your
clientId. -
Directory (tenant) ID: This is your
tenantId.
-
-
Go to Certificates & Secrets and Create New Client Secret Copy and Save its Value by giving proper Description and Expires Duration

-
Save these values securely.
6. Retrieve Company ID and Environment Name
Steps to Retrieve Company ID and Environment Name
-
Log in to your Business Central account using the same credentials as Azure.

-
Navigate to the Admin Center and check your environment. If no environment exists, create a new one and name it appropriately.
-
Copy the Environment Name.

-
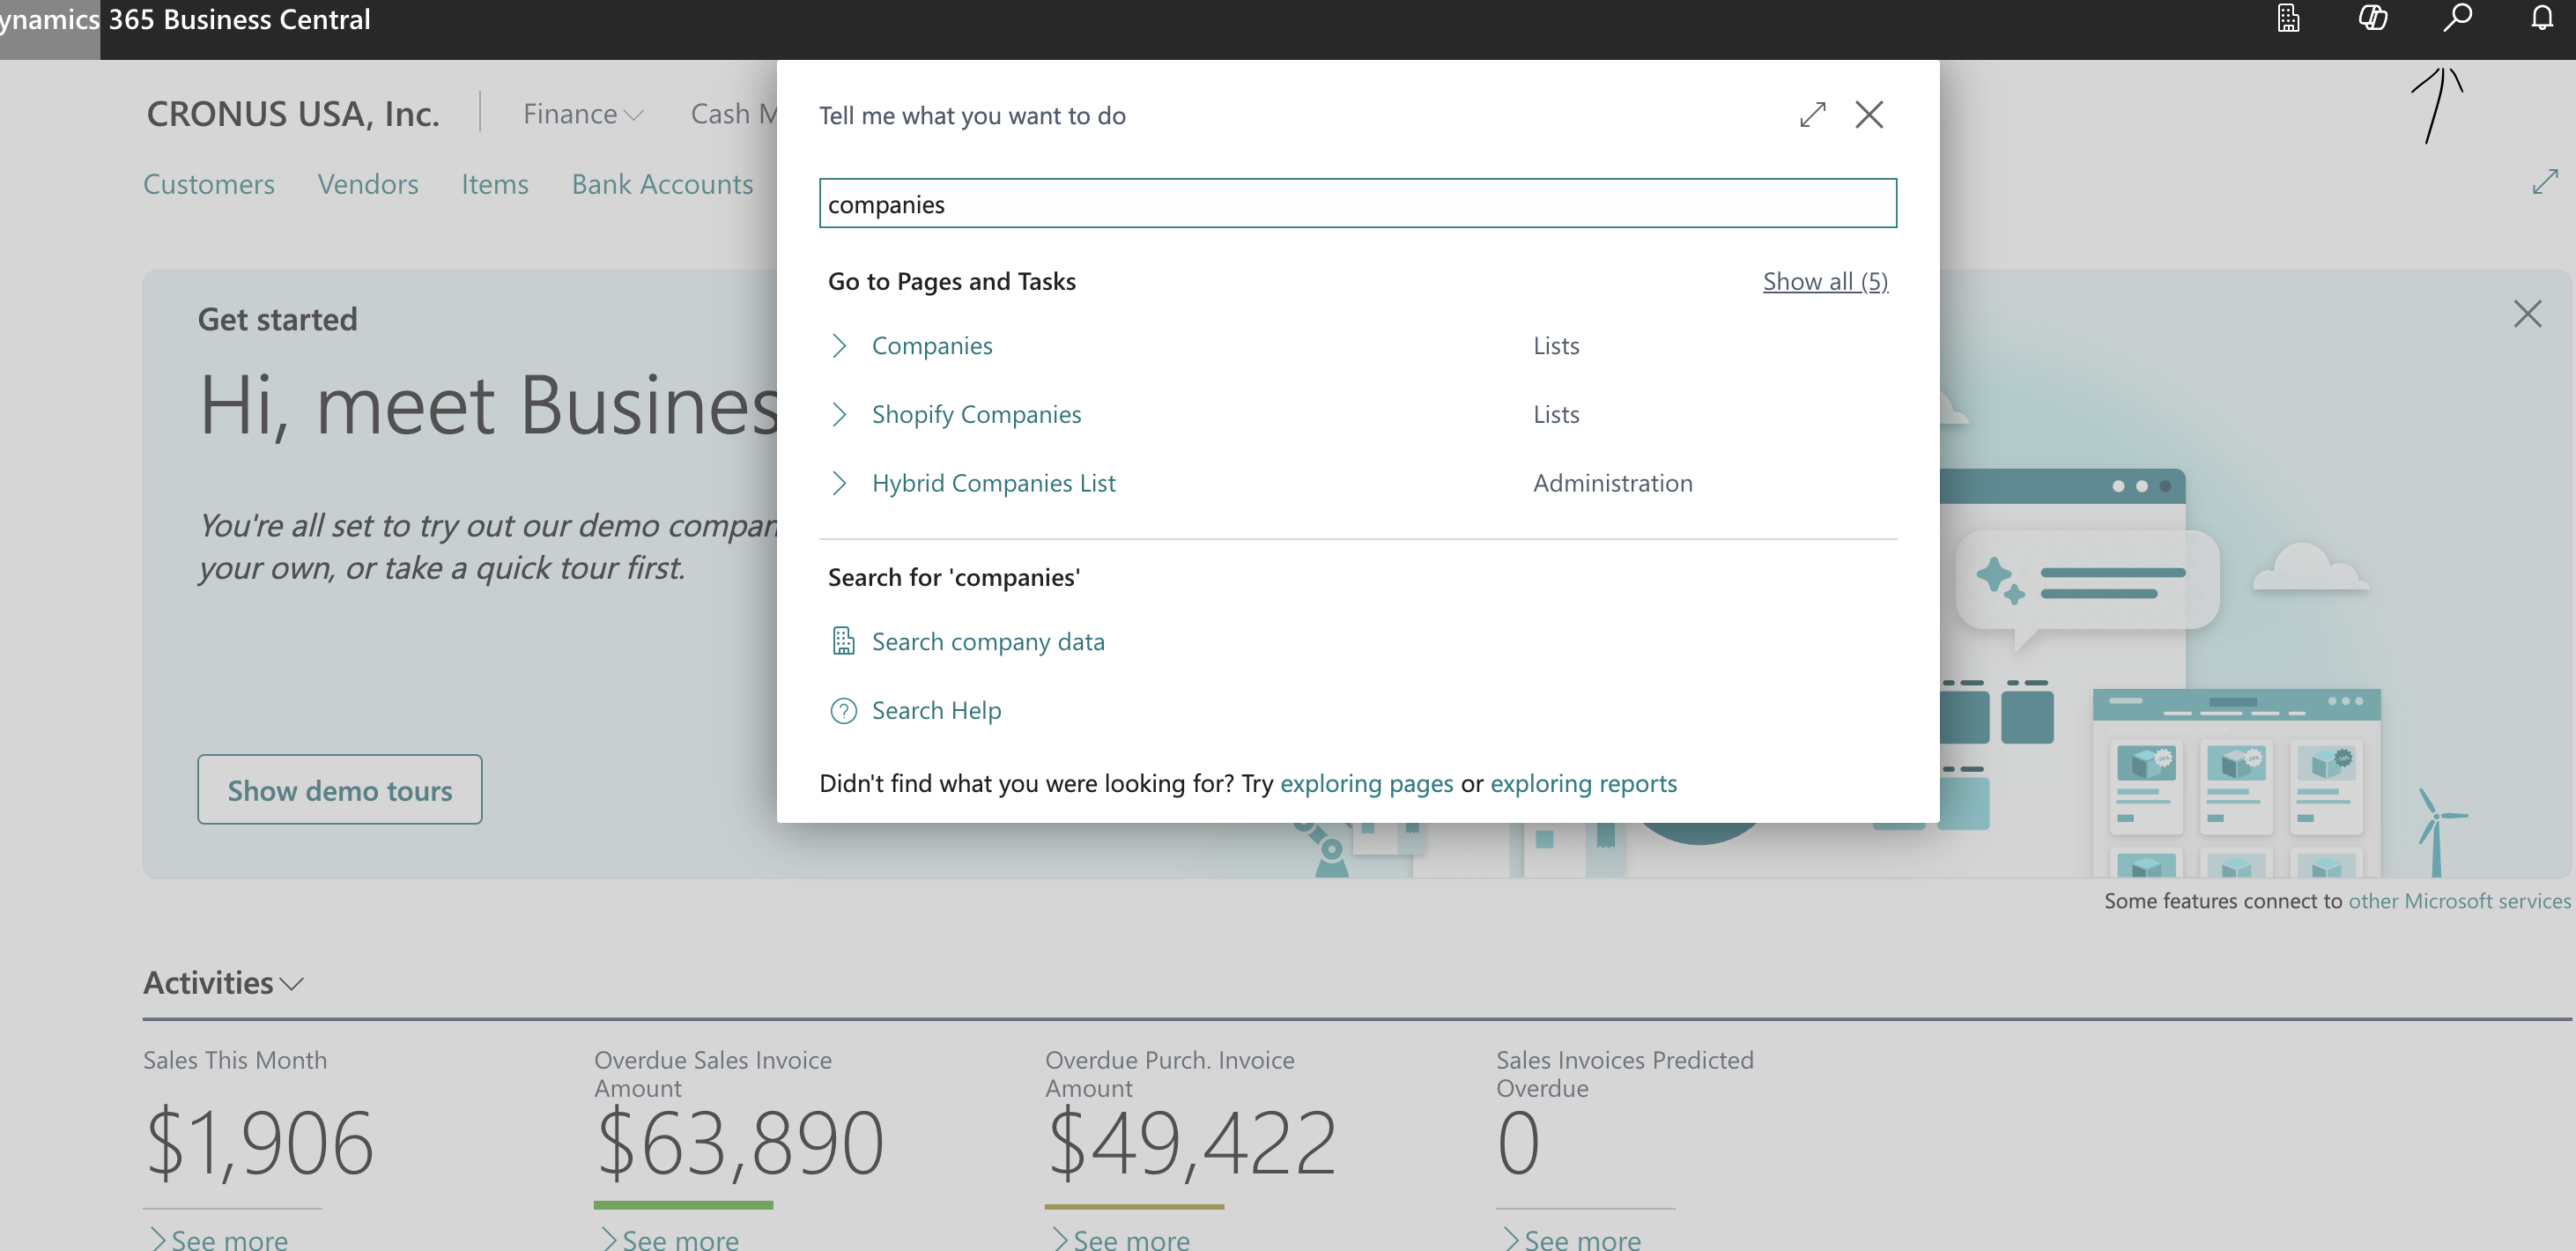
In the Business Central homepage, click on the Search icon and open the Companies tab.
-
Click the Help & Support button (question mark icon) in the top-right corner.
-
Under the Troubleshooting section, click Inspect pages and data.
-
In the inspector, search for Id. The first result contains your Company ID. Copy and save it securely.
7. Share Details with the Delivery Team
Once you have the following details, share them with the delivery team:
-
tenantId
-
clientId
-
clientSecret
-
companyId
-
Environment Name