This guide explains what you, as the customer, need to provide to enable the integration between Genesys Livechat and our platform.
1. Setup in Customer's Genesys Account
The following setup steps need to be completed in the customer's Genesys account. You can ask them to perform these steps:
Steps to create integration
-
Create an integration in Genesys Cloud
-
Specify the outbound webhook URL and secret token that open messages need to be authenticated on the server
-
You can create an integration from the Genesys Cloud Admin UI
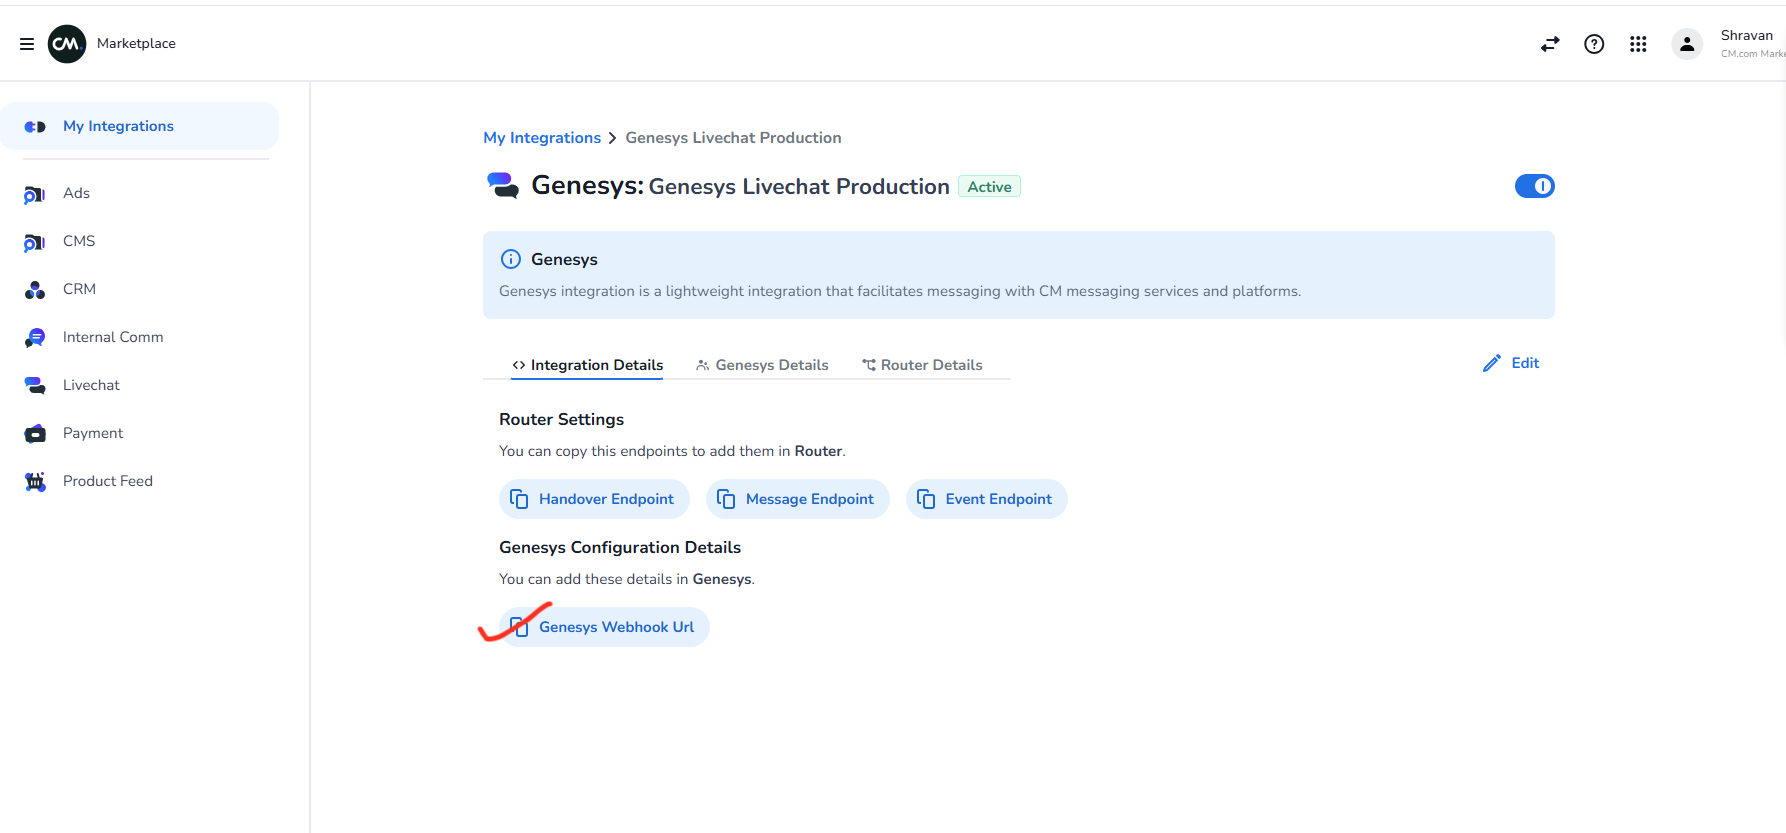
Steps to get the webhook url
-
Copy the Genesys WebHook URL from the Marketplace UI as shown in below
-
This will be used as the outbound webhook URL
Secret token must be longer than 15 characters.
Steps to configure oAuth client
-
Navigate to the OAuth admin page: Admin > Integrations > OAuth
-
The Client ID for each configured OAuth client will be shown in the list
-
Edit the OAuth client to view:
-
Grant type
-
Client secret
-
Redirect URIs
-
-
If you need to create a new OAuth client, see Create an OAuth Client
-
Note down the Client ID and Client Secret (important for Setup in Marketplace for Genesys Details)
Steps to retrieve queue id
-
Retrieve the Queue ID from the customer
-
This is the queue in which the agent will be present in Genesys
Steps to configure disconnect event payload
The customer needs to set the request payload for the disconnect event when the agent leaves on the Genesys side in the outbound webhook URL.
Payload format:
{
    "conversationId": "xxxxx",
    "eventType": "disconnect"
}
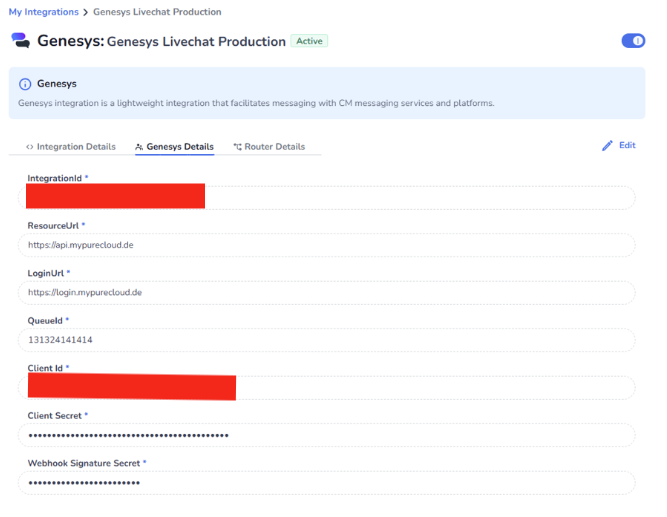
2. Setup in Marketplace for Genesys Details
In the Marketplace form fields, input the following details:
-
Retrieve the Integration ID created after following Steps to create integration and input this value in the IntegrationId form field.
-
Note down the Client ID and Client Secret from the Steps to configure oauth client and fill in the Client Id and Client Secret form fields respectively.
-
Input the Login URL. It will be
https://login.mypurecloud.xwherexis the country-code top-level domain. For example, it is "de" for Germany, so if your location is Germany then usehttps://login.mypurecloud.deas Login URL. -
Input the Resource URL. It will be
https://api.mypurecloud.xwherexis the country-code top-level domain. For example, it is "de" for Germany, so if your location is Germany then usehttps://api.mypurecloud.deas Resource URL. -
The value of Webhook Signature Secret will be the secret token created after following Steps to create integration. This value must be longer than 15 characters.
-
The value of Queue ID will be the Queue ID retrieved from the customer in Steps to retrieve queue id .
in the end it will look like this: