This screen appears when the user clicks:
Entrance management → Entrance plans → + Add entrance plan
It starts the full creation flow of a new entrance validation configuration.
An entrance plan defines:
-
How tickets are scanned
-
Where scanning applies
-
Who can scan
-
How validation behaves
The creation flow consists of two steps:
-
Basic details
-
Configuration
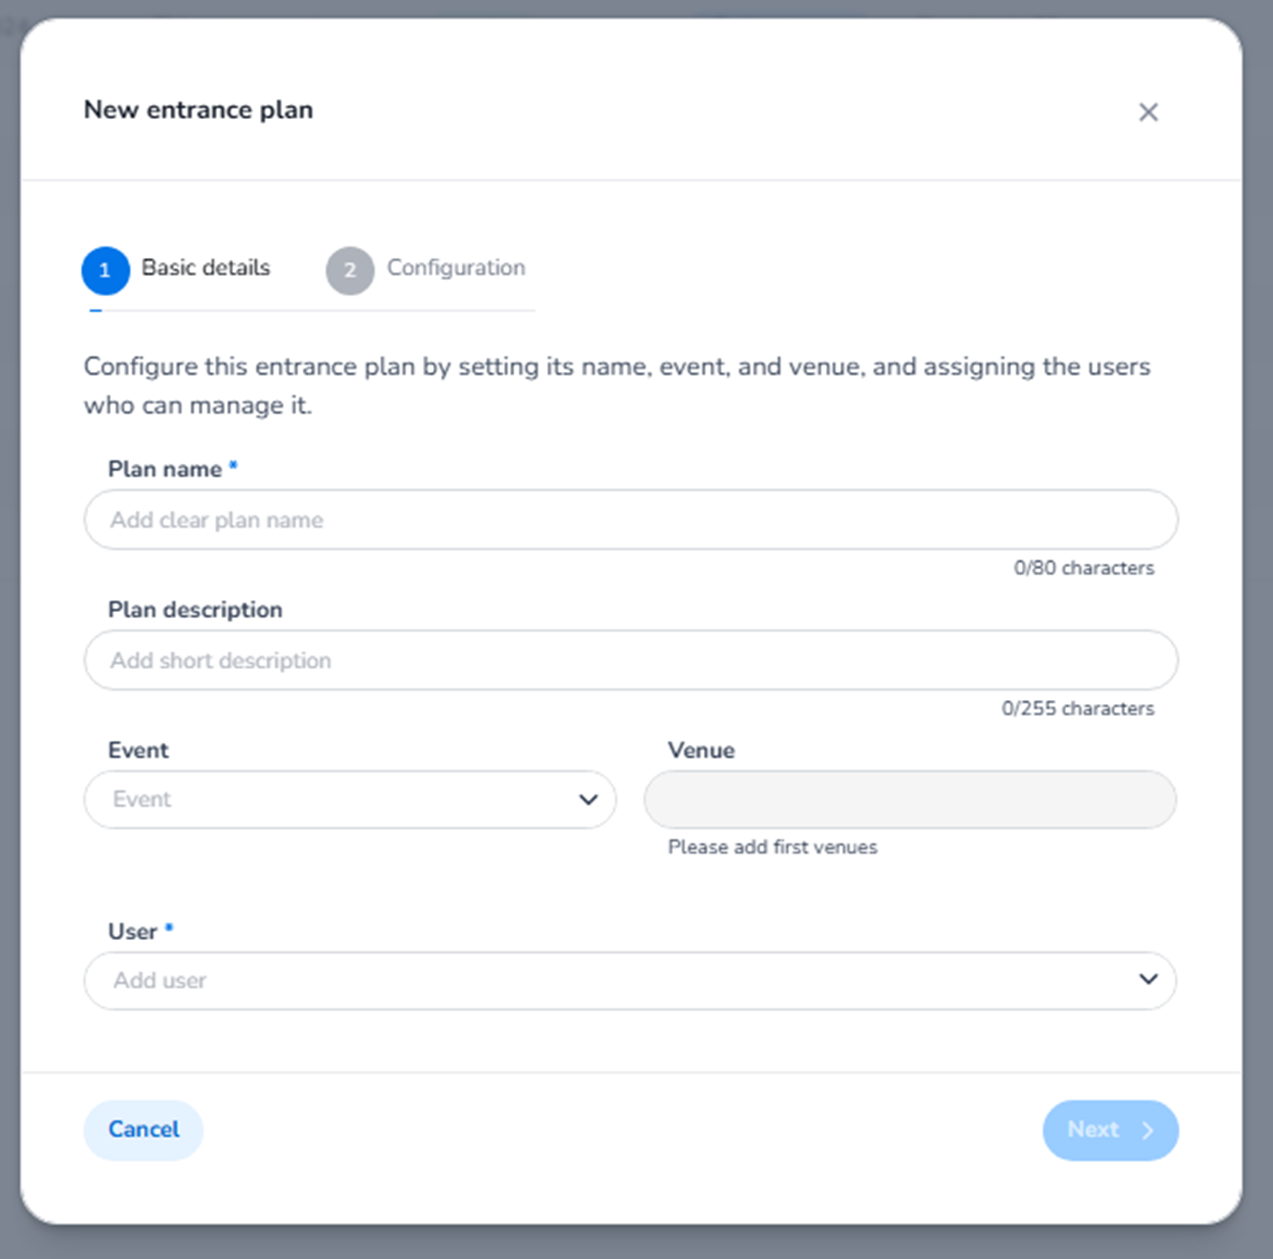
Step 1 — Basic Details
This step defines the structural setup of the entrance plan.
Plan Name (Required)
Field: Plan name
Purpose:
-
Identifies the entrance plan in the overview list.
-
Should clearly describe the entrance logic.
Examples:
-
“Main Entrance – Saturday”
-
“VIP Gate”
-
“Crew Access”
This name will appear in the Entrance Plans overview.
Plan Description
Field: Plan description
Purpose:
-
Internal clarification of the plan’s purpose.
-
Not visible to ticket buyers.
-
Helps operational teams understand the logic.
Example:
-
“General admission – main gate”
-
“Backstage only access”
-
“Press entrance”
Event
Dropdown: Event
Purpose:
-
Links the entrance plan to a specific event.
-
Determines which tickets are validated.
This defines the ticket pool that can be scanned.
Without selecting an event, validation logic cannot function.
Venue
Dropdown: Venue
Purpose:
-
Links the plan to a physical location.
-
Defines where scanning applies.
Important for:
-
Multi-location events
-
Multiple entry gates
-
Large festival sites
User (Required)
Field: User
Purpose:
-
Assigns scanning users to this entrance plan.
-
Only assigned users can log into the scan app using this plan.
Users assigned here:
-
Operate scanners
-
Validate tickets
-
Follow the rules defined in Step 2
Navigation Buttons
Cancel
Closes the modal without saving.
Next
Moves to Step 2: Configuration.
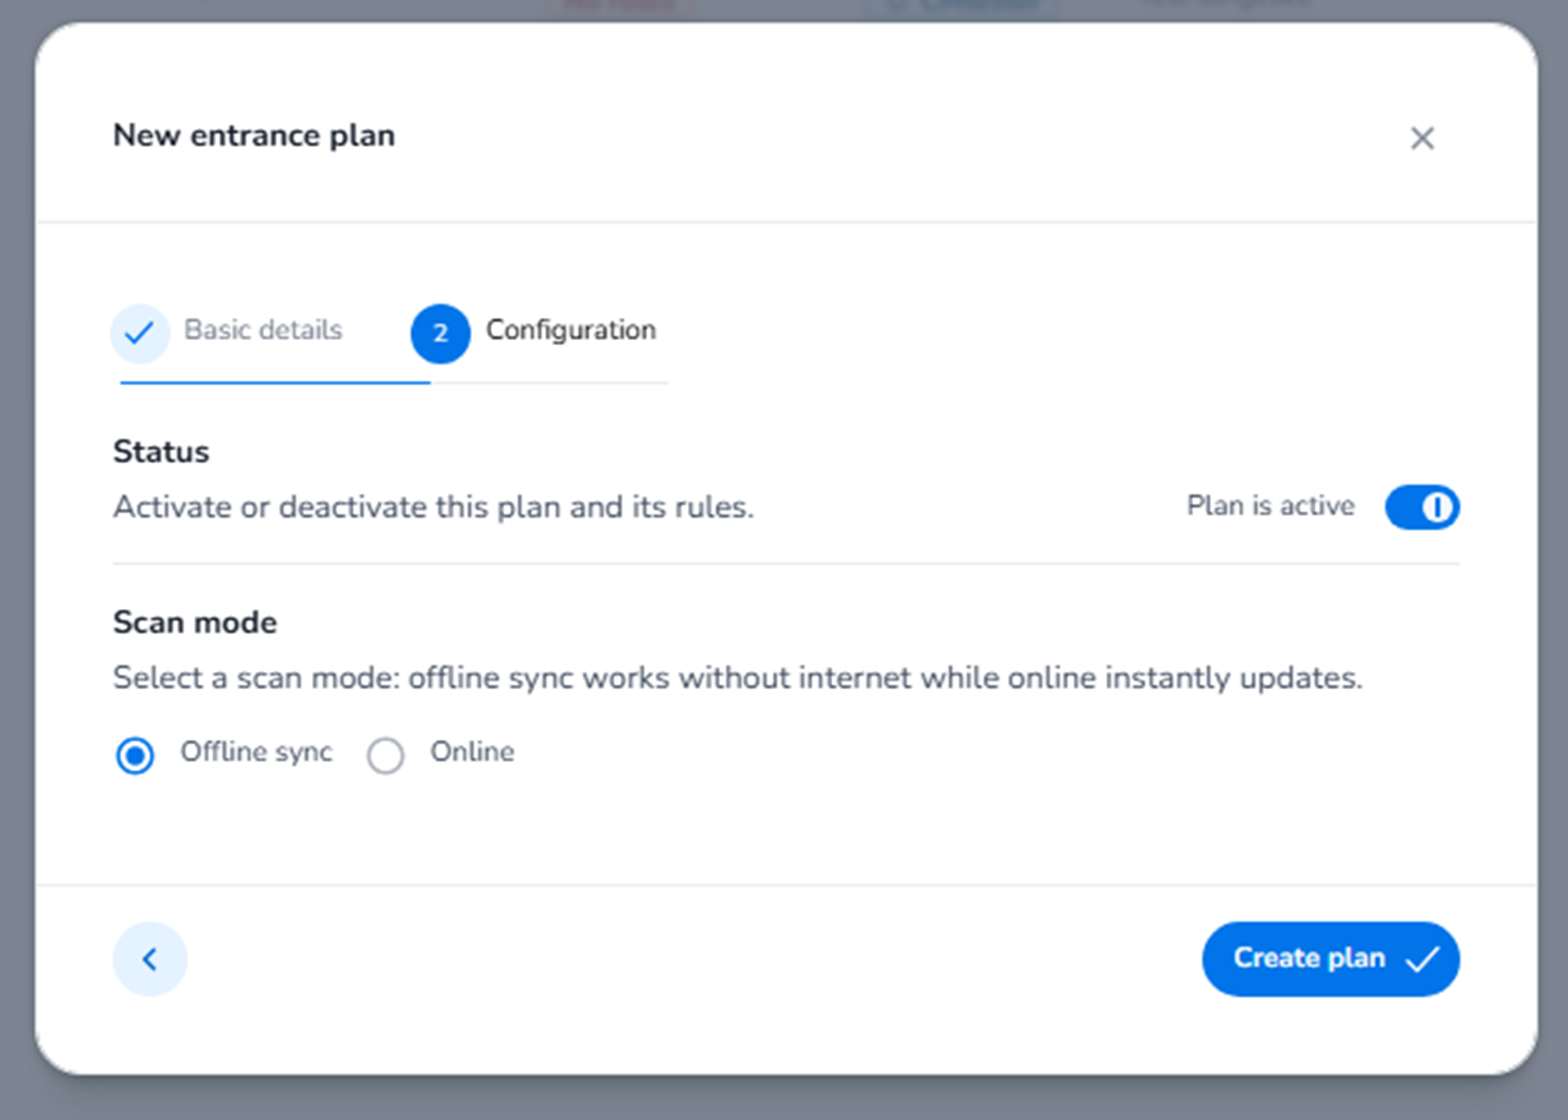
Step 2 — Configuration
This step defines how scanning behaves.
Status
Section: Status
Toggle: Plan is active
Purpose:
-
Activates or deactivates the entrance plan.
-
If inactive:
-
Scanning is disabled.
-
Assigned users cannot validate tickets using this plan.
-
Active = scanning allowed
Inactive = scanning blocked
This controls operational availability.
Scan Mode
Section: Scan mode
Options:
-
Offline sync
-
Online
Offline Sync
-
Scanning works without internet connection.
-
Devices validate tickets locally.
-
Data synchronises later.
Best for:
-
Unstable network environments
-
Outdoor festivals
-
Large crowd scenarios
Online
-
Scanning validates tickets instantly via live connection.
-
Requires internet access.
-
Immediate updates across devices.
Best for:
-
Indoor venues
-
Stable network environments
-
Real-time validation requirements
Create Plan
Button: Create plan
Purpose:
-
Finalises the entrance plan.
-
Saves structure and configuration.
-
Makes the plan available in the Entrance Plans overview.
After creation, you can:
-
Add validation rules
-
Add conditions
-
Edit scan limits
-
Assign additional users
-
Configure detailed rule logic
What + Add Entrance Plan Actually Creates
Clicking this and completing both steps creates:
-
A new scanning validation framework
-
A separate operational access control logic
-
A dedicated scan configuration linked to event and venue
-
A user-restricted scanning environment
It becomes part of the entrance plan overview and can be further configured.
Functional Summary
When using + Add entrance plan, the user can:
-
Define structural details (name, event, venue, users)
-
Activate or deactivate scanning
-
Choose scan behaviour (offline or online)
-
Create a new validation framework
This forms the foundation for:
-
Who can scan
-
What tickets are valid
-
Where scanning applies
-
How scanning behaves
It defines operational entrance control logic for the event.