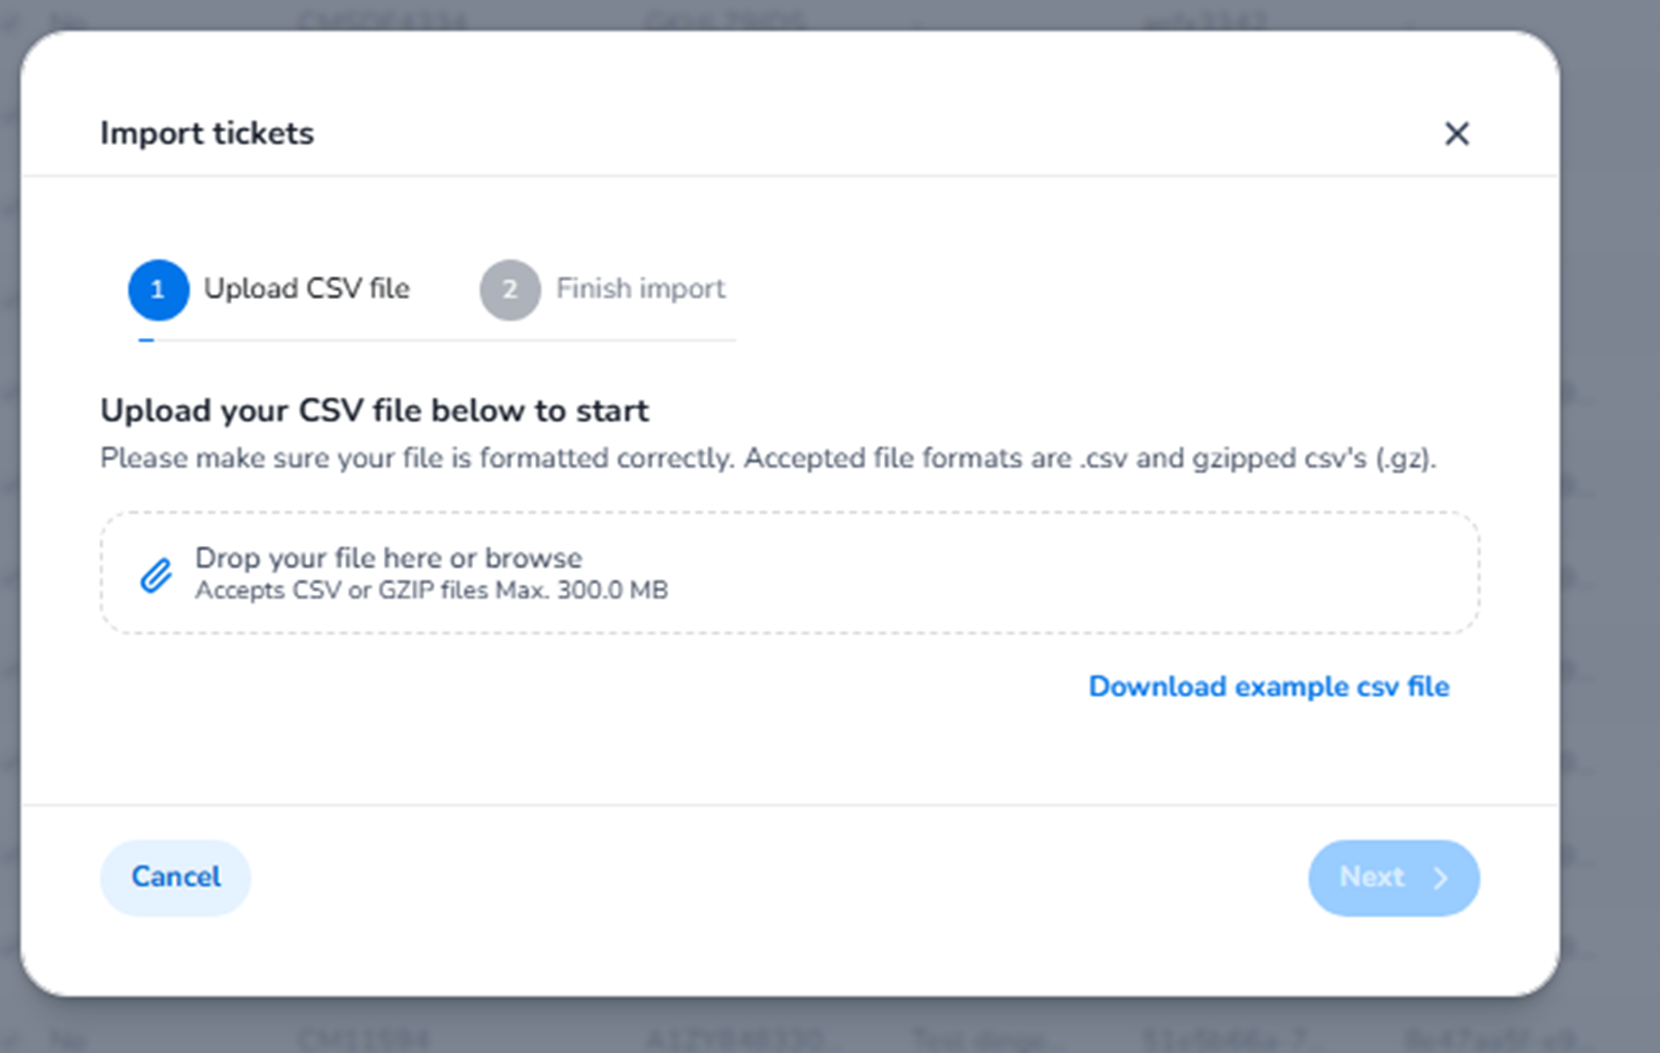
This screen appears when the user clicks:
Tickets → Imported tickets → Import tickets
It opens the ticket import workflow.
This functionality is used to upload externally created tickets into the platform for validation and scanning.
It is specifically intended for tickets that were not sold directly via the platform, but originate from:
-
Third-party systems
-
Legacy systems
-
Manual sales
-
External integrations
Import Workflow Structure
At the top of the modal, you see a two-step progress indicator:
-
Upload CSV file (active step)
-
Finish import (greyed out)
This indicates the process consists of two phases.
The greyed-out Finish import step becomes active only after a valid file has been uploaded.
Step 1 — Upload CSV File
Instruction Text
"Upload your CSV file below to start"
The system clearly instructs the user to begin by uploading a correctly formatted file.
Accepted formats:
-
.csv
-
.csv.gz (zipped CSV)
Maximum file size: 300 MB
Upload Area
Field: Drop your file here or browse
Function:
-
Allows drag-and-drop upload.
-
Allows file selection via file browser.
-
Validates file type and size before proceeding.
This is the entry point of the import process.
Download Example CSV File
Button: Download example csv file
Function:
-
Downloads a template CSV.
-
Shows the required column structure.
-
Ensures correct formatting before upload.
Used for:
-
Preparing import files correctly.
-
Understanding required fields.
-
Preventing formatting errors.
-
Matching expected column headers.
This significantly reduces validation errors during import.
Cancel Button
Closes the modal without starting an import.
Next Button
Button: Next
Initially inactive.
Becomes active only after:
-
A valid CSV file is uploaded.
Moves the user to:
Step 2 — Finish import.
Step 2 — Finish Import (Greyed Out)
This step is currently inactive in the screenshot because no file has been uploaded yet.
Once activated, this step typically allows the user to:
-
Review uploaded data
-
Validate ticket records
-
Confirm import settings
-
Finalise the import
This is where the system processes:
-
Ticket IDs
-
Barcode data
-
Product references
-
Event associations
Only after completing this step will tickets become available for validation in scanning.
What Happens After Import
Once the import is completed:
-
The batch appears in the Imported tickets overview.
-
The system shows:
-
Import status (processing / completed / failed)
-
Number of successfully imported tickets
-
Number of failed records
-
Error details if applicable
-
Imported tickets then become usable in:
-
Entrance scanning
-
Validation logic
-
Access control
What This Page Does
The Import tickets workflow serves as:
-
A gateway for external ticket ingestion
-
A validation checkpoint before tickets become active
-
A structured two-step import process
It ensures:
-
File format validation
-
Controlled ticket activation
-
Clear separation between platform-sold and externally uploaded tickets
Functional Summary
Within Import tickets, the user can:
-
Upload external ticket data
-
Download a correct CSV template
-
Validate file structure
-
Complete a two-step import process
-
Activate imported tickets for scanning
This section enables controlled and structured integration of external ticket sources into the scanning and entrance validation system.