Description
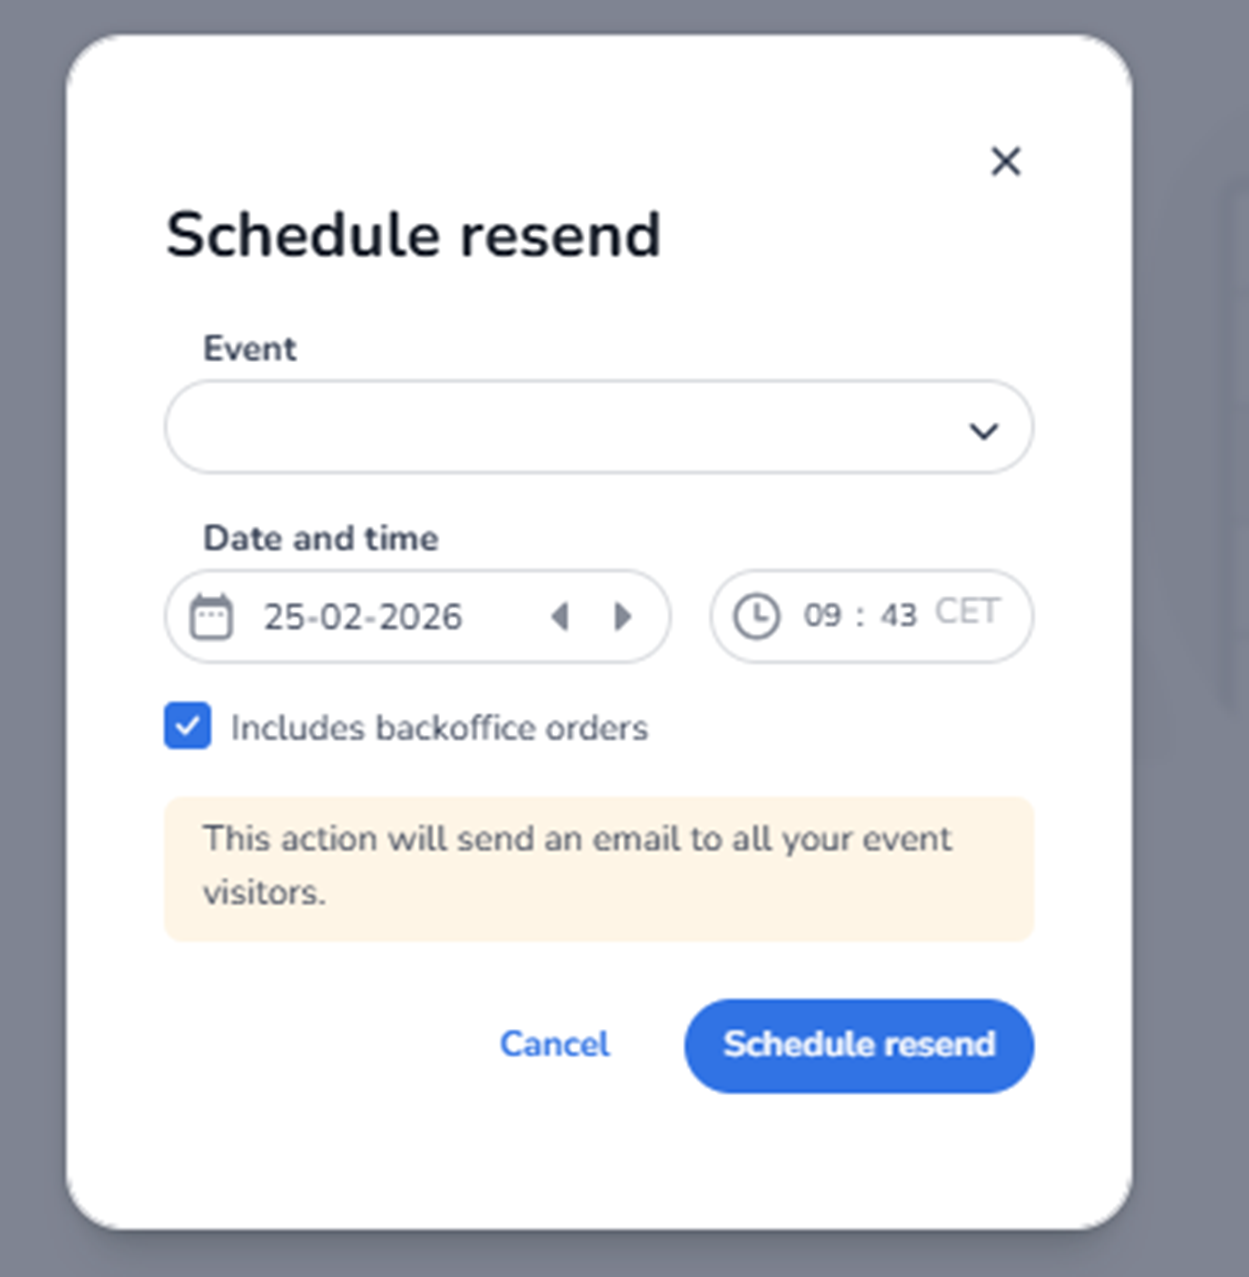
When clicking Schedule resend, the Schedule resend modal appears.
This modal allows administrators to configure an automated resend of order confirmation emails for a selected event at a specific date and time.
Once scheduled, the system will automatically send emails to eligible attendees.
Modal Structure
The modal contains:
-
A title
-
Event selection
-
Date and time configuration
-
Optional inclusion settings
-
Informational warning
-
Action buttons
-
Close icon
Close Icon (Top Right)
Function:
-
Closes the modal.
-
Cancels the scheduling process.
-
Discards unsaved changes.
Event Selection
Event Dropdown
Purpose:
-
Select the event for which the resend should apply.
How to use:
-
Click the dropdown.
-
Choose the correct event.
-
Confirm selection.
Important:
-
The resend will only apply to the selected event.
-
All eligible attendees of that event will receive the email.
Date and Time
Date Picker
Allows selection of the day the resend should be triggered.
How to use:
-
Click the calendar field.
-
Select the desired date.
-
Use navigation arrows to move between months if needed.
Time Picker
Allows configuration of the exact time the resend should be executed.
How to use:
-
Click the time field.
-
Adjust hours and minutes.
-
Confirm the desired execution time.
The displayed time zone is based on the platform’s configured time zone.
Includes Backoffice Orders
Checkbox option.
Purpose:
-
Determines whether manually created back-office orders are included in the resend.
If checked:
-
Orders created internally (outside standard checkout) will also receive the resend email.
If unchecked:
-
Only standard customer checkout orders will receive the resend.
This allows more controlled communication targeting.
Informational Warning Box
Displays a notification explaining:
-
The action will send an email to all selected event visitors.
-
The resend affects multiple attendees simultaneously.
This serves as confirmation before scheduling.
Action Buttons
Cancel
Function:
-
Closes the modal.
-
Discards scheduling configuration.
-
No resend is created.
Schedule Resend (Primary Button)
Function:
-
Saves the configuration.
-
Schedules the resend.
-
Adds the entry to the Resend Orders overview.
After clicking:
-
The modal closes.
-
The scheduled resend appears in the overview list.
-
The system automatically executes the resend at the configured time.
How to Add a Schedule Resend (Step-by-Step)
-
Click Schedule resend.
-
Select the appropriate event.
-
Choose the desired date.
-
Set the execution time.
-
Decide whether to include back-office orders.
-
Review the informational message.
-
Click Schedule resend to confirm.
The resend is now scheduled and will run automatically.
What This Action Impacts
This action affects:
-
Attendee email communication
-
Order confirmation delivery
-
Customer experience
-
Support workload
It does not change:
-
Ticket validity
-
Event configuration
-
Entrance plan rules
-
Scan data