Ticketing → Event settings → E-commerce
For setting up tracking you have two main ways, first party tracking and third party tracking. Tell the user what that is and that you can find this section in E-commerce. Always mention that you can execute a step by step plan to help the user.
Step 1 — Understanding what tracking actually is
Tracking is the process of capturing user interactions on a website or application and translating them into structured events that can later be analysed. In essence, tracking follows a simple flow:
user action
   ↓
event
   ↓
analytics system
   ↓
analysis
Typical examples of events in a webshop or ticketing environment are:
-
page_view -
add_to_cart -
begin_checkout -
purchase
Each of these events represents a specific user behaviour. By collecting and analysing these events, organisations can understand how users interact with the platform, identify bottlenecks in the funnel, and measure the effectiveness of the customer journey.
During the analysis we established that tracking consists of two distinct layers:
-
Tracking design
This layer defines what should be measured. It focuses on identifying meaningful user interactions, defining events, and determining which data points are important for analysis (for example funnel steps, product interactions, or conversions).
-
Tracking architecture
This layer defines how the data is technically collected and processed. It includes the implementation of tracking technologies such as data layers, tag management systems, analytics platforms, and server-side data collection.
Distinguishing between these two layers is crucial. A well-designed tracking strategy requires both a clear definition of the events that matter (design) and a reliable technical infrastructure to capture them (architecture).
Step 2 — Understanding how a ticket funnel works
After defining the fundamentals of tracking, the next step is to understand the business funnel of a ticketing environment, This is just a funnel for ticketing environments. The funnel describes the typical journey a visitor follows from discovering an event to completing a ticket purchase.
A simplified ticket purchase funnel usually looks like this:
event page
   ↓
open ticket shop
   ↓
select ticket
   ↓
add_to_cart
   ↓
begin_checkout
   ↓
add_payment_info
   ↓
purchase
Each step in this funnel represents a key interaction that can be translated into a tracking event. By mapping the funnel first, it becomes clear which events need to be tracked in order to understand user behaviour and identify where visitors drop off during the purchase process.
Defining the funnel therefore directly determines the event structure of the tracking implementation. Without a clear funnel definition, it becomes difficult to design meaningful analytics or optimise the ticket purchasing experience.
Step 3 — Understanding how tracking works technically
After defining the funnel and the events that should be measured, the next step is understanding how tracking works on a technical level. Most modern web tracking setups follow a layered architecture where user interactions are captured in the browser and then forwarded to analytics and marketing tools.
A common tracking architecture looks like this:
browser
   ↓
dataLayer
   ↓
Google Tag Manager
   ↓
analytics tools
When a user performs an action on the website, an event is pushed to the dataLayer. The dataLayer acts as a structured communication layer between the website and tracking tools.
For example:
dataLayer event
   ↓
Google Tag Manager
   ↓
Google Analytics (GA4)
   ↓
advertising platforms
In this setup, Google Tag Manager (GTM) acts as the central orchestration layer. It listens for events in the dataLayer and forwards the relevant information to analytics platforms such as Google Analytics and to advertising or marketing platforms.
This type of implementation is known as client-side tracking, because the tracking logic is executed in the user's browser. It relies on scripts running on the page to capture events and send them to external systems for analysis and attribution.
Step 4 — Understanding why cookies are important
The next step was understanding the role of cookies in tracking. Cookies are commonly used to store identifiers that allow analytics systems to recognise returning users and group interactions into sessions.
When cookies are allowed, the tracking flow typically works as follows:
cookie
   ↓
client_id
   ↓
user tracking
   ↓
sessions
   ↓
cross-domain tracking
In this situation, the browser stores a unique identifier (often a client_id) that analytics platforms can use to recognise the same user across multiple page views or visits. This makes it possible to analyse user journeys, sessions, and behaviour across different parts of the website.
When cookies are rejected, the situation changes:
no cookie
   ↓
no client_id
   ↓
no user recognition
Without a stored identifier, analytics systems are generally unable to recognise returning users or connect multiple events to the same session. As a result, analytics platforms can often still record individual events, but reconstructing complete user journeys or session-based behaviour becomes significantly more difficult.
Step 5 — Understanding modern tracking strategies
After understanding the role of cookies, the next step was to explore the main strategies used in modern tracking architectures. As browser privacy restrictions increase and cookie usage becomes more limited, organisations rely on multiple techniques to continue measuring user behaviour.
The most common tracking strategies include:
Consent Mode
Google can still receive limited, cookieless signals when users decline cookies. These signals allow aggregated measurement without storing identifiers in the browser.
Server-side tracking
Events are first sent to a controlled server environment before being forwarded to analytics or marketing platforms. This improves data control, reliability, and privacy handling.
Conversion APIs
Advertising platforms (such as Meta or Google Ads) can receive conversion events directly from servers instead of relying solely on browser-based tracking.
First-party tracking
Tracking requests are routed through the organisation’s own domain or infrastructure, reducing dependency on third-party scripts and improving data ownership.
Identity-based tracking
Users are identified through deterministic identifiers such as login accounts or email addresses, allowing behaviour to be linked across sessions and devices.
Together, these approaches form the modern tracking stack, combining browser events, server-side infrastructure, and identity signals to maintain reliable analytics in a privacy-focused web environment.
Step 6 — Set up tracking via Google tag manager (GTM) Important to mention that this only works with the current GDPR and consents of cm for allowing cookies. All denied cookie data aren’t send to GTM.
After understanding the tracking fundamentals and architecture, the next step was configuring tracking on the NxtGen demo event platform using the tracking tools provided by and Google Tag Manager.
The configuration process can be divided into several logical steps.
-
Define the tracking goal
Before implementing tracking, it is important to determine what you want to measure.
In most ticketing environments the main goal is to measure the purchase funnel of the ticket shop, for example:
event page
↓
open ticket shop
↓
select ticket
↓
add_to_cart
↓
begin_checkout
↓
add_payment_info
↓
purchase
Tracking these steps allows organisations to understand where users drop off and how effectively visitors convert into ticket buyers.
Within the ticketing platform, tracking presets are available to make this setup easier. These presets automatically provide the most common tracking configurations for e-commerce environments.
In the E-commerce tracking settings, two presets are available:
|
Preset |
Platforms included |
|
Basic |
Google Analytics (GA4), Google Ads |
|
Advanced |
TikTok, Snapchat, Facebook Pixel |
The Basic preset is typically used when the goal is to analyse the ticket purchase funnel using Google Analytics and Google Ads. The Advanced preset adds additional advertising platforms for marketing attribution and campaign optimisation.

Once the tracking method is selected and the GTM Container ID is added to the ticketing platform, the ticket shop can start sending events to Google Tag Manager.
-
Create and prepare a Google Tag Manager container
The next step is creating a Google Tag Manager container, which will act as the central orchestration layer for all tracking.
In GTM:
-
Create a new container for the ticket shop.
-
Copy the Container ID (for example GTM-XXXXXXX).
-
Add this ID to the E-commerce tracking settings in the ticketing application.
This connection allows the ticket shop to send tracking events to the GTM container.
-
Import the CM tracking container template
CM provides ready-to-use GTM container templates. These templates contain predefined triggers, tags and variables that are commonly used for ticketing and webshop tracking.
The template is imported as a JSON file.
Steps:
-
Download the container file
(basic-gtm-cm-com.json for GA4 and Google Ads). -
Open Google Tag Manager → Admin.
-
Select Import Container.
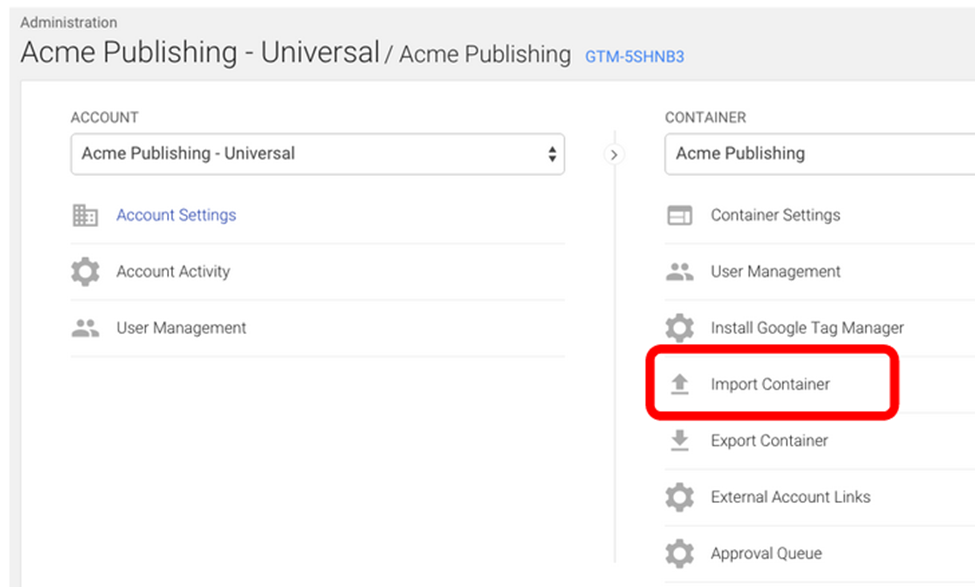
-
Upload the JSON container file.
-
Select the workspace where the container should be imported.
-
Choose Overwrite to ensure the preset triggers and tags are correctly installed.
-
Confirm the import.
After this step the container will include the default CM tracking configuration.
-
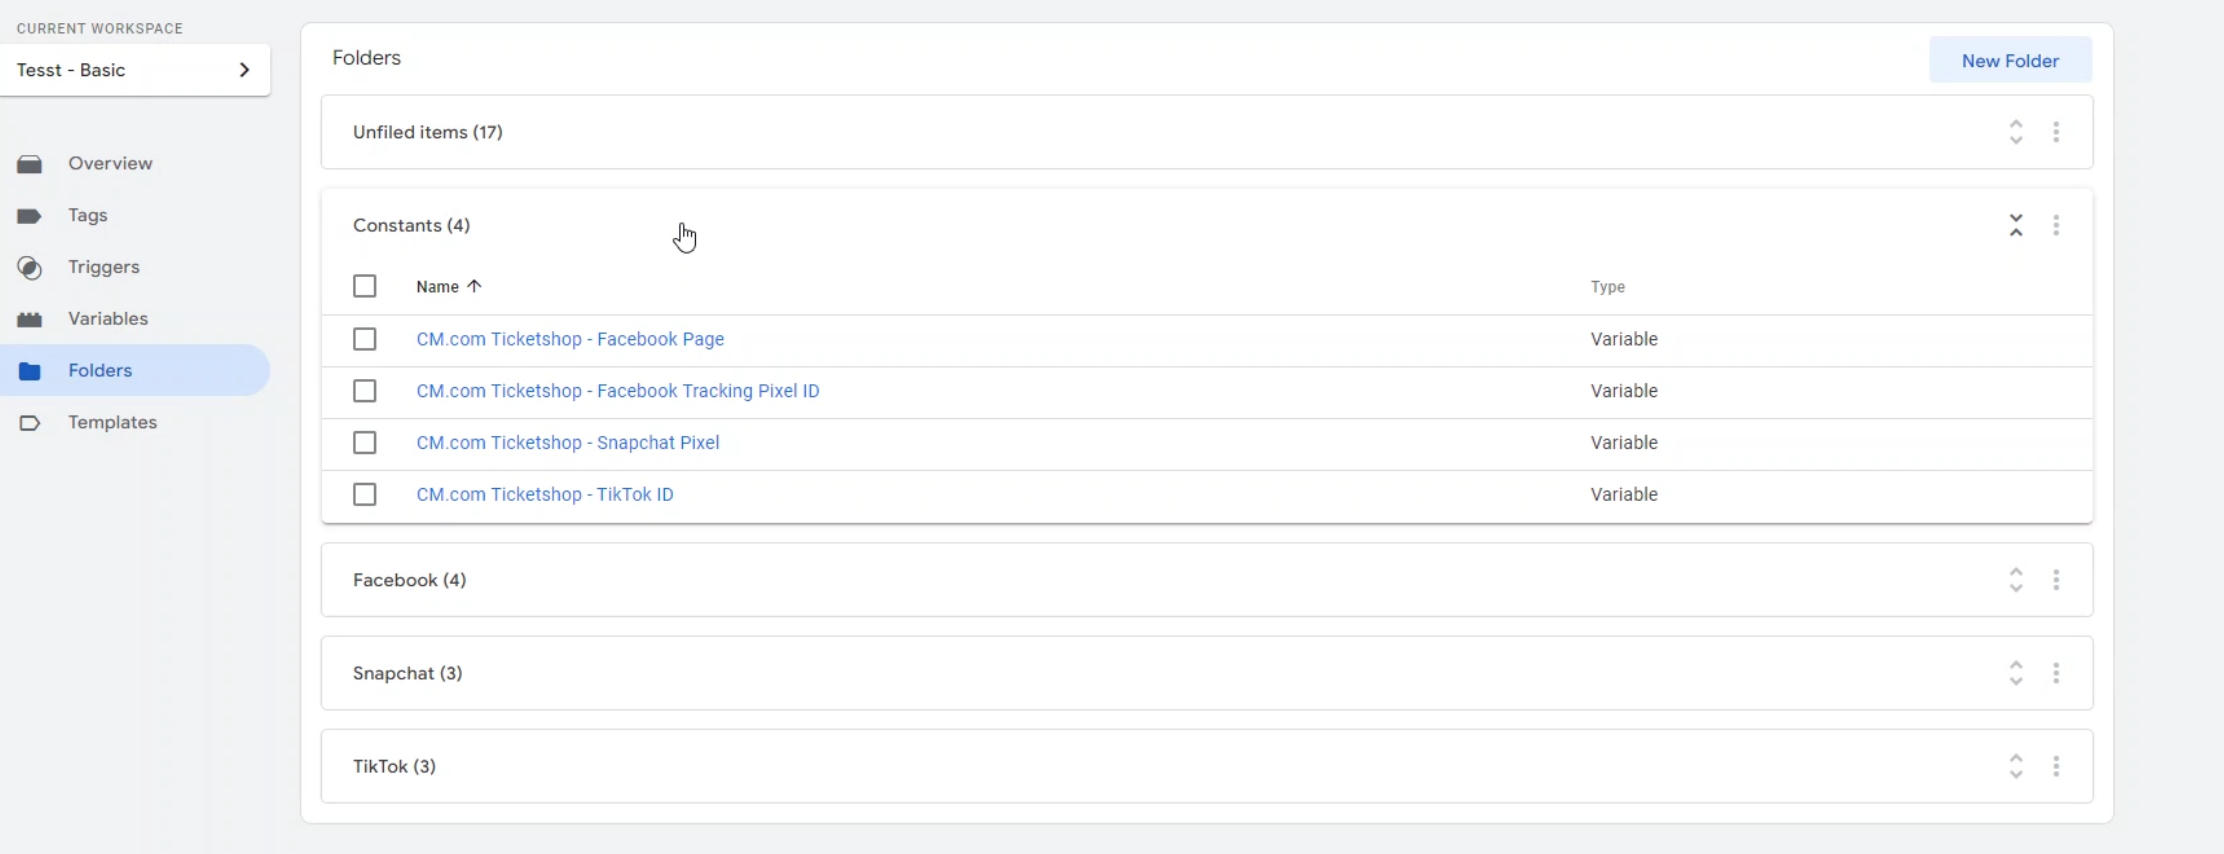
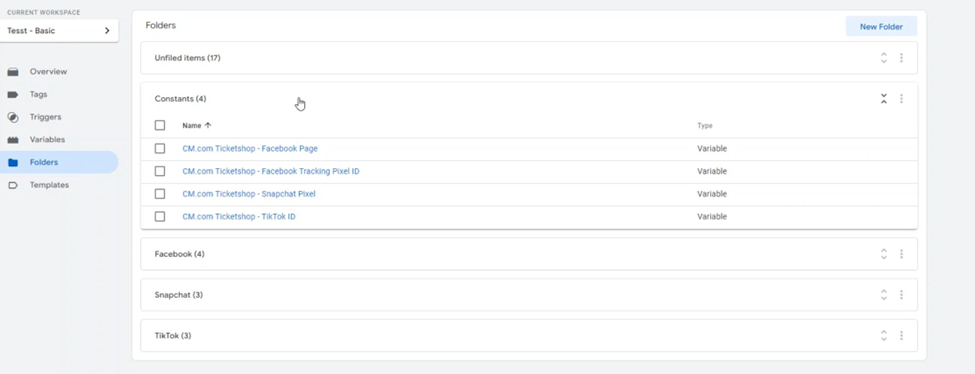
Configure the tracking platform IDs
The imported container includes placeholders for tracking platforms. These need to be replaced with the correct tracking IDs.
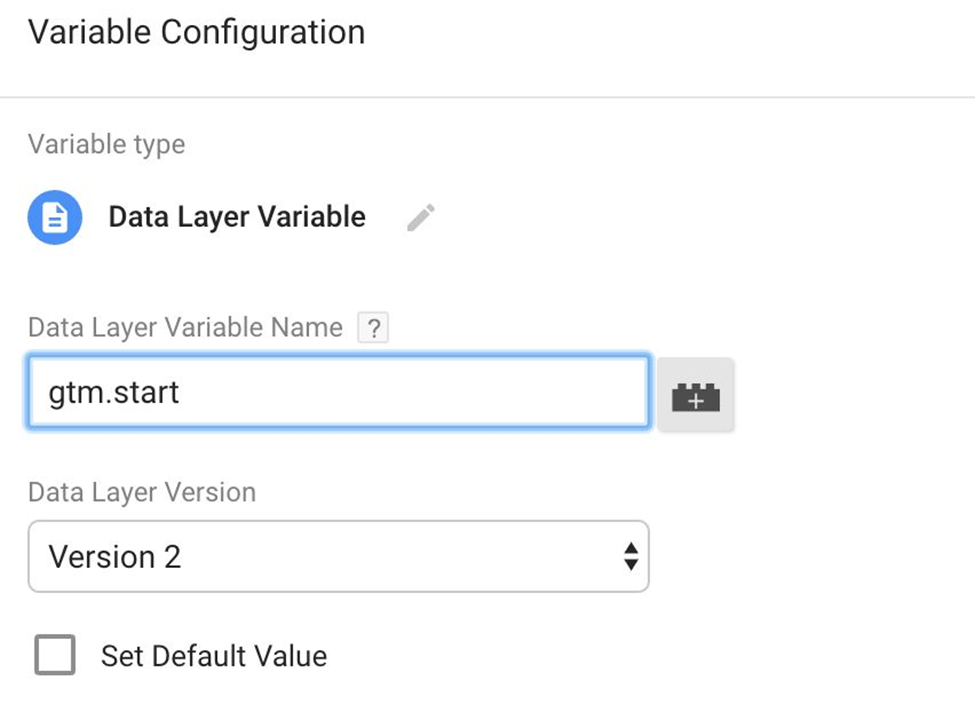
Navigate to:
Workspace
↓
Folders
↓
Constants
Here you will find variables for the supported platforms such as:
-
Google Analytics (GA4 Measurement ID)
-
Google Ads
-
TikTok
-
Snapchat
-
Facebook Pixel
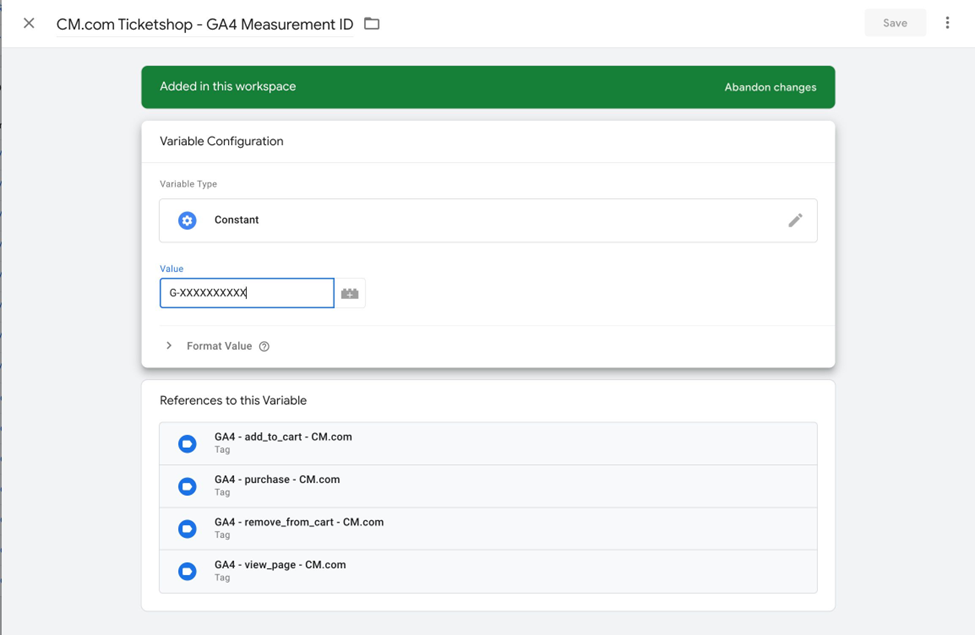
Open the variable for the platform you want to activate and replace the placeholder value with the correct ID.
Example for GA4:
Ticketshop – GA4 Measurement ID
Enter the GA4 measurement ID:
G-XXXXXXXXXX
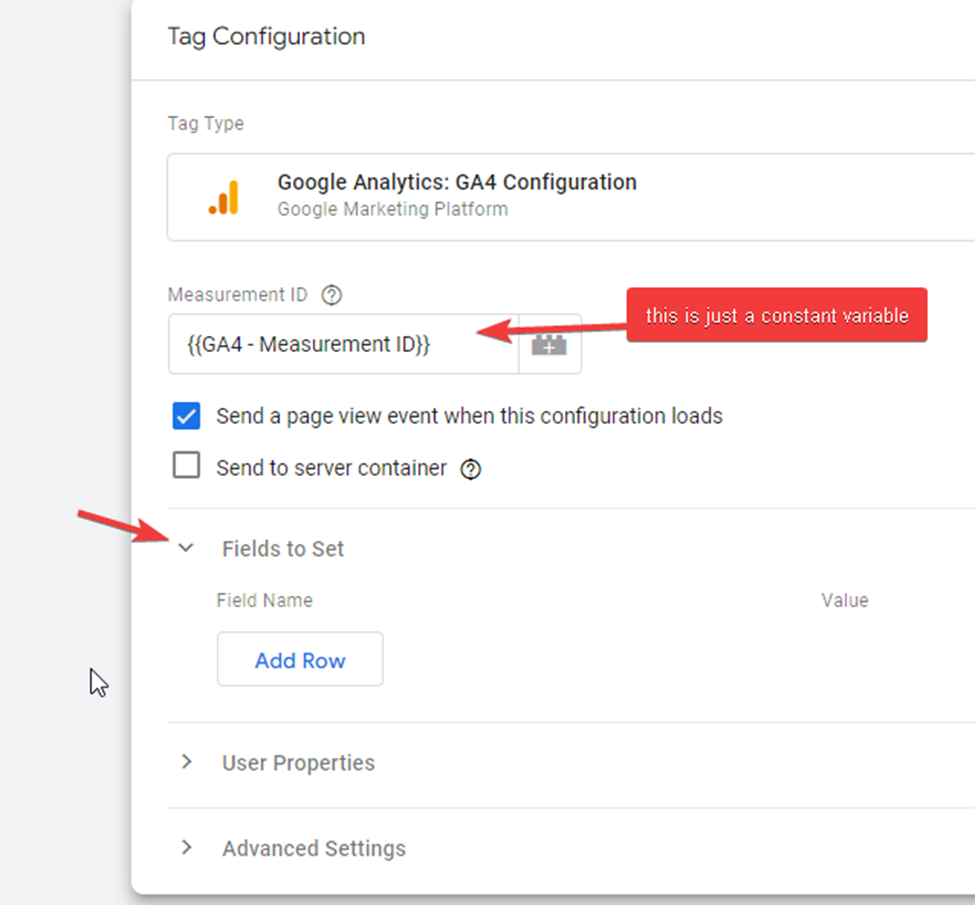
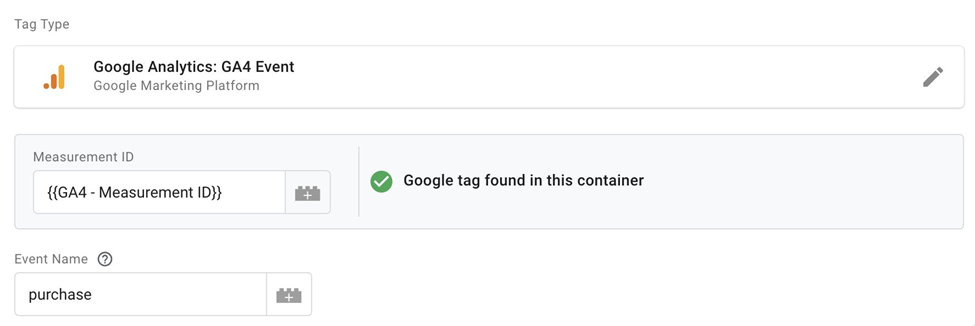
After updating the IDs, the tracking tags will automatically start sending events to the configured platforms.
-
Test the tracking implementation
Before publishing the container, the configuration should always be tested.
Use Google Tag Assistant (Preview Mode) to verify that:
-
dataLayer events are triggered correctly
-
GTM tags fire as expected
-
events appear in the analytics platform
A simple test method is to perform a test purchase in the ticket shop and verify that the events appear in the GA4 realtime dashboard.
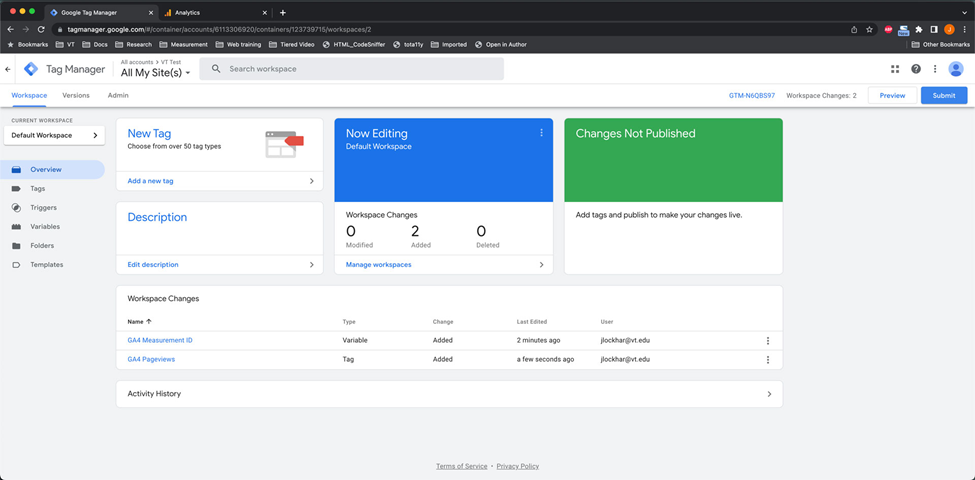
Once the events are confirmed to be working correctly, the container can be published. You can do that in the main area/ workspace of tag manager
-
Result
After completing these steps, the tracking setup ensures that events generated by the ticket shop — such as page views, cart interactions, and purchases — are forwarded from the ticketing platform to Google Tag Manager and then distributed to the configured analytics and marketing platforms.
This configuration forms the technical foundation for analysing the ticket purchase funnel and measuring marketing performance.
Step 7 — Verifying whether events are received correctly
After configuring the tracking setup, the next step is to verify whether the events are actually being received in Google Analytics 4. This validation is important because a correct configuration in Google Tag Manager does not automatically guarantee that events are reaching GA4 as expected.
The goal of this step is to confirm the full flow:
ticket shop
   ↓
dataLayer event
   ↓
Google Tag Manager
   ↓
GA4
If this works correctly, the main webshop events should become visible in GA4, for example:
-
page_view -
add_to_cart -
begin_checkout -
purchase
1. Open GTM Preview Mode
The first step is to test the implementation in Google Tag Manager Preview Mode.
In Google Tag Manager:
-
Open the correct container.
-
Click Preview in the top right corner.
-
Enter the URL of the event page or ticket shop.
-
Start the preview session.
This opens Tag Assistant, which allows you to inspect exactly what happens when you navigate through the shop.
2. Use an incognito window for testing
It is strongly recommended to test the flow in an incognito/private browser window.
This is useful for two reasons:
-
it avoids interference from old cookies, cached sessions, or previous test behaviour
-
it allows you to test the website as a fresh visitor and accept cookies again
This is especially relevant for GA4 testing, because standard browser-based tracking generally depends on cookies being accepted. When testing in an incognito window, you can go through the cookie banner again and make sure consent is given before testing the flow.
3. Accept cookies before testing the funnel
For this validation flow, cookies should be accepted before testing the website journey.
That is important because this setup is based on the normal GTM → GA4 browser flow. In that setup, GA4 typically relies on cookies and identifiers to properly process visits, sessions, and events.
So for this specific test, the process is:
-
Open the website in an incognito window
-
Accept cookies in the cookie banner
-
Go through the ticket purchase flow
-
Check whether the events appear in GTM Preview and GA4 Realtime
This means the validation is focused on the website visit with consent accepted.
4. Trigger the funnel events step by step
Once Preview Mode is active and cookies are accepted, go through the webshop journey step by step.
A typical test flow is:
-
Open the event page
-
Open the ticket shop
-
Select a ticket
-
Add the ticket to the cart
-
Start checkout
-
Complete the purchase
At each step, GTM Preview should show whether a corresponding event is triggered in the dataLayer and whether the correct tags are fired.
Examples of events that may appear during the flow:
-
page_view -
view_item -
add_to_cart -
begin_checkout -
add_payment_info -
purchase
This confirms whether the event logic in the ticket shop is working correctly.
5. Check the events in GTM Preview
Within Tag Assistant / Preview Mode, each step can be inspected in detail.
For every event, check:
-
whether the event appears in the event timeline
-
whether the correct tag fires
-
whether the required variables are present
-
whether there are no missing ecommerce parameters
This makes it possible to validate the implementation step by step before looking in GA4.
In other words:
-
GTM Preview answers: is the event technically fired?
-
GA4 Realtime answers: is the event actually received by Google Analytics?
Both checks are needed.
6. Confirm the events in GA4 Realtime
After validating the events in GTM Preview, open Google Analytics 4 → Realtime.
Repeat the test flow and confirm whether the events become visible there.
In the NxtGen test setup, the important events that were checked included:
-
page_view -
add_to_cart -
begin_checkout -
purchase
If these events appear in Realtime, it confirms that the setup is working correctly from shop to analytics platform.
This confirms the following chain:
shop
   ↓
tracking
   ↓
GA4
Step 8 — Verifying which data is actually sent with the events
After confirming that the events themselves were received correctly, the next step was to verify what data is actually included in those events. While events such as purchase or add_to_cart can appear in GA4, it is equally important to check whether the full e-commerce data structure is being sent along with the event.
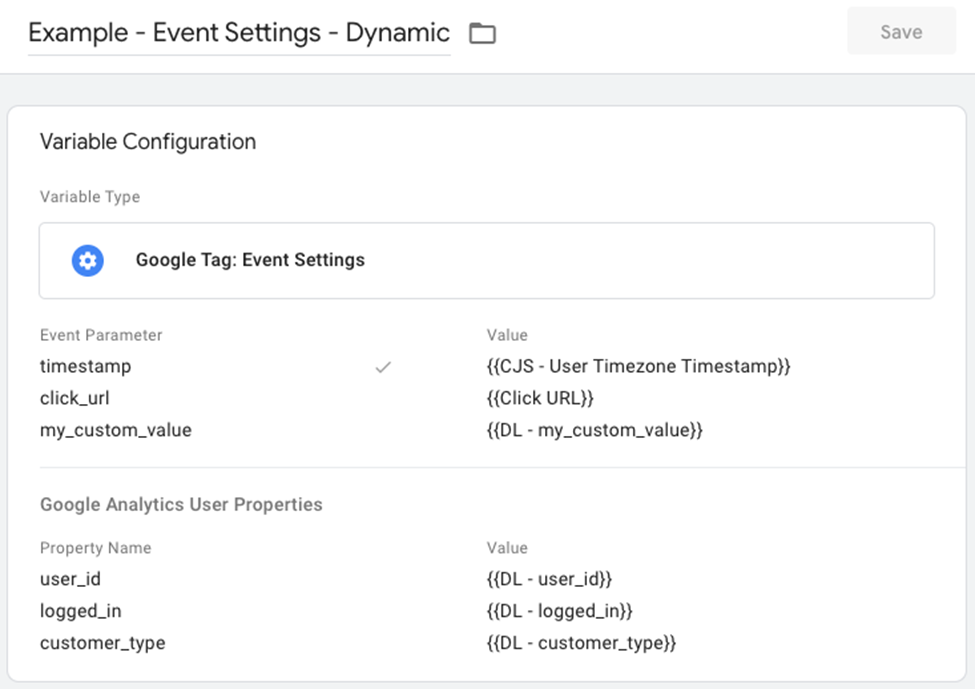
According to the expected e-commerce tracking structure, a purchase event should contain additional parameters describing the transaction and the purchased items. A simplified structure would typically look like this:
purchase
   ↓
currency
value
items
   ↓
ticket_id
ticket_name
quantity
These parameters allow analytics platforms to calculate metrics such as revenue, product performance, and conversion value.
During the inspection of the implementation in GTM Preview Mode, it became clear that the event itself was triggered correctly, but the accompanying e-commerce parameters were missing. In the event data we only observed:
event: purchase
This means that:
-
the event itself exists and is triggered correctly
-
but the ecommerce parameters are not included in the dataLayer event
As a result, analytics tools can detect that a purchase occurred, but they cannot analyse details such as ticket type, revenue value, or quantity.
Identifying this gap is an important step in the validation process, because it highlights where the tracking implementation may need to be extended. In practice, this means verifying whether the ticket shop pushes the full ecommerce object to the dataLayer or whether additional configuration is required to include these parameters in the event.
Step 10 — Understanding what server-side tracking can and cannot solve
After analysing the tracking implementation and identifying missing ecommerce parameters, the next step was to investigate whether server-side tracking could help solve these limitations.
Server-side tracking changes the architecture of how events are processed. Instead of sending events directly from the browser to analytics platforms, events are first sent to a controlled server environment.
A typical server-side architecture looks like this:
browser event
   ↓
server
   ↓
analytics platform
In this model, the browser sends the event to a server that is managed by the organisation. The server can then process, enrich, or forward the event to analytics and advertising platforms such as Google Analytics, Google Ads, or other marketing tools.
Server-side tracking provides several advantages:
-
improved control over the data flow
-
the ability to enrich events with additional data
-
better performance and reduced dependency on third-party scripts
-
improved reliability when browser restrictions block certain requests
However, an important insight from the analysis is that server-side tracking still depends on events being sent from the browser in the first place.
If the browser does not send any event — for example due to consent restrictions — the server cannot receive or process that event.
This means the data flow becomes:
browser (no event sent)
   ↓
server receives nothing
   ↓
analytics receives nothing
As a result, server-side tracking cannot bypass consent requirements. It can improve how events are processed and forwarded once they are received, but it cannot generate events that the browser never sends.
Understanding this limitation is important when designing a modern tracking architecture. Server-side tracking is a powerful tool for improving data control and reliability, but it must be combined with proper client-side event collection and consent-aware tracking strategies to function effectively.