Overview
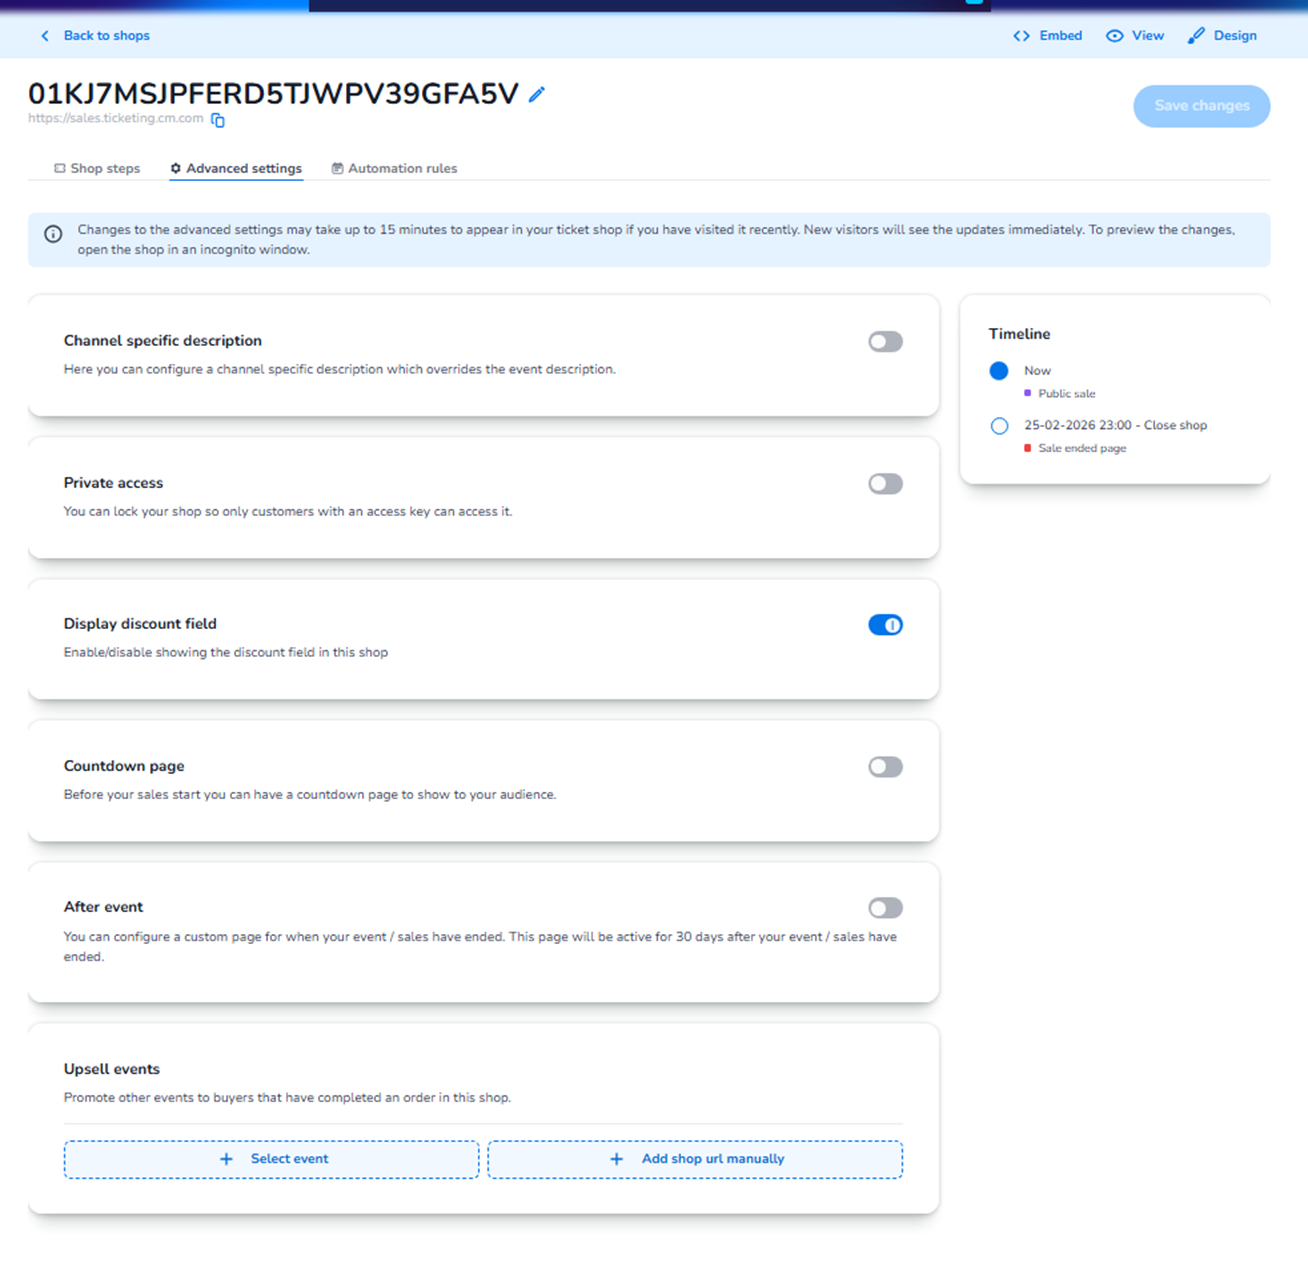
The Advanced settings section allows users to configure additional behavioural and visibility settings for a specific shop (sales channel).
These settings control:
-
How the shop is accessed
-
What visitors see before, during, and after sales
-
Optional functionality (such as discount fields)
-
Promotional upsell behaviour
This section is used to fine-tune the customer journey beyond the basic ticket configuration.
What You Can Configure Here
Channel Specific Description
What it does:
Allows you to define a shop-specific description that overrides the default event description.
Why use it:
Different sales channels may require different messaging.
For example:
-
Partner sales
-
Member pre-sale
-
Corporate ticketing
-
Special campaigns
How it works:
-
Enable the toggle
-
Enter a custom description
-
Save changes
-
This description will appear only in this specific shop
Private Access
What it does:
Locks the shop so only visitors with an access key can enter.
Why use it:
For:
-
Pre-sales
-
Invite-only sales
-
Sponsor allocations
-
Exclusive campaigns
How it works:
-
Enable the toggle
-
Configure the access key
-
Only visitors with the correct key can access the shop
This prevents public visibility.
Display Discount Field
What it does:
Enables or disables the discount code input field in the shop.
Why use it:
-
Hide the field if no discounts are active
-
Show the field when running campaigns or promotional codes
How it works:
-
Toggle ON → Visitors can enter a discount code
-
Toggle OFF → Discount field is hidden
This keeps the checkout clean when discounts are not relevant.
Countdown Page
What it does:
Displays a countdown page before sales officially start.
Why use it:
-
Build anticipation
-
Prevent early access
-
Create structured sale launches
How it works:
-
Enable the toggle
-
The shop shows a countdown instead of ticket selection until the sale time
-
Once the sale begins, the shop opens automatically
After Event
What it does:
Allows you to configure a custom page that appears after the event or after sales have ended.
Why use it:
-
Redirect visitors to future events
-
Display thank-you messaging
-
Provide additional information
-
Maintain engagement
How it works:
-
Enable the toggle
-
Configure custom content
-
This page remains active for up to 30 days after sales/event end
Upsell Events
What it does:
Promotes other events to customers who completed an order in this shop.
Why use it:
-
Increase repeat purchases
-
Cross-promote events
-
Boost customer lifetime value
How it works:
Two options:
Select event
-
Choose another event within the platform
-
Automatically link it for promotion
Add shop URL manually
-
Enter a direct URL
-
Redirect customers to an external or specific shop
This appears after order completion.
Timeline Panel (Right Side)
The Timeline shows:
-
Current shop status (e.g., Public sale)
-
Scheduled closing date and time
-
What page will be shown after closing
This gives a quick operational overview of the shop lifecycle.
Important Notice
Changes in Advanced Settings:
-
May take up to 15 minutes to update for returning visitors
-
Are visible immediately for new visitors
-
Can be tested in an incognito window for instant preview
Why This Section Matters
Advanced Settings control:
-
Access control
-
Messaging per channel
-
Promotional behaviour
-
Checkout cleanliness
-
Pre-sale and post-sale experience
-
Revenue optimisation
It does not control:
-
Ticket types
-
Pricing
-
Capacity
-
Payment methods
It controls how the shop behaves as a sales channel.