Overview
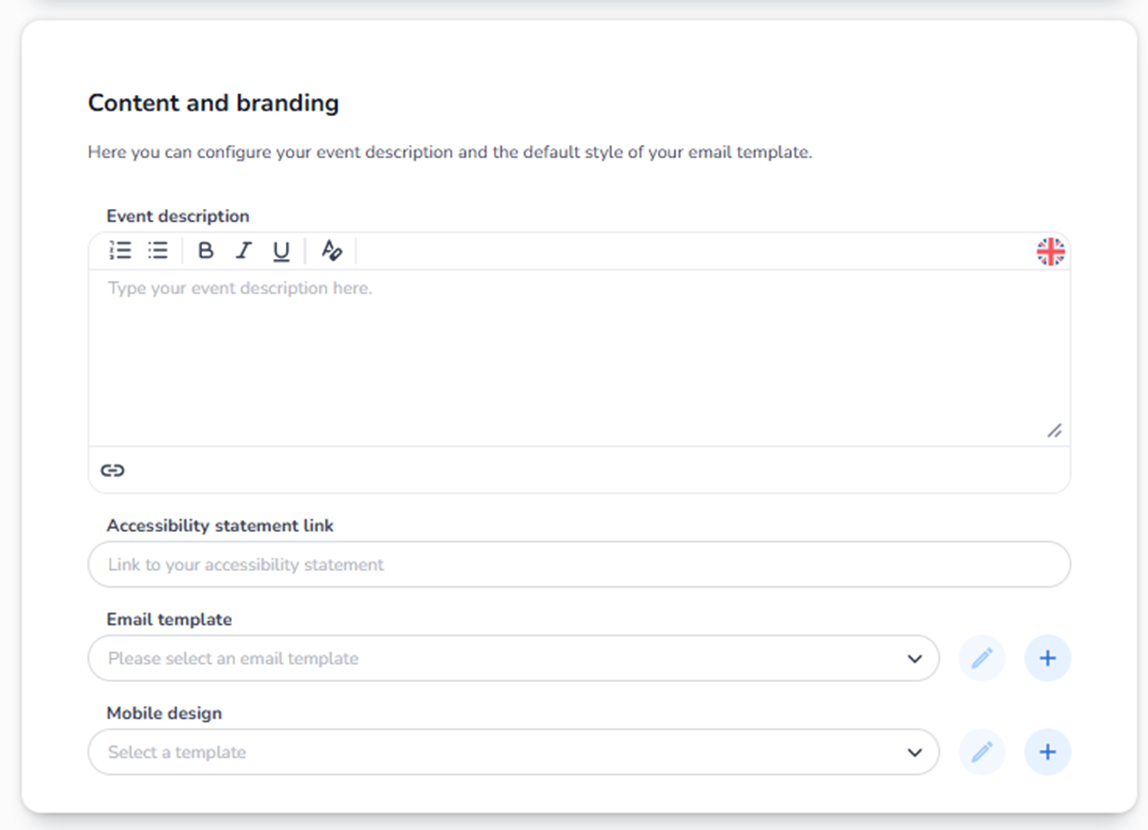
The Content and branding section controls how your event looks and communicates to customers.
This section affects:
-
The event description shown to buyers
-
The accessibility information
-
The design of confirmation emails
-
The mobile design template
It is entirely customer-facing.
If something looks wrong in emails or event pages, this is the first place to check.
Section Breakdown
-
Event Description
Field: Rich Text Editor
This is where you write the official description of your event.
What You See:
-
Text input area
-
Formatting toolbar with:
-
Bullet list
-
Numbered list
-
Bold
-
Italic
-
Underline
-
Link insertion
-
-
Language indicator (flag icon)
-
Expand/resize control (bottom corner)
-
Link icon (bottom)
What It Does:
The text entered here is used for:
-
Event page description
-
Confirmation emails (depending on template)
-
Buyer information context
-
Possibly shop pages
Formatting Options Explained:
Bullet List
Creates a list with bullet points.
Numbered List
Creates a step-by-step list.
Bold (B)
Highlights important information.
Italic (I)
Used for emphasis.
Underline (U)
Highlights specific details (use sparingly).
Link Icon
Allows you to insert hyperlinks (e.g., venue website, FAQ page).
Language Flag Icon
This indicates which language version you are editing.
If multiple languages are enabled:
-
You may need to provide translations per language.
Why This Matters:
Poor description leads to:
-
Customer confusion
-
Increased support questions
-
Misunderstood event details
This section defines the public identity of your event.
-
Accessibility Statement Link
Field: Text Input
This allows you to add a URL to your accessibility statement.
What It Does:
Provides buyers with:
-
Accessibility information
-
Venue accessibility details
-
Compliance documentation
Why It Is Important:
-
Legal compliance
-
Transparency
-
Improved customer trust
-
Required for some regions
If left empty:
No accessibility link will appear.
-
Email Template
Field: Dropdown Selector
This defines which email template is used for:
-
Order confirmations
-
Ticket emails
-
Possibly reminders
What You See:
-
Dropdown to select template
-
Pencil icon (edit)
-
Plus icon (create new template)
Buttons Explained:
Dropdown
Select an existing email template.
Pencil Icon
Opens editor for the selected template.
Plus (+) Icon
Create a new email template.
Why This Is Critical:
Email template controls:
-
Branding colors
-
Logo placement
-
Header & footer
-
Legal text
-
Tone of voice
Incorrect template may cause:
-
Wrong branding
-
Missing ticket attachment
-
Confusing communication
-
Legal disclaimers missing
-
Mobile Design
Field: Dropdown Selector
This controls the design template used for mobile display.
What You See:
-
Template selector dropdown
-
Pencil icon (edit template)
-
Plus icon (create new template)
What It Affects:
-
Mobile ticket view
-
Confirmation page layout
-
Mobile-optimized branding
This ensures your event is displayed correctly on smartphones.
How This Section Connects to the Buyer Journey
Buyer Flow:
-
Buyer sees event page → Event Description is shown.
-
Buyer purchases ticket → Email template is sent.
-
Buyer opens ticket on phone → Mobile design template applies.
-
Buyer checks accessibility → Accessibility link is used.
Common Issues & Where to Check
If users report:
-
“Email looks wrong” → Check Email Template.
-
“Event description not visible” → Check Event Description.
-
“Wrong language shown” → Check language flag.
-
“Mobile layout broken” → Check Mobile Design template.
-
“Accessibility info missing” → Check Accessibility link field.
Summary
Content and Branding = Customer Experience Layer
It controls:
-
How your event is presented
-
How your emails look
-
How your brand is communicated
-
How your event appears on mobile
This section does not affect ticket logic or pricing.
It affects presentation and communication only.